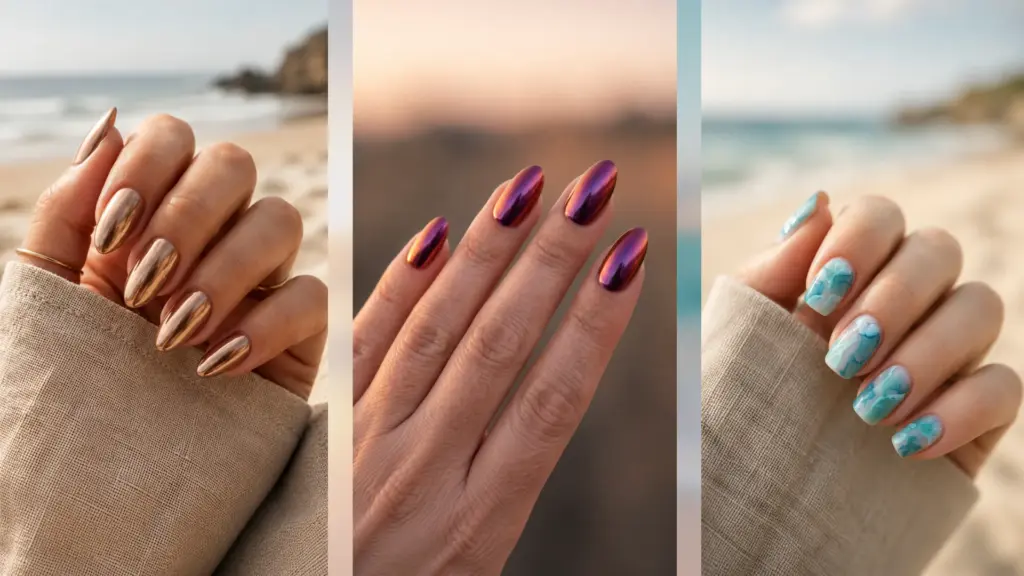
Every summer, my booking list fills with clients preparing for beach trips. Most know they want vacation nails, but not the exact style. A beach getaway feels better with a manicure that matches the mood.
The best vacation nails feel effortless. You notice them while holding a drink, flipping through a book, or relaxing by the water. Everything feels more put together.
Bright tropical colors work well for fun beach days, while soft neutrals and subtle details create a cleaner look that still feels polished. Certain styles feel perfect by the ocean, while others transition easily into dinner plans.
I gathered my favorite vacation beach nail ideas below, organized by mood and style.
Why Vacation Manicures Often Don’t Last
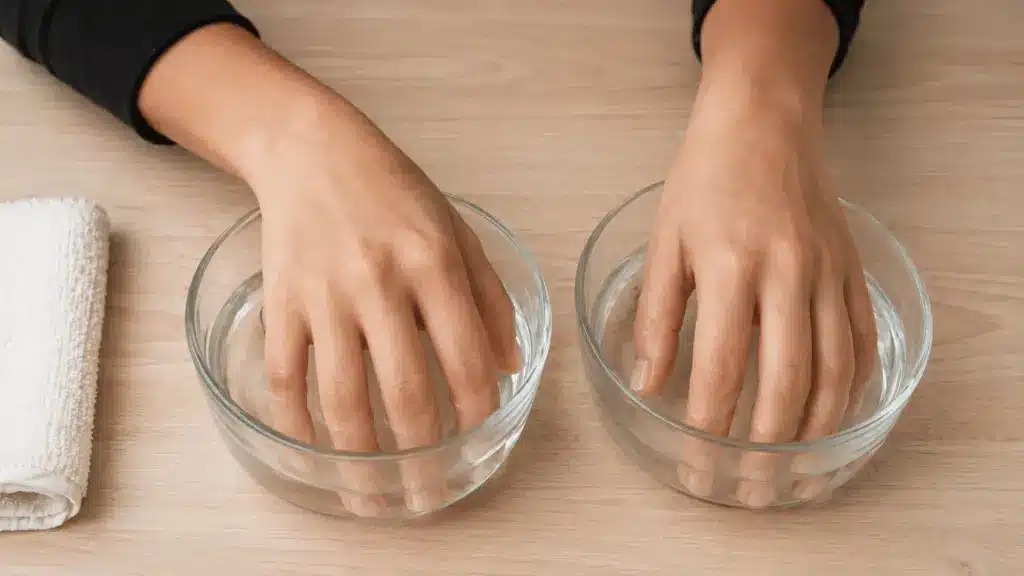
I’ve seen more holiday manicures fall apart by day two than I can count. Clients come back from trips showing chips at the tip, lifting at the cuticle, and that dull fade that happens when the top coat gives up too early. It is not always the design’s fault.
Sometimes the issue is prep, and sometimes it is the finish. Going straight into the ocean a few hours after a manicure does not help either.
Beach conditions are rough on nails. Sun fades color, salt dries the cuticle edge, and spray sunscreen can weaken the polish around the sides.
A beach manicure should last the entire trip: water, sun, sand, and dinner included. That is the standard I build every design around.
Coral Reef Vacation Beach Nail Designs
Coral reef nail ideas focus on layered colors, organic textures, and fluid patterns that mimic underwater forms while adding depth through subtle gradients, glossy finishes, and intricate details inspired by marine life and coastal environments.
1. Fractured Reef
Best for: Beach lovers, abstract nail art fans, and anyone allergic to matching sets.
Fractured reef nails use a nude or pale sand base with coral, aqua, and white cracked-glass lines. The uneven pattern gives this summer nail design a coastal, artsy finish without screaming souvenir shop.
How to Create This Nail Look:
- Start with a nude or sand base.
- Paint thin, irregular, reef-like lines.
- Seal with matte top coat.
2. Bioluminescent Tide
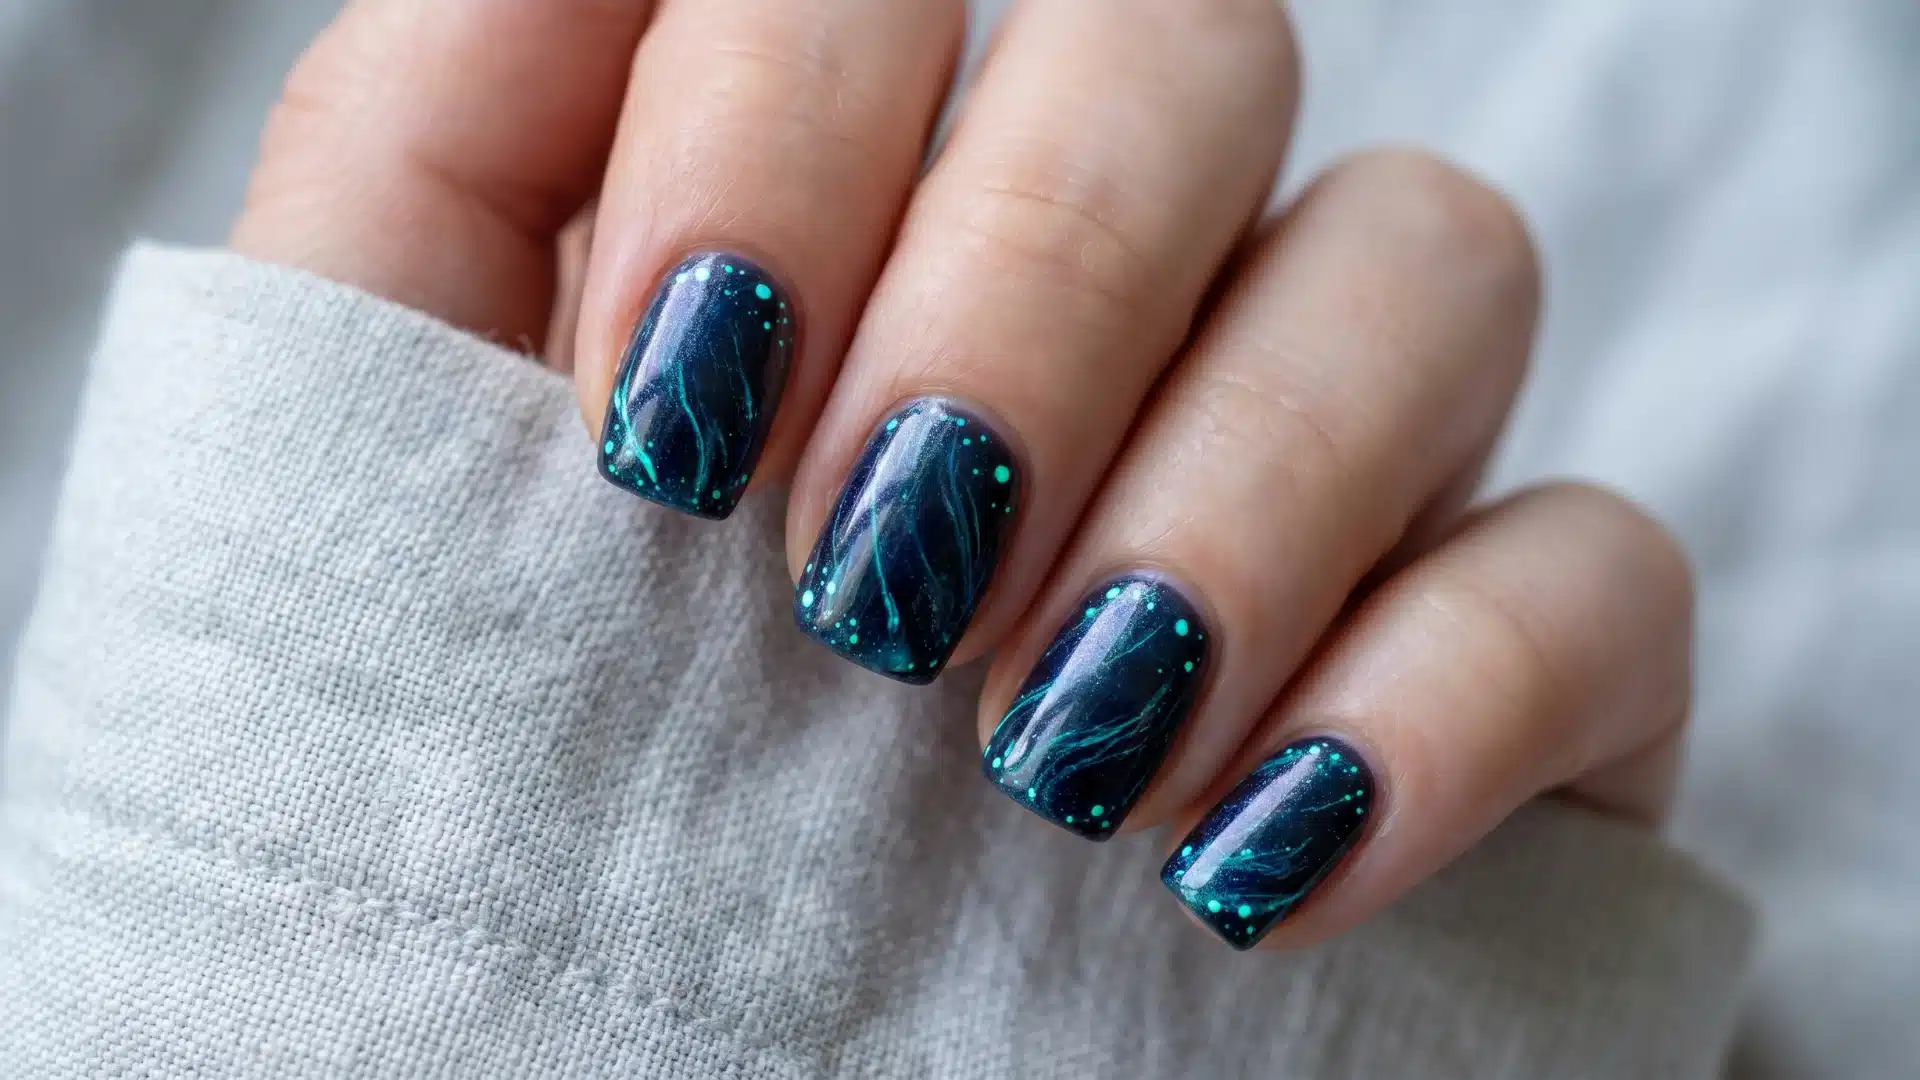
Best for: Night swimmers, resort cocktails, and anyone who thinks daylight is overrated.
Bioluminescent tide nails use a dark navy or near-black base with neon blue-green dots along the tips and sides. These beach vacation nails look moody by day, then glow under UV light after sunset, which is annoyingly clever.
How to Create This Nail Look:
- Apply a deep navy base.
- Add neon blue-green dots and streaks.
- Use UV-reactive polish for glow.
3. Bleached Coral Branch
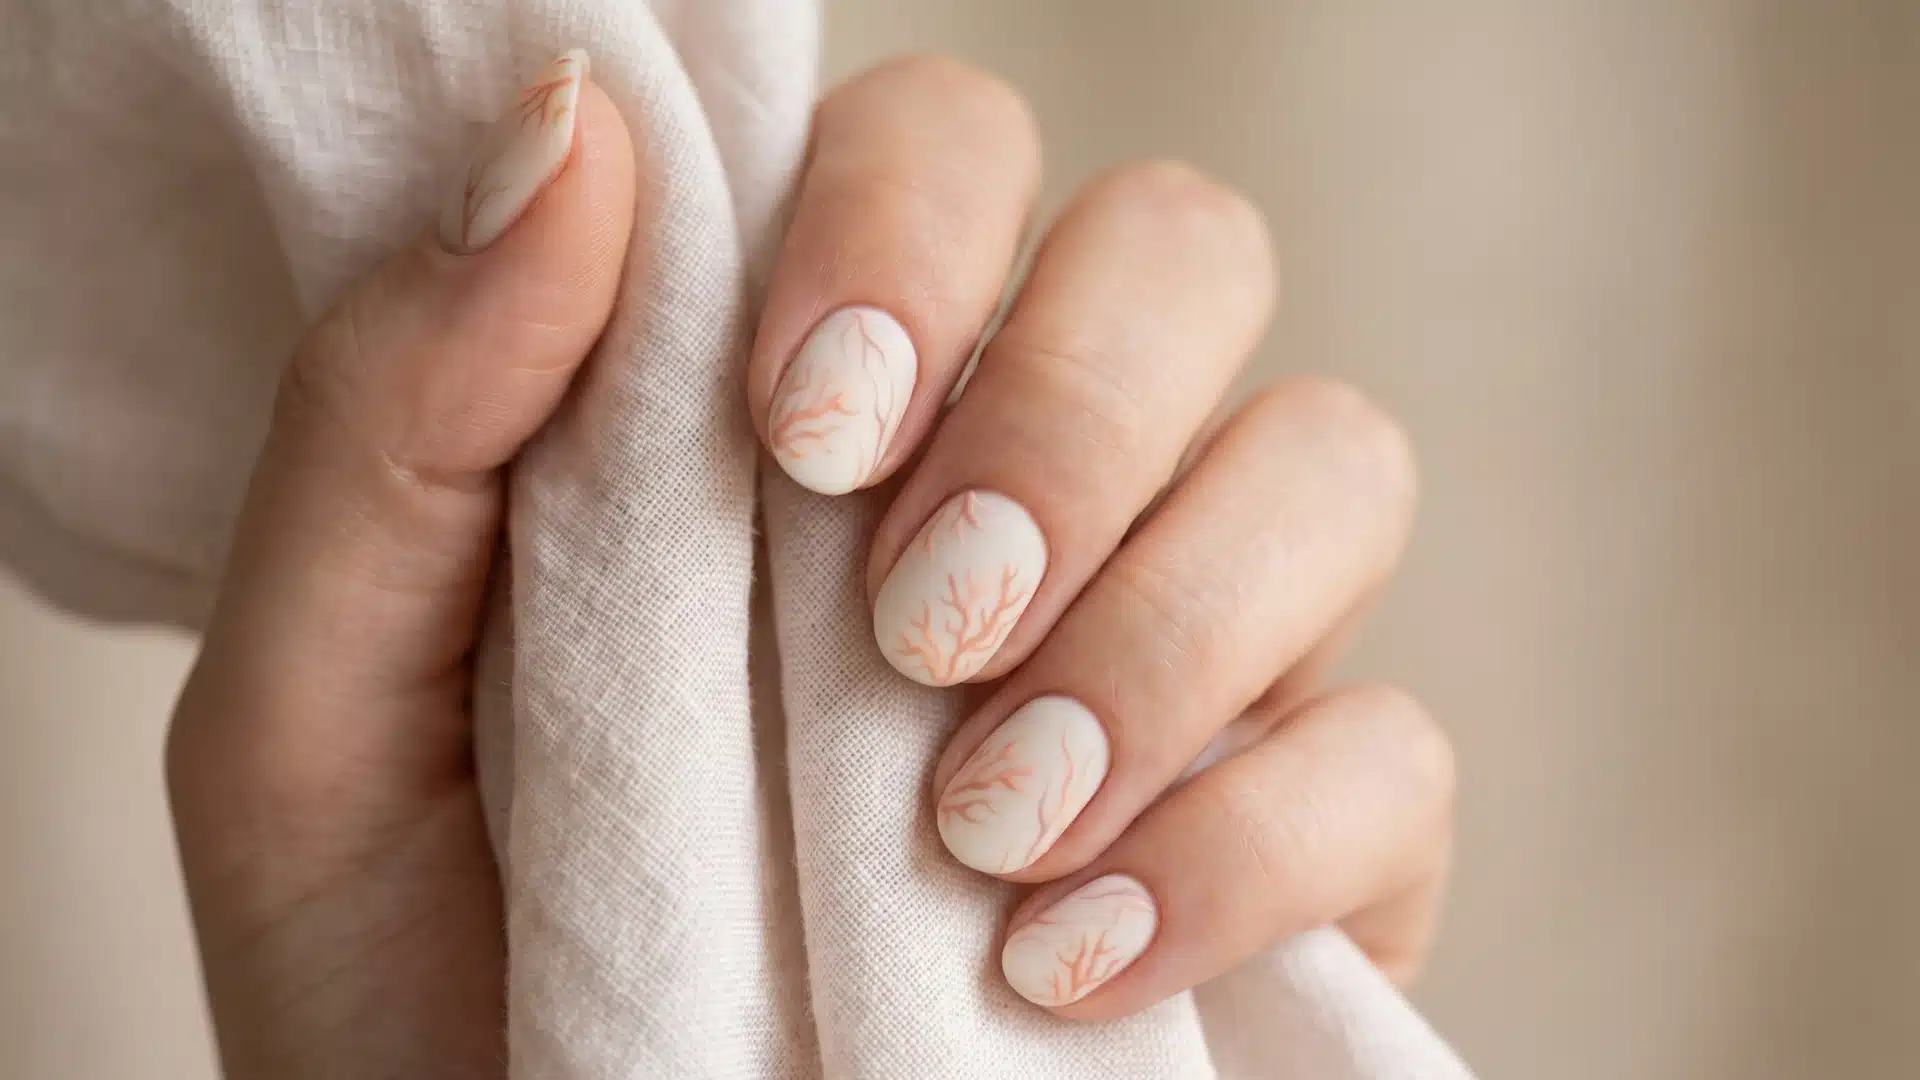
Best for: Short oval nails, clean aesthetics, and people who like subtle detail without trying too hard.
Bleached coral branch nails use a pale pink or off-white base with thin peach or deeper pink branching lines. This minimalist nail design sits between coral and winter branches, keeping it intentional rather than themed.
How to Create This Nail Look:
- Apply a pale pink or off-white base.
- Draw fine branching coral lines.
- Finish with a glossy top coat.
4. Tidal Pool Gradient

Best for: Ombre lovers, beach nail designs, and anyone tired of perfectly identical sets.
Tidal pool gradient nails blend sandy beige, seafoam green, and teal into a soft ombre. This beach-nail idea mimics real tidal pools, so a slight variation across nails makes it look more natural and less try-hard.
How to Create This Nail Look:
- Apply a beige base near the cuticle.
- Sponge seafoam and teal towards the tip.
- Blend softly, then seal with a top coat.
5. Sea Glass Scatter
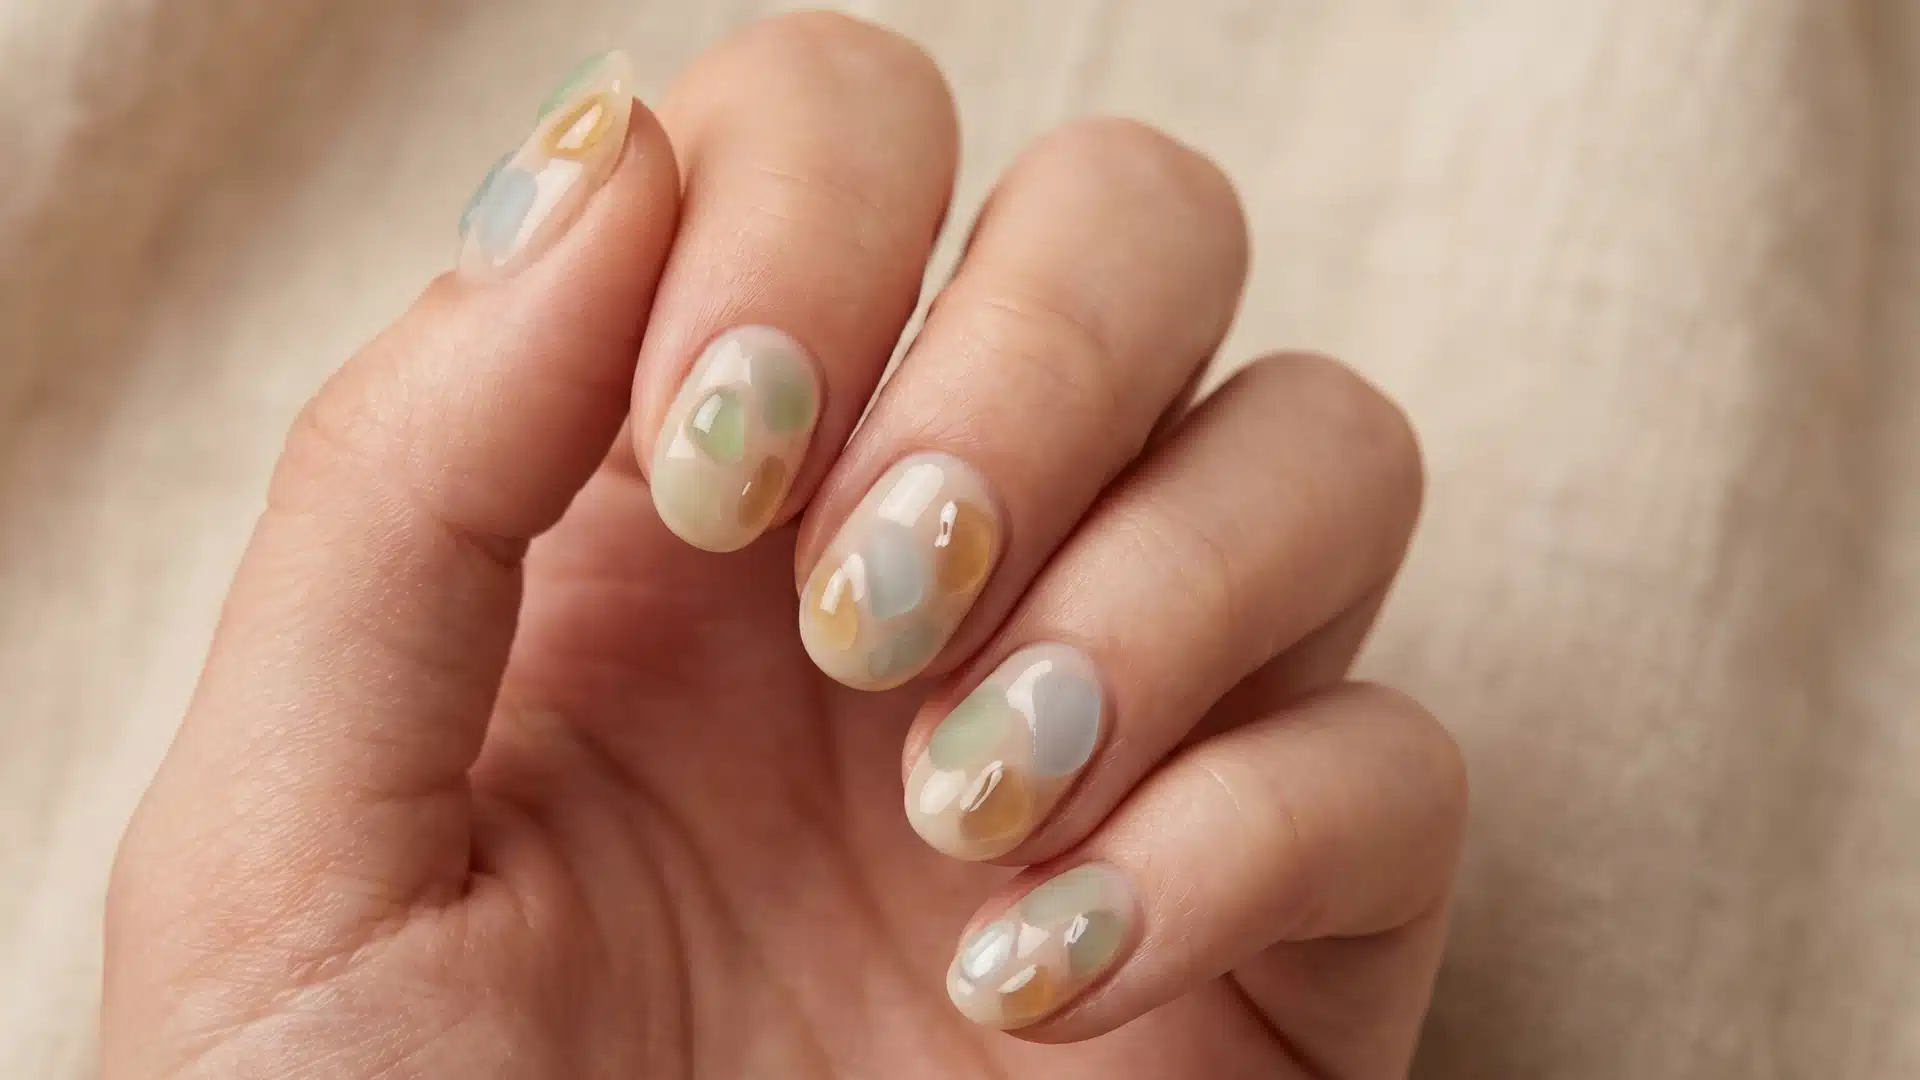
Best for: Soft summer nails, minimal nail art fans, and those who prefer quiet detail over loud designs.
Sea glass scatter nails use a sheer white or pale nude base with soft patches of green, blue, and amber. The mix of matte and glossy finishes gives this beach nail design texture without turning it into a full performance.
How to Create This Nail Look:
- Apply a sheer white or nude base.
- Add small, rounded color patches.
- Mix matte and glossy top coats.
6. Coral Pink with Sand Texture
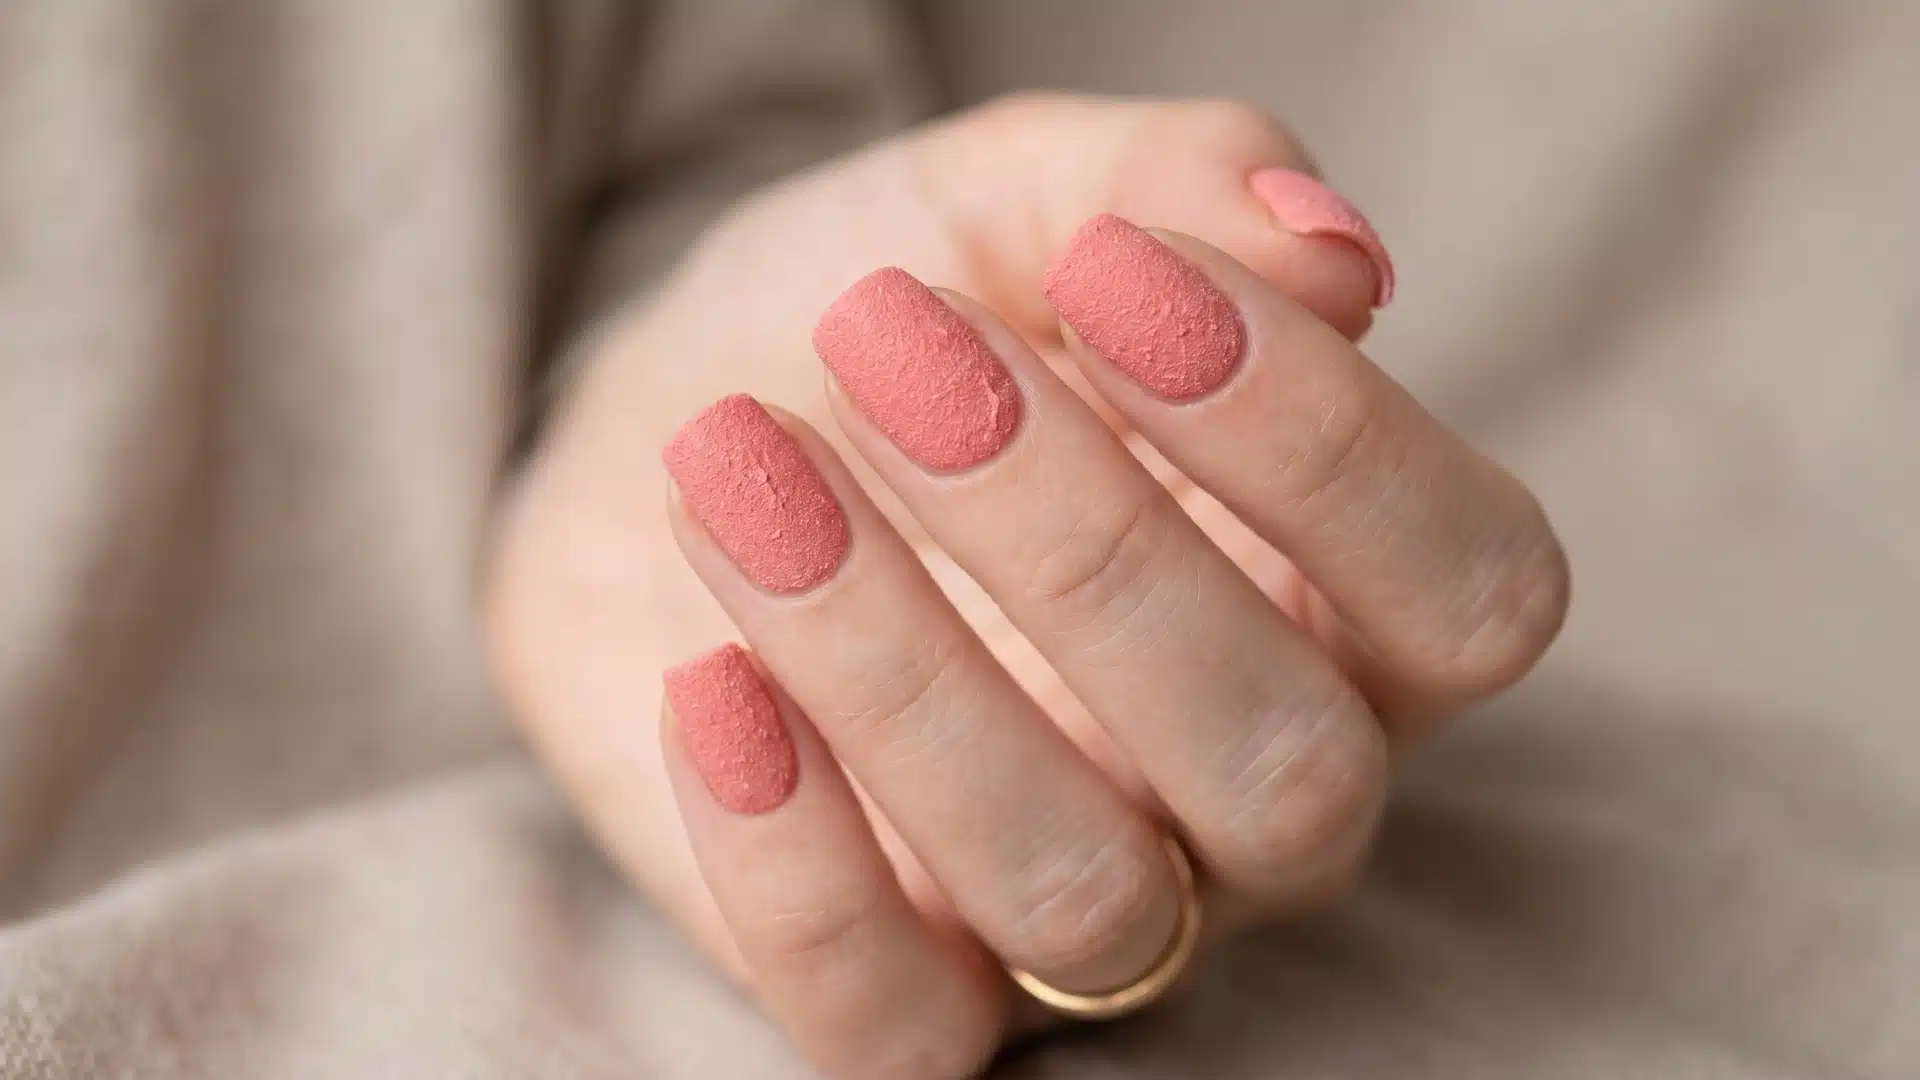
Best for: Summer beach nails, coral polish fans, and anyone brave enough to enjoy something off-camera.
Coral pink sand texture nails use a warm coral base with a fine-grained top coat. The matte finish gives this beach nail design a sun-warmed, sandy feel that looks far better in person than in photos. Tragic, but refreshing.
How to Create This Nail Look:
- Apply a warm coral base.
- Press sand-textured top coat over it.
- Leave matte and slightly grainy.
7. Anemone Bloom

Best for: Dark nail lovers, beach vacation nails, and anyone bored with predictable tropical sets.
Anemone bloom nails pair a deep burgundy or oxblood base with small floral accents in white or pale pink. This beach nail design feels rich and slightly offbeat, and the sea anemone reference usually lands late, which helps.
How to Create This Nail Look:
- Apply a burgundy or oxblood base.
- Paint tiny multi-petal flowers on accent nails.
- Seal with a glossy top coat.
Open Ocean Series
Open ocean nail ideas focus on cool tones, clean finishes, and restrained designs inspired by deep water, sea spray, and horizon lines while adding subtle gradients, minimal accents, and smooth textures that reflect calm seascapes.
8. Deep Water Mirror Chrome
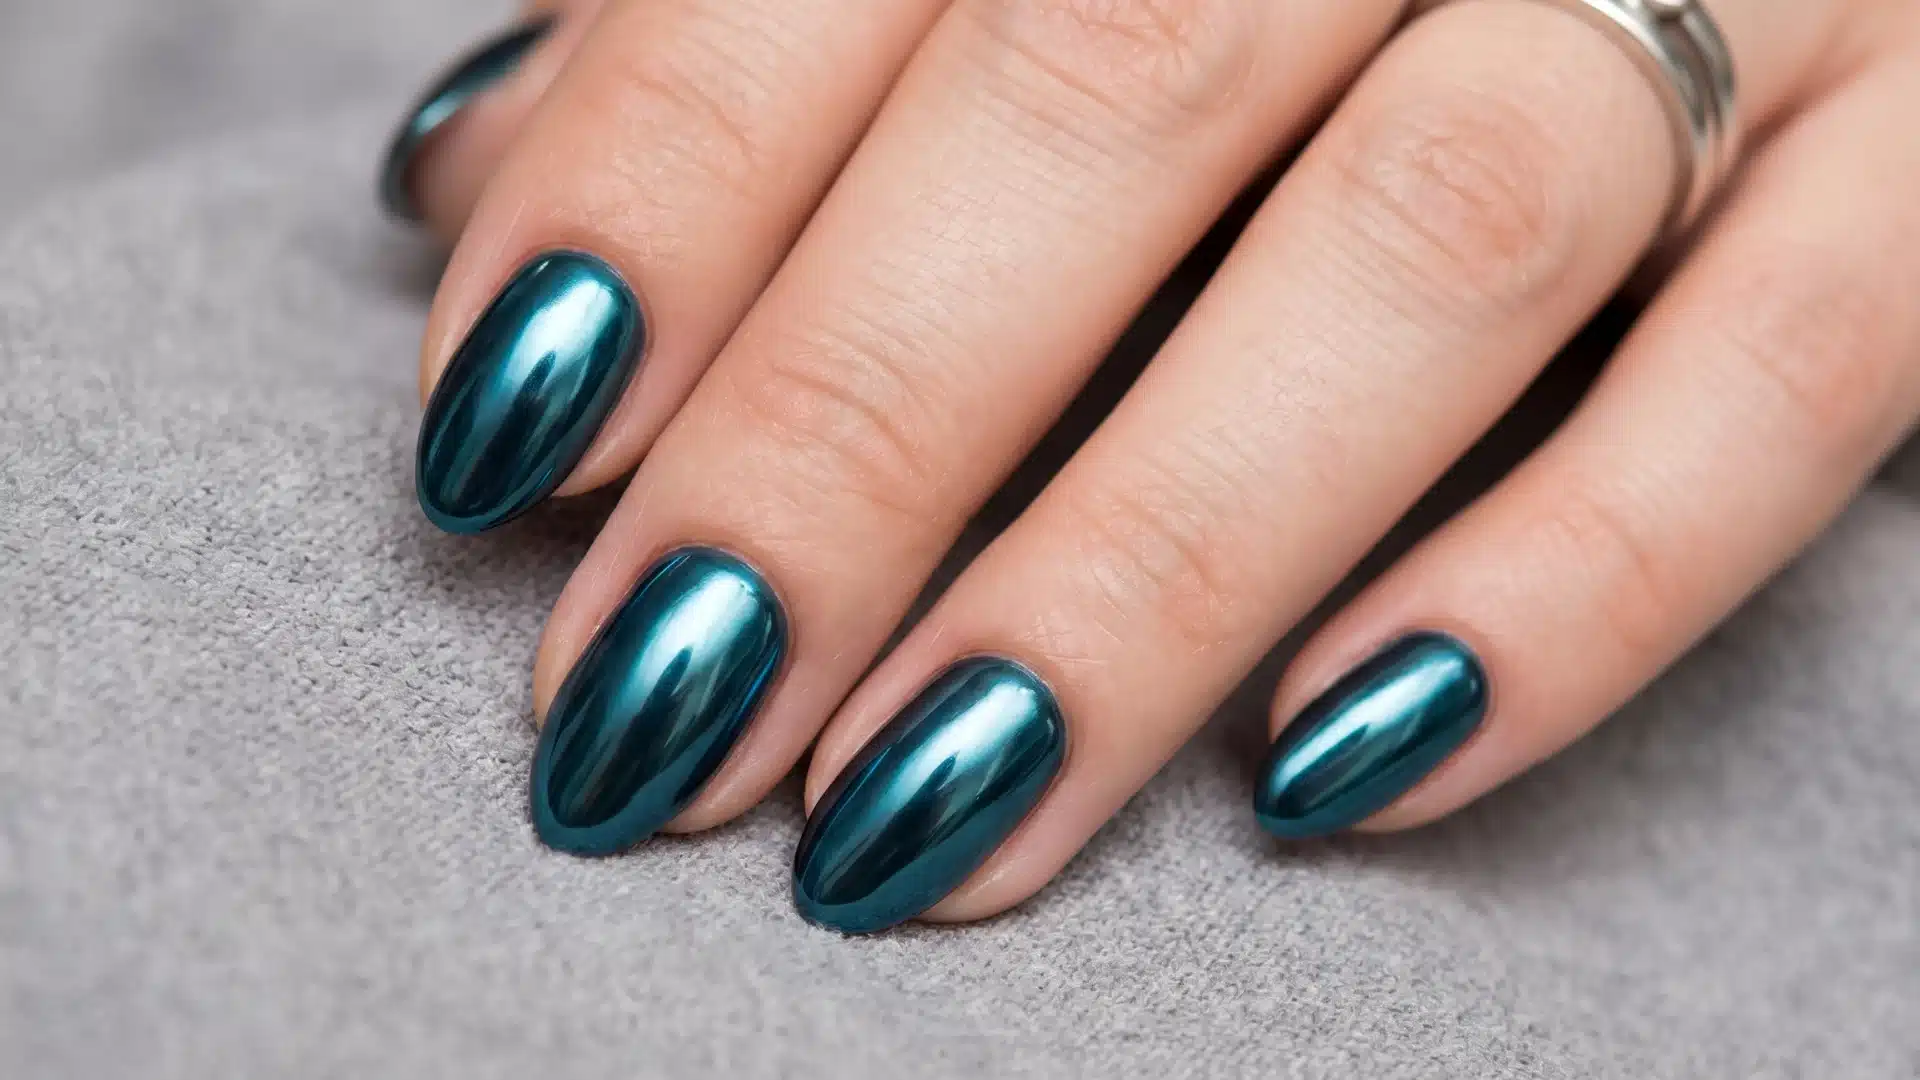
Best for: Minimalists, chrome nail lovers, and anyone who finds beach nail art a bit too cheerful.
Deep water mirror chrome nails use a single dark teal, almost petrol blue chrome. This ocean-inspired nail design relies solely on color, shine, and light, making it look far more put-together than most busy beach nails.
How to Create This Nail Look:
- Apply a dark teal base.
- Add chrome powder for mirror shine.
- Seal with a high-gloss top coat.
9. Ink Wash Ocean
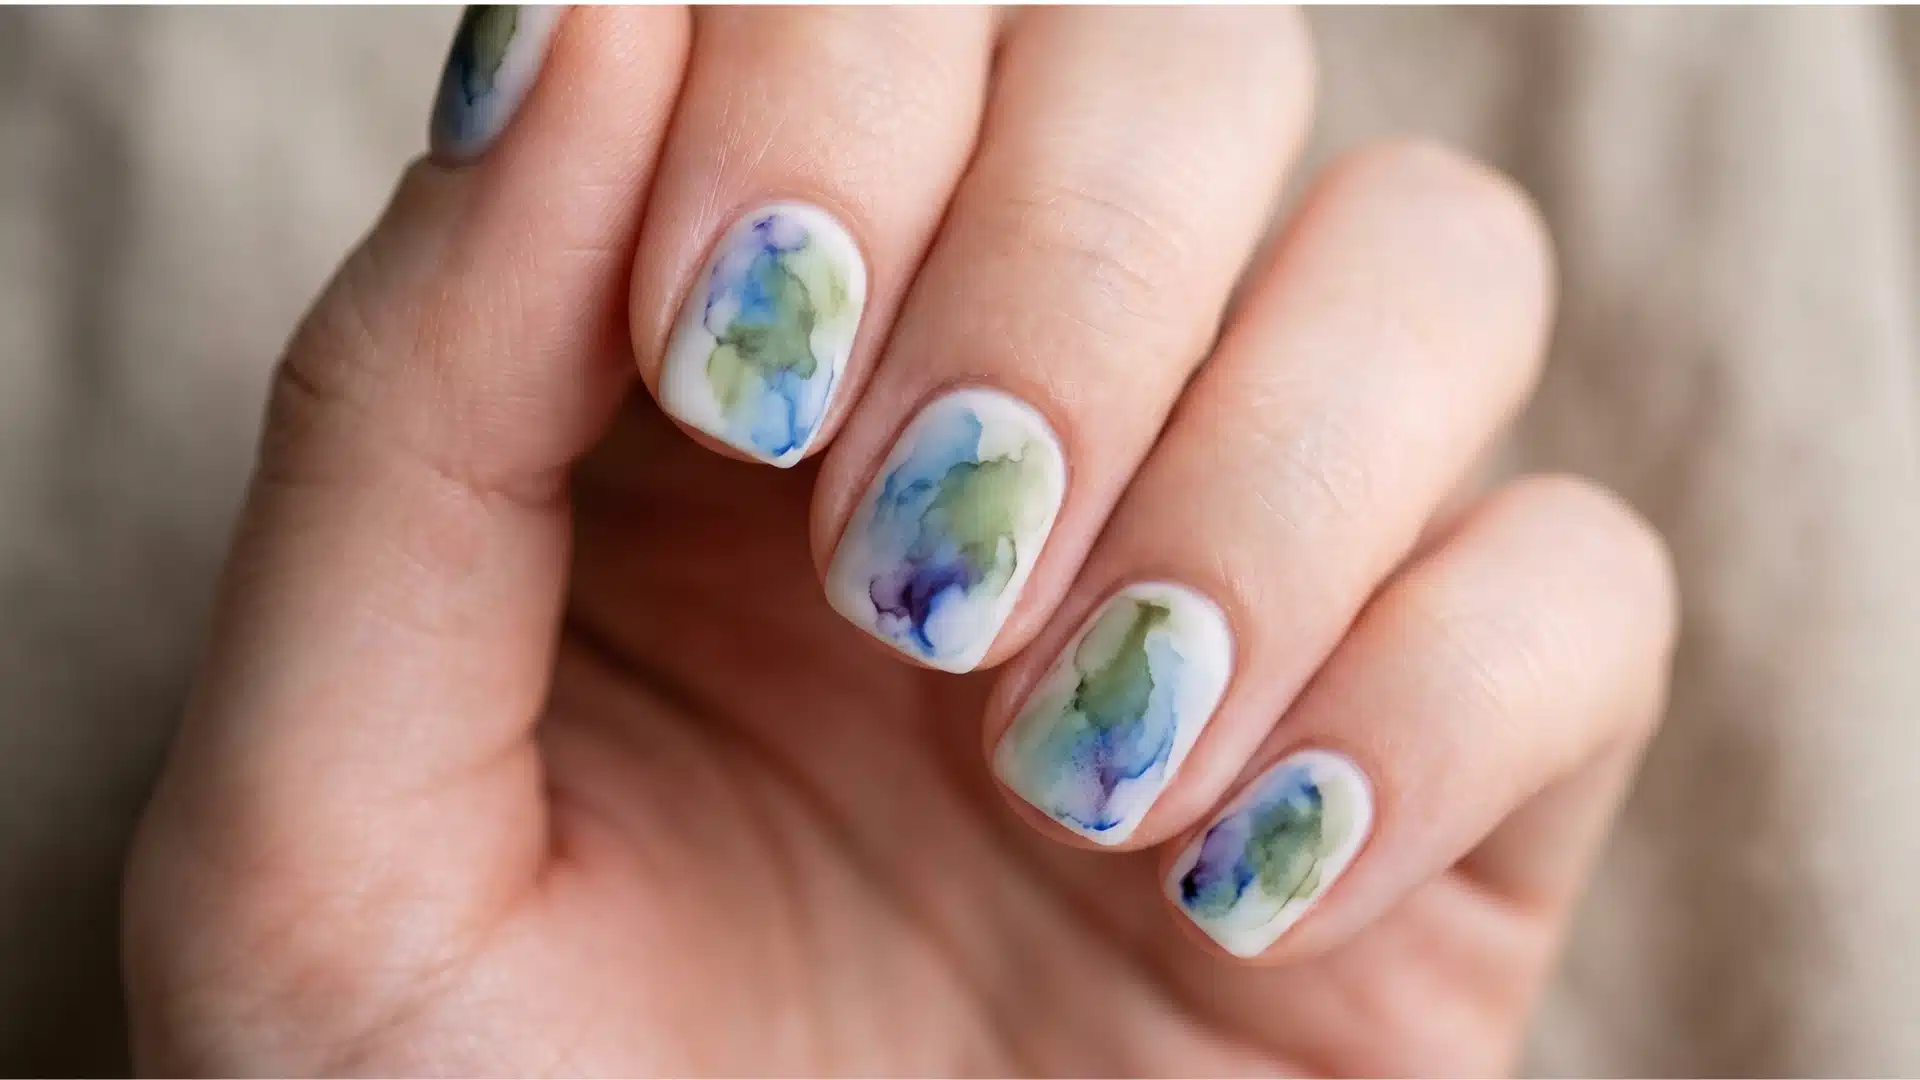
Best for: Artistic types, matte nail fans, and anyone who prefers subtle over showy.
Ink wash ocean nails use a white base with soft blue and green blends that bleed like watercolor. This ocean nail design avoids sharp edges, and the matte finish stops it from looking overly pleased with itself.
How to Create This Nail Look:
- Apply a white base.
- Blend blue and green in a soft wash.
- Finish with a matte top coat.
10. Wave Sequence Nails

Best for: Story-driven nail art fans, minimal design lovers, and those who like something a bit more considered.
Wave sequence nails tell a simple ocean story on each nail, from a calm horizon to a breaking wave. The white line work on a pale blue base keeps this summer beach nail design clean and unexpectedly sharp.
How to Create This Nail Look:
- Apply a pale blue base.
- Paint minimal white wave stages on each nail.
- Keep lines thin and precise.
11. Salt Crystal Tips

Best for: Texture lovers, ocean nail designs, and anyone bored with color doing all the work.
Salt crystal tips nails use a deep ocean blue base with textured, reflective tips. This beach-vacation nail design focuses on surface over color, making it feel sharper and slightly more considered than most.
How to Create This Nail Look:
- Apply a deep ocean blue base.
- Add clear gel mixed with coarse salt to the tips.
- Cure and seal lightly to keep the texture.
12. Horizon Line

Best for: Minimalists, structured nail designs, and medium- to long-nail shapes.
Horizon line nails use three clean bands: a pale tip, a dark line, and a blue base. This ocean nail design feels almost strict, but that sharp structure is exactly what makes it look polished and intentional.
How to Create This Nail Look:
- Paint a medium blue base.
- Add a thin navy or charcoal line across the middle.
- Finish with a pale tip and seal.
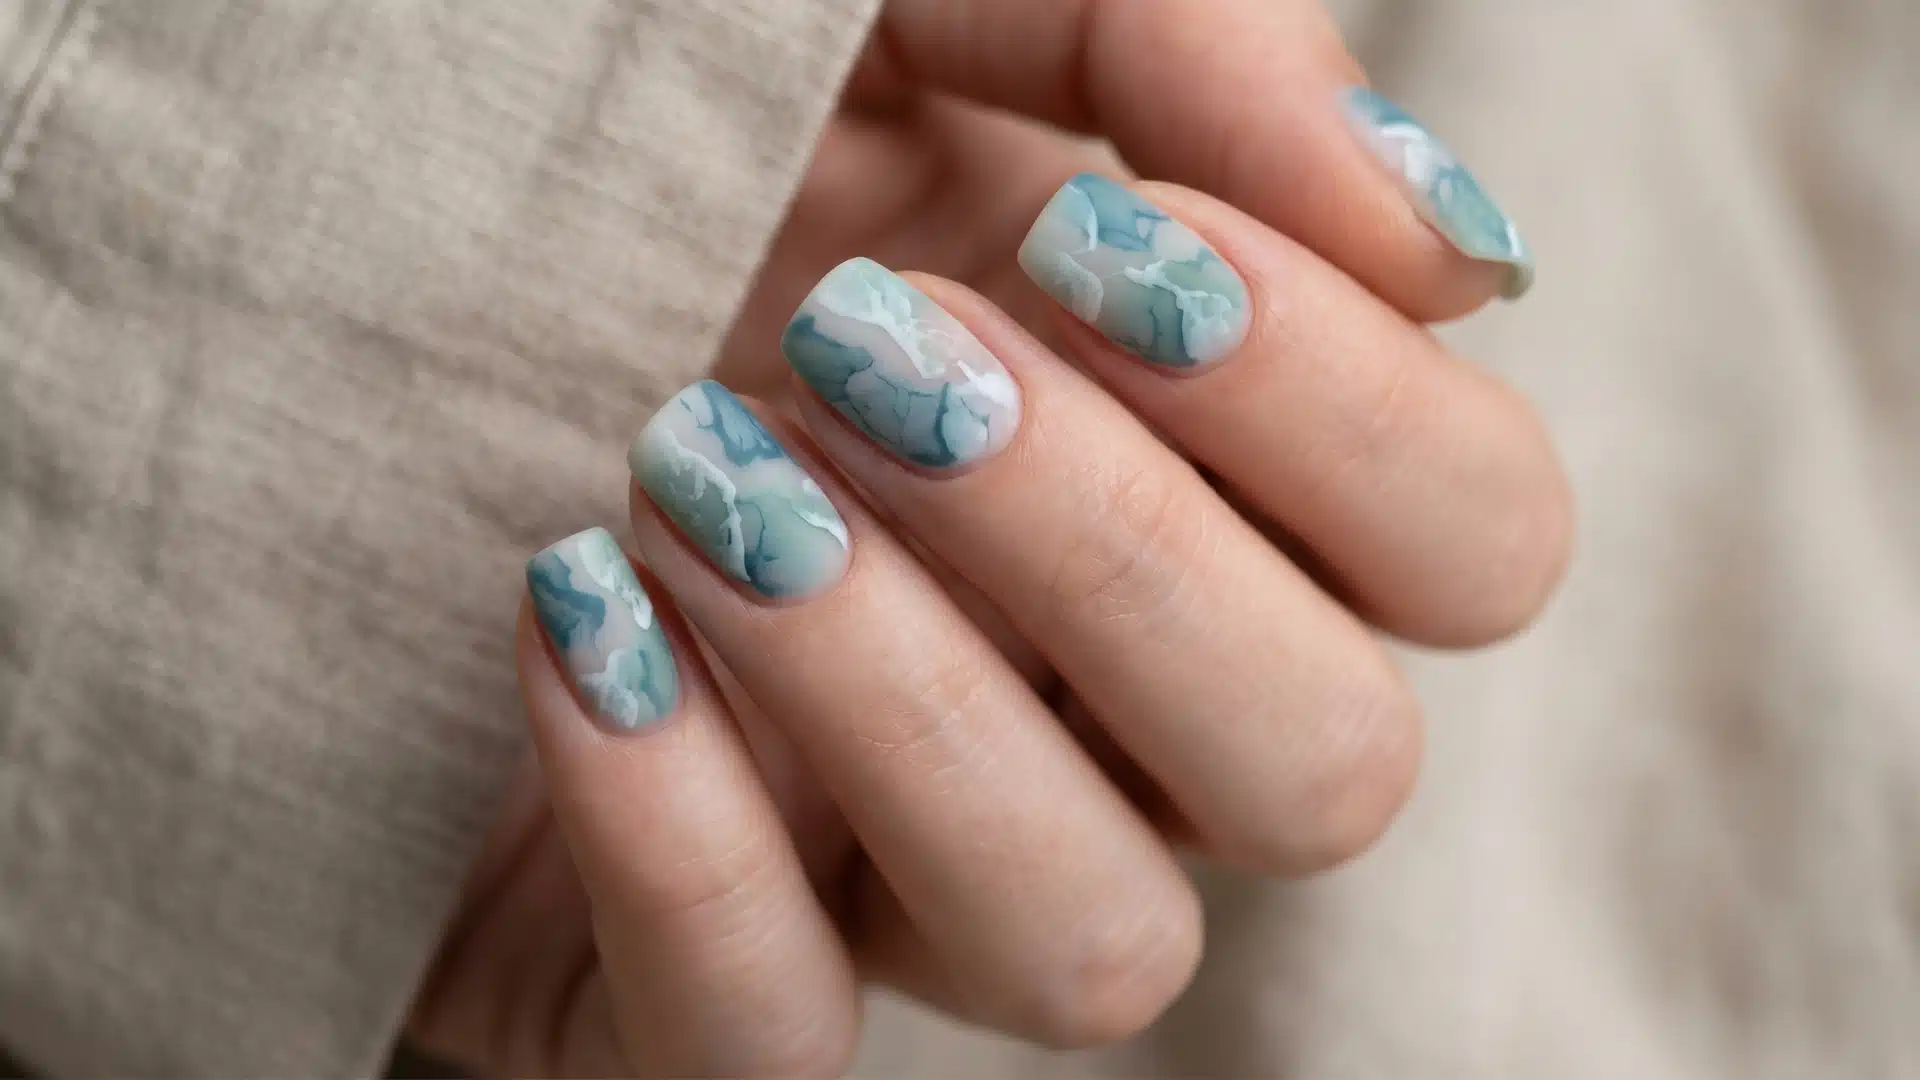
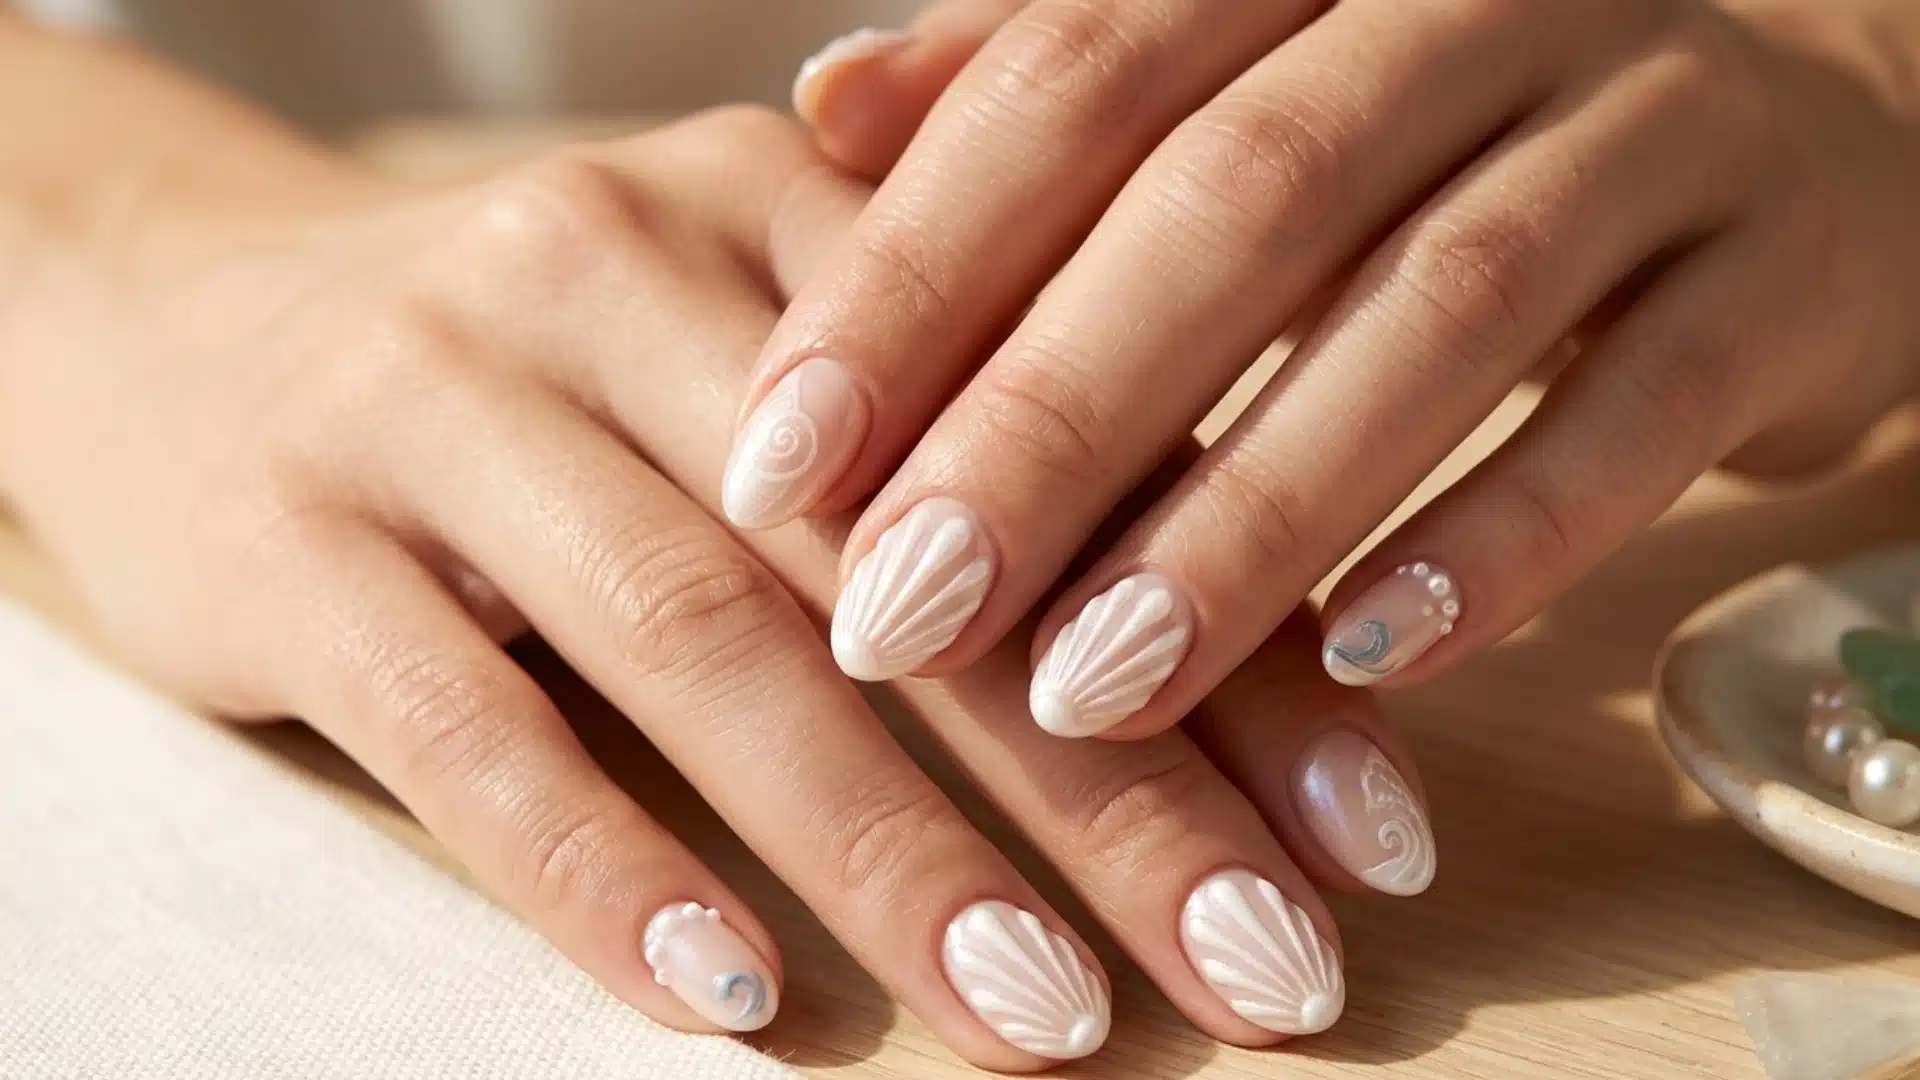
13. Seafoam Lace
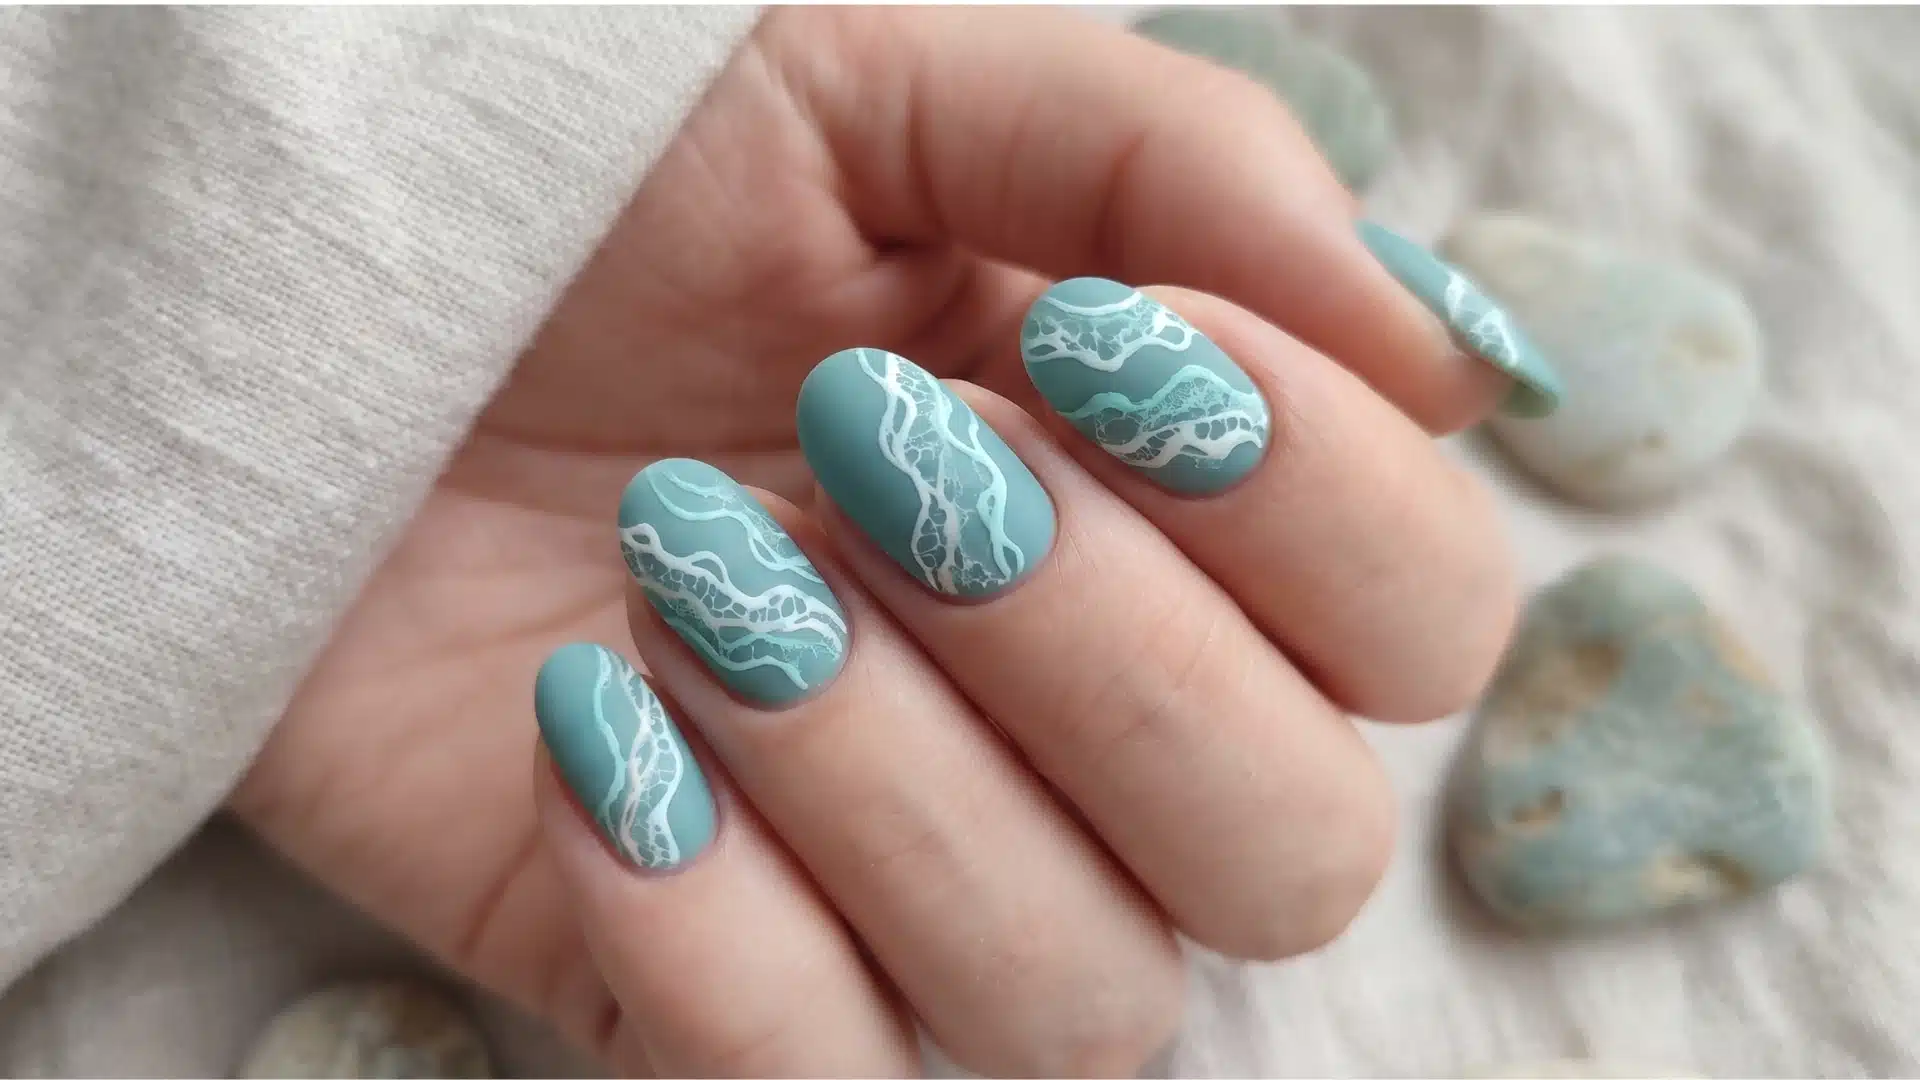
Best for: Detail lovers, elegant beach nail designs, and anyone wary of cluttered nail art.
Seafoam lace nails feature a teal or ocean-blue base with soft white patterns layered on top. This beach nail idea feels organic and fluid, more like seafoam than anything decorative, which keeps it refined.
How to Create This Nail Look:
- Apply a teal or ocean blue base.
- Add fine, irregular white patterns.
- Keep the design soft and seal with gloss.
14. Oceanic Negative Space
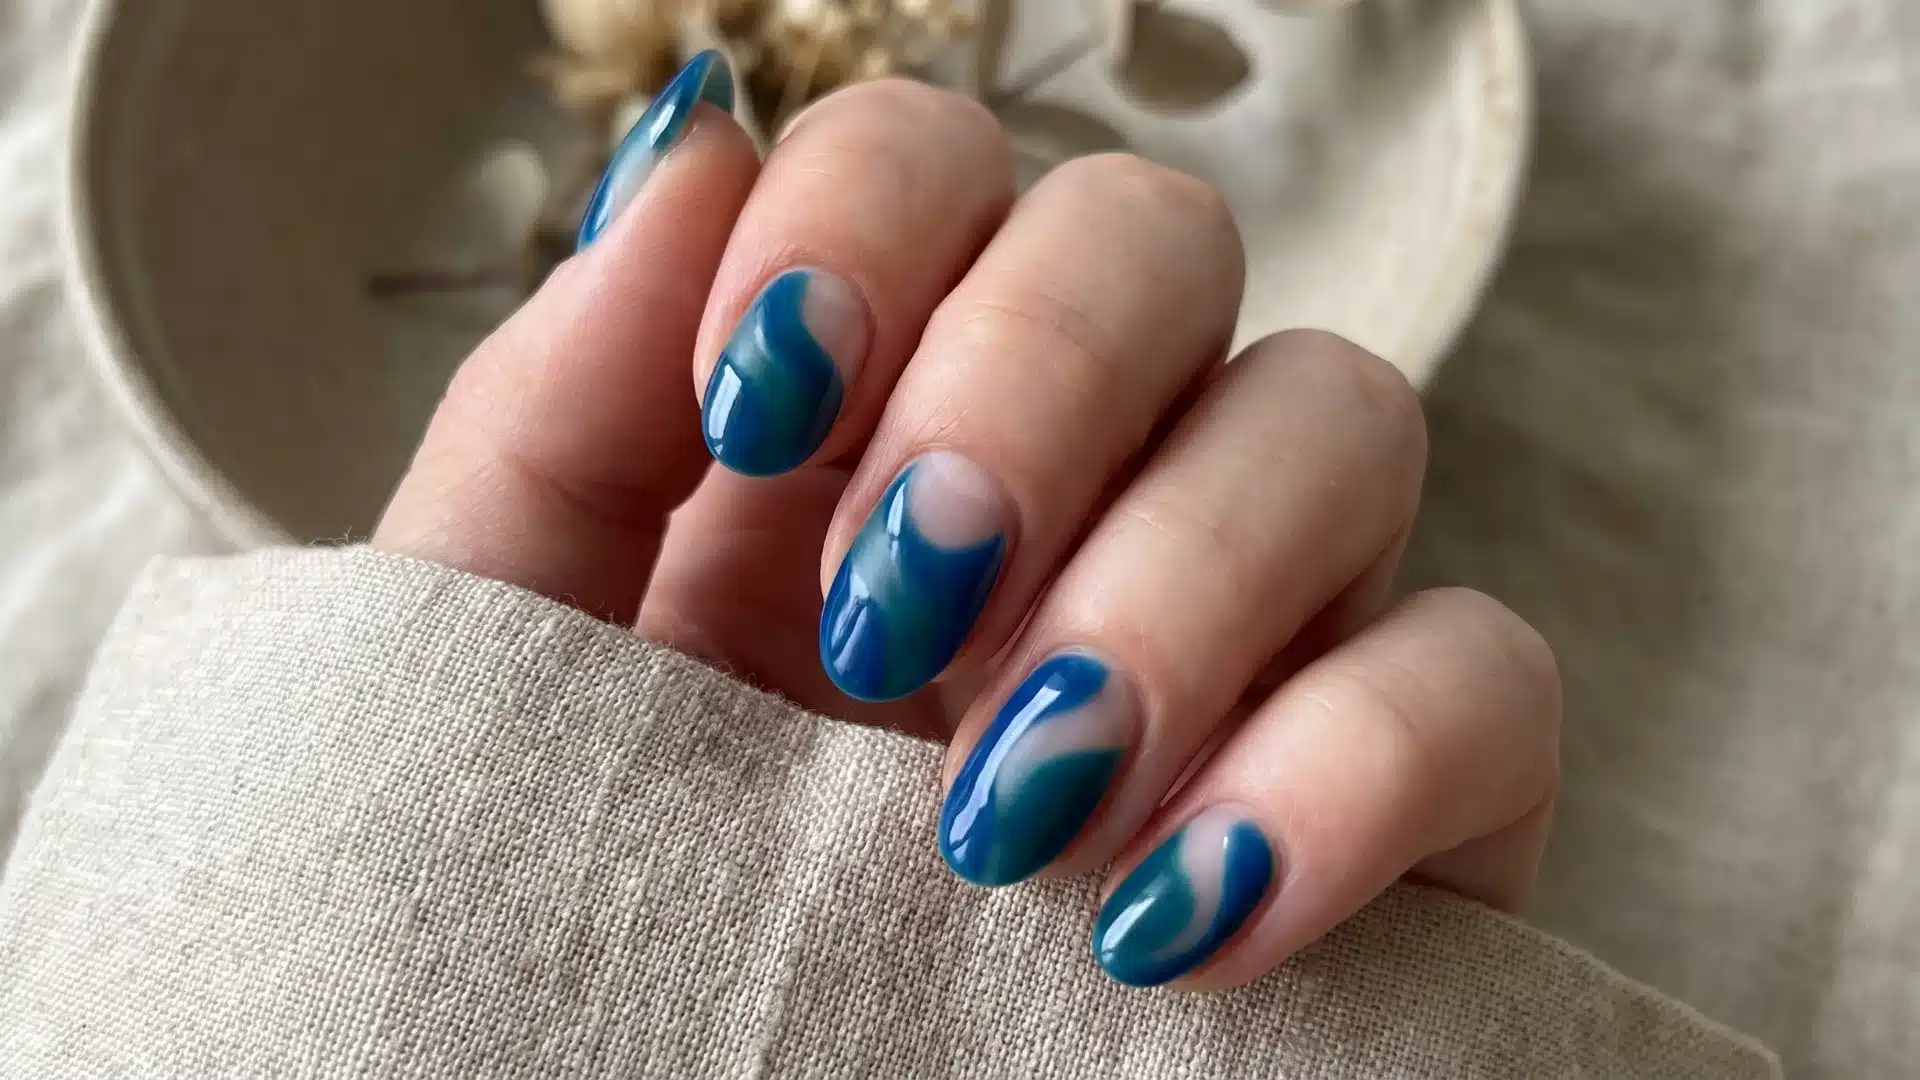
Best for: Modern nail lovers, minimal designs, and anyone who prefers low-effort detail.
Oceanic negative space nails use a teal or cobalt base with a curved bare section near the cuticle. This modern nail design feels clean and slightly asymmetric, which keeps it interesting without trying too hard.
How to Create This Nail Look:
- Leave a curved section near the cuticle bare.
- Paint the rest with teal or cobalt polish.
- Clean edges and seal with the top coat.
Sand and Shore Series
Sand-and-shore nail ideas focus on warm neutrals, soft textures, and subtle coastal details inspired by dunes, wet sand, and driftwood, while adding matte finishes, gentle gradients, and minimal accents that reflect a calm beach setting.
15. Sand Dune Ombre
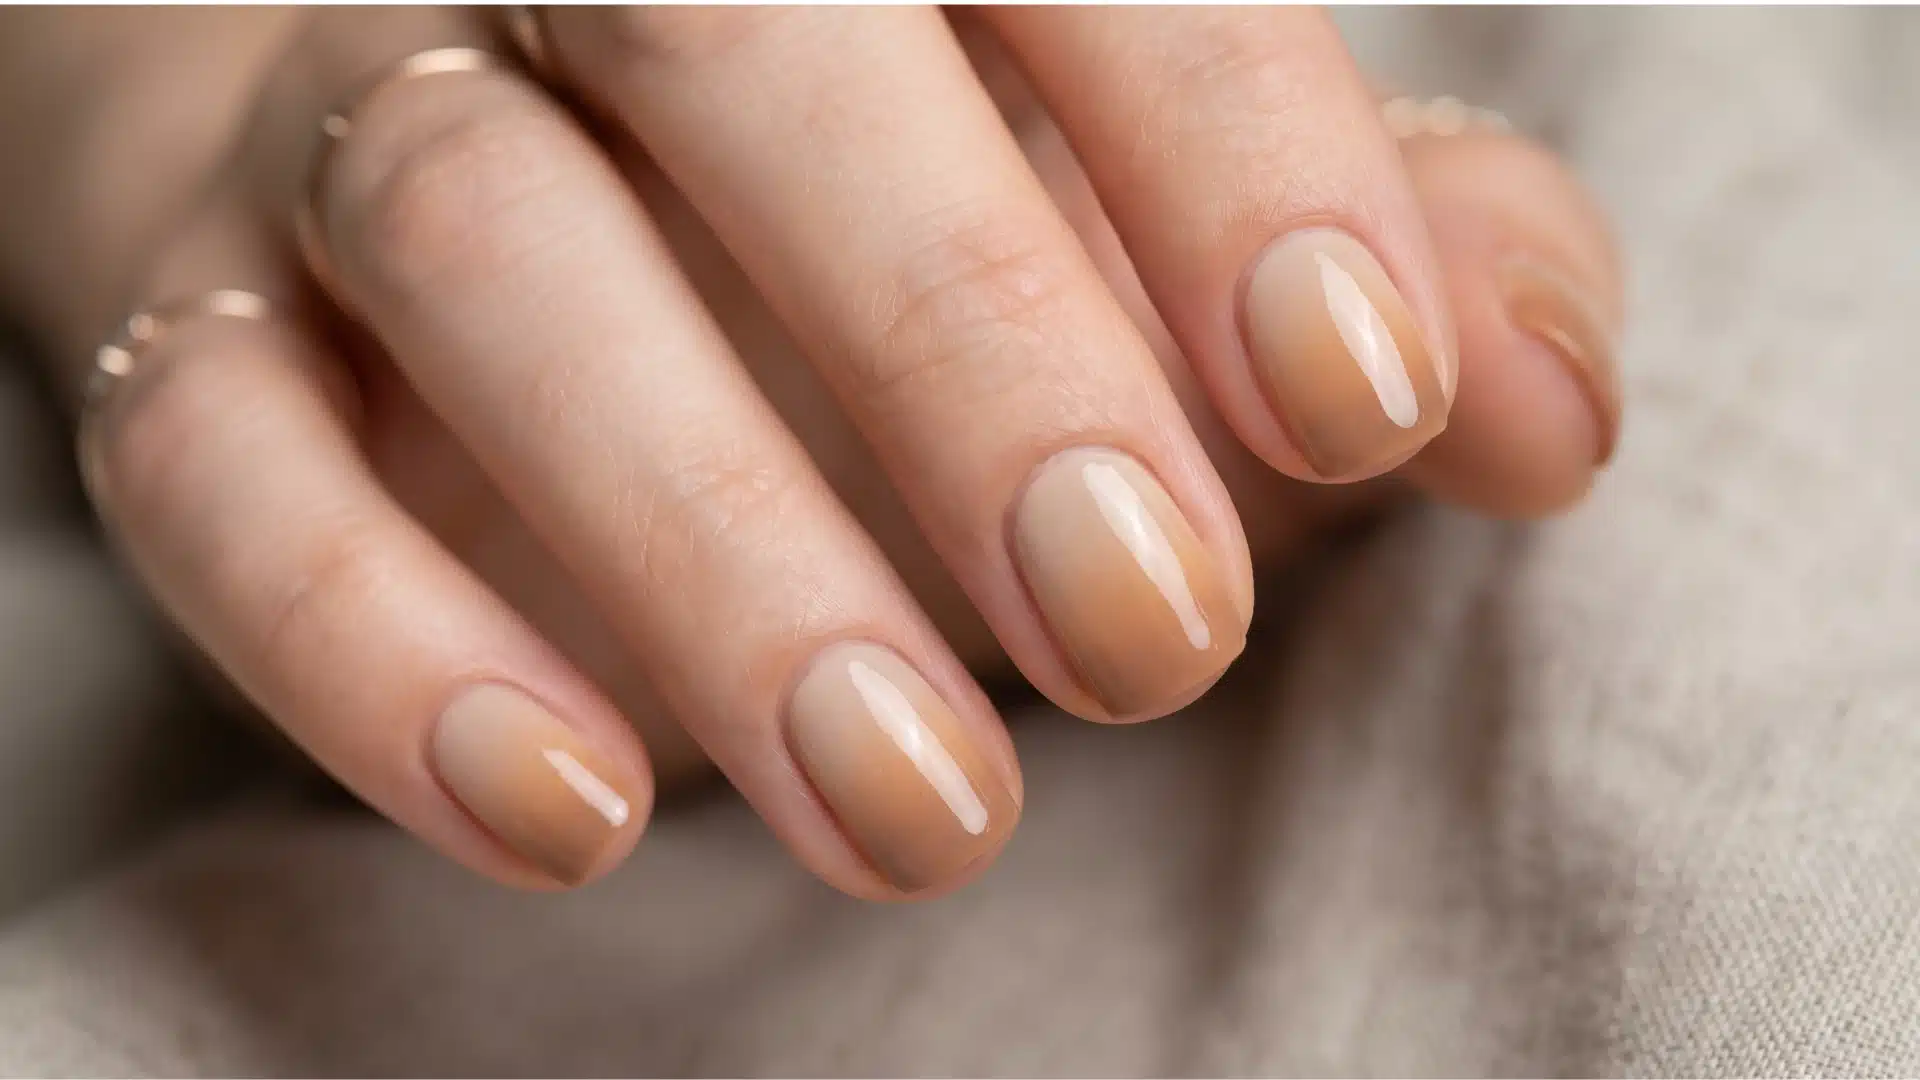
Best for: Neutral nail lovers, summer beach nails, and anyone avoiding obvious decoration.
Dune ombre nails blend pale beige, warm tan, and soft caramel into a subtle gradient. This beach nail design reads warm and quietly expensive, rather than clearly ombre, which is usually the better outcome.
How to Create This Nail Look:
- Apply the lightest nude at the cuticle.
- Blend into tan and caramel towards the tip.
- Keep the gradient soft and seal with gloss.
16. Wet Sand Chrome

Best for: Minimalists, chrome nail fans, and easy-to-wear beach vacation nails.
Wet sand chrome nails use a warm, dark gold or bronze metallic shade that mimics late-afternoon sand. This beach nail design reflects the surrounding colors, which makes it quietly dynamic without adding any detail.
How to Create This Nail Look:
- Apply a warm bronze or gold base.
- Add chrome powder for a metallic finish.
- Seal with a high-gloss top coat.
17. Shoreline Geometry
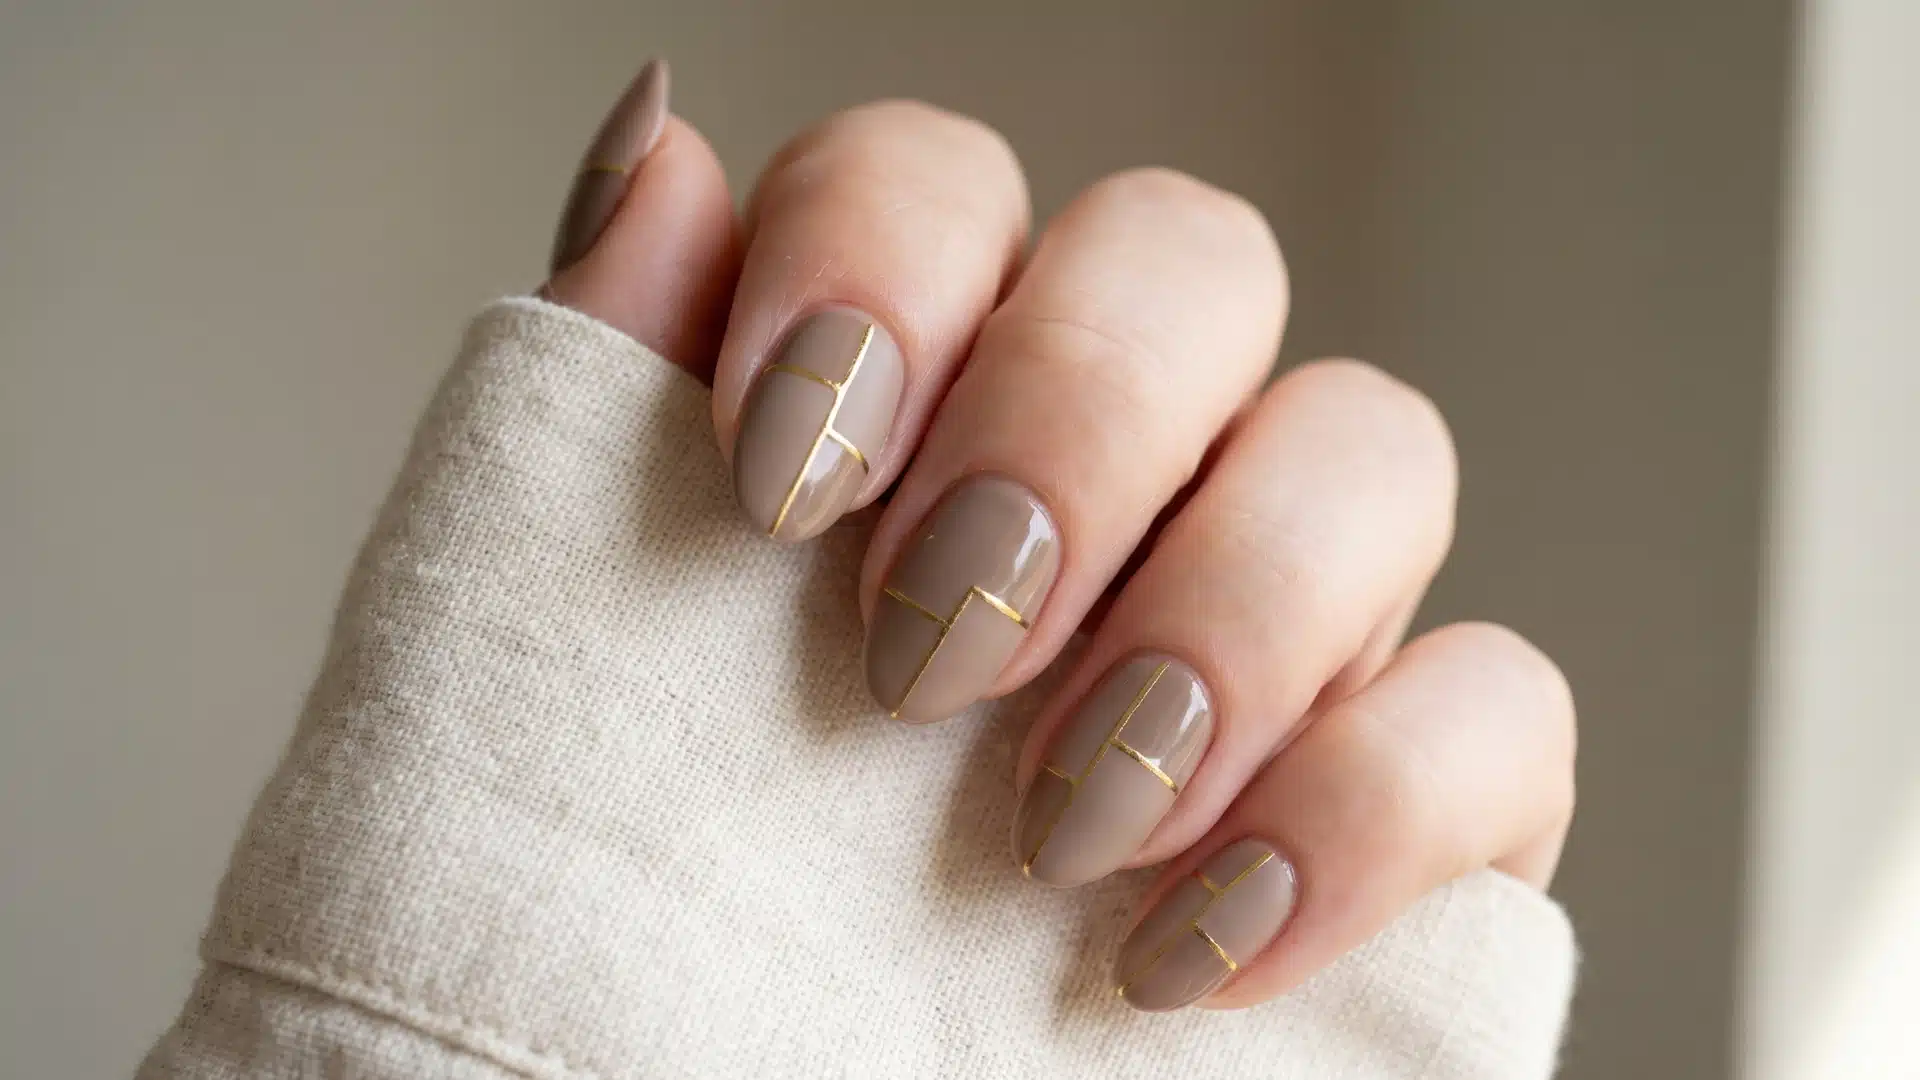
Best for: Structured nail designs, minimalists, and anyone who prefers clean over fussy.
Shoreline geometry nails use a neutral base with matte and glossy sections split by thin gold lines. The irregular shapes keep this beach manicure idea from looking too rigid, making it feel both architectural and relaxed.
How to Create This Nail Look:
- Apply a neutral base shade.
- Create matte and glossy sections with top coats.
- Add thin gold lines to separate shapes.
18. Driftwood Grain
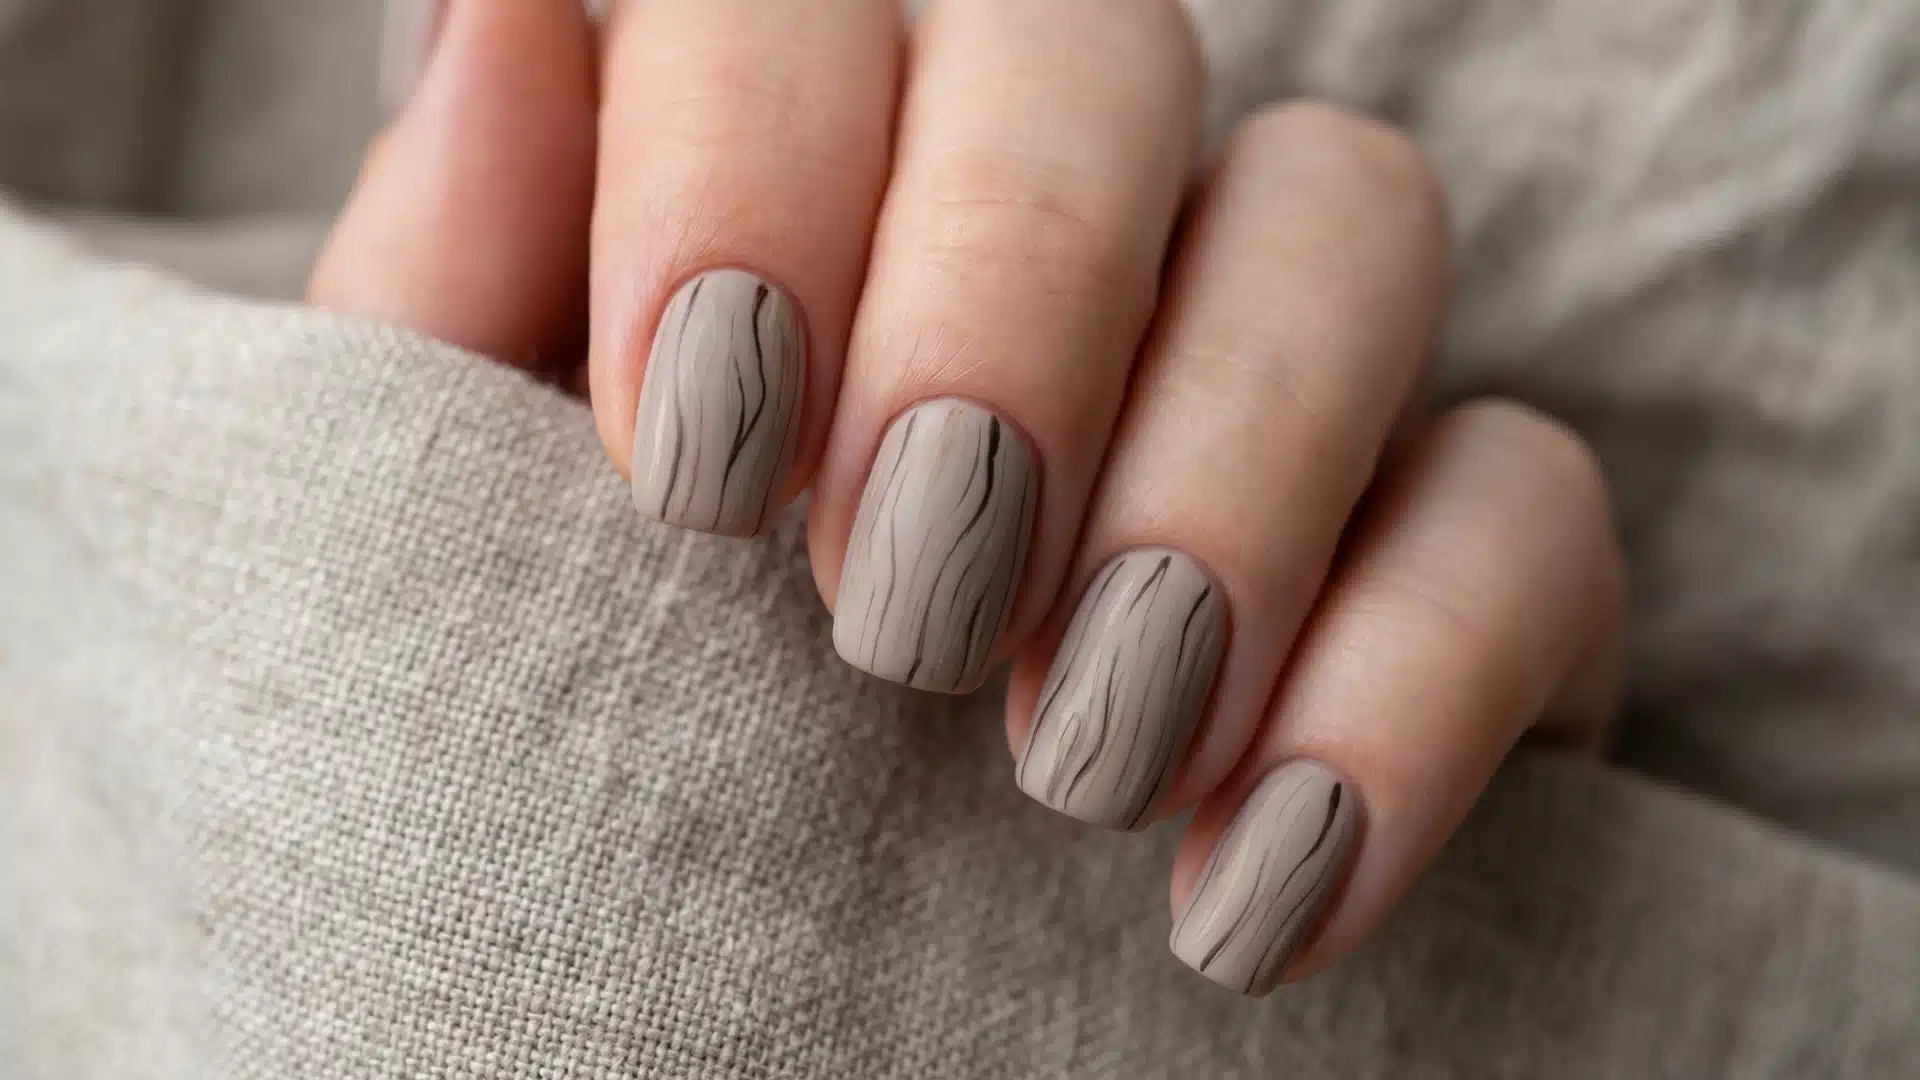
Best for: Natural nail lovers, subtle textures, and anyone asking for something “not boring”.
Driftwood grain nails use a warm grey or taupe base with fine, vertical lines. The soft curves and slight splits keep this natural nail design organic, not suspiciously precise.
How to Create This Nail Look:
- Apply a warm grey or taupe base.
- Draw fine, slightly curved vertical lines.
- Let lines vary and seal with a matte finish.
19. Low Tide Negative Space French
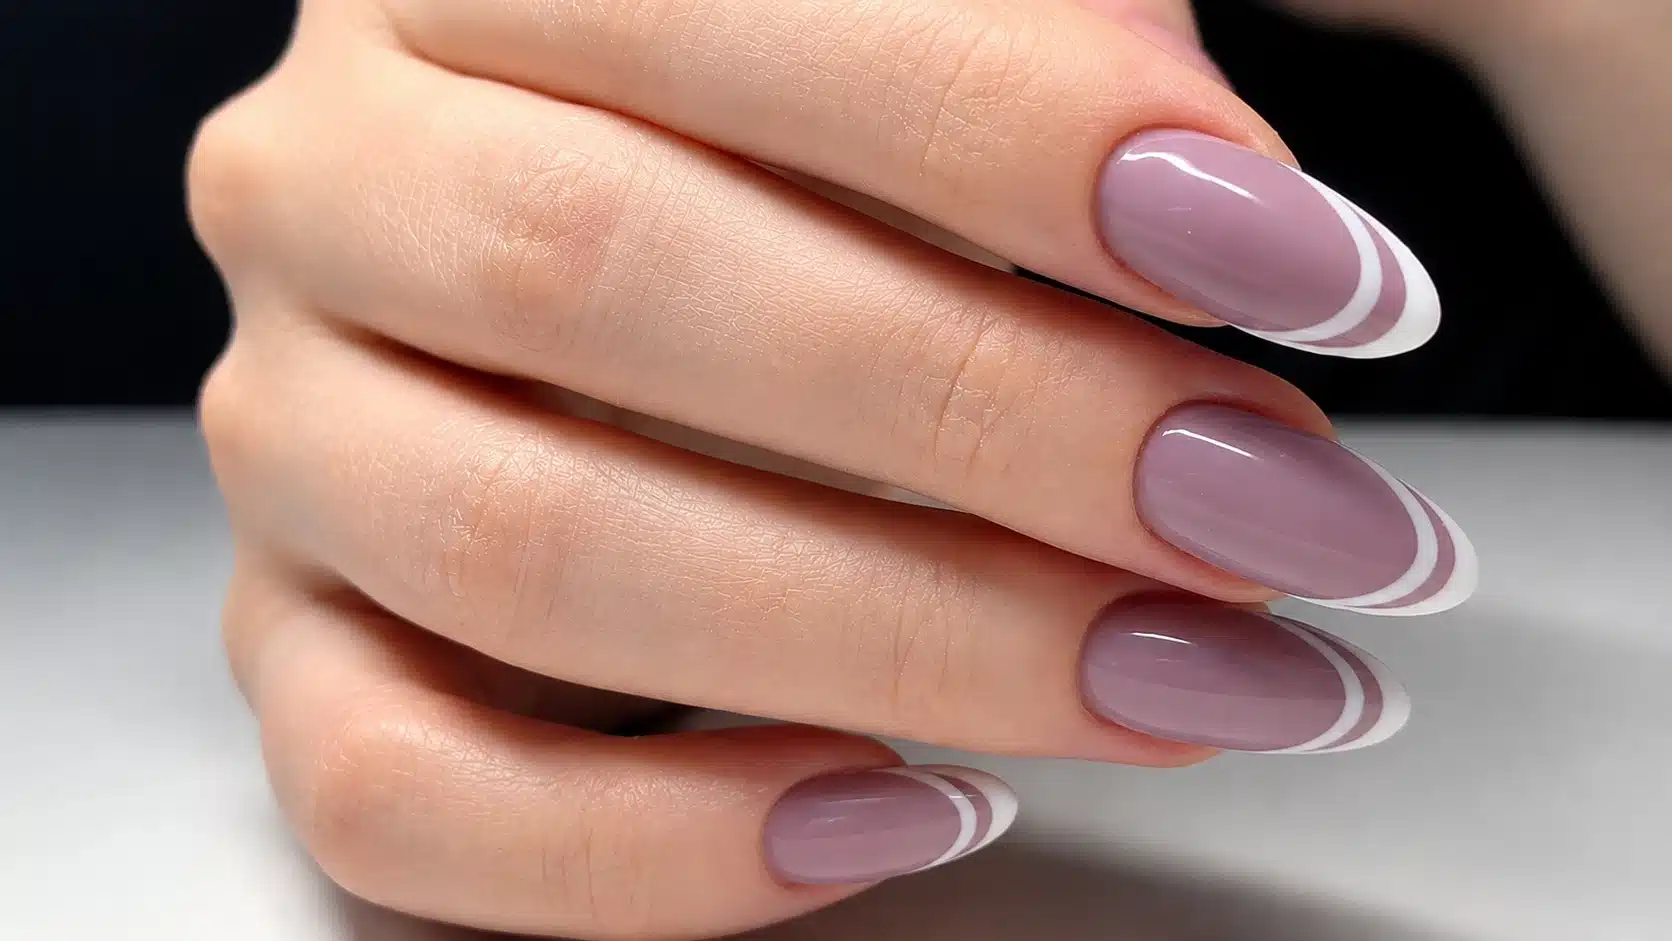
Best for: Minimal French manicure fans, neutral nails, and understated beach nail designs.
Low tide negative space French nails swap the usual white tip for a thin bare crescent, paired with a sheer beige base. This beach nail design looks familiar at first, then quietly more refined up close.
How to Create This Nail Look:
- Leave a thin crescent tip bare.
- Apply sheer beige or sand over the rest.
- Clean edges and seal with gloss.
20. Sandstorm Abstract
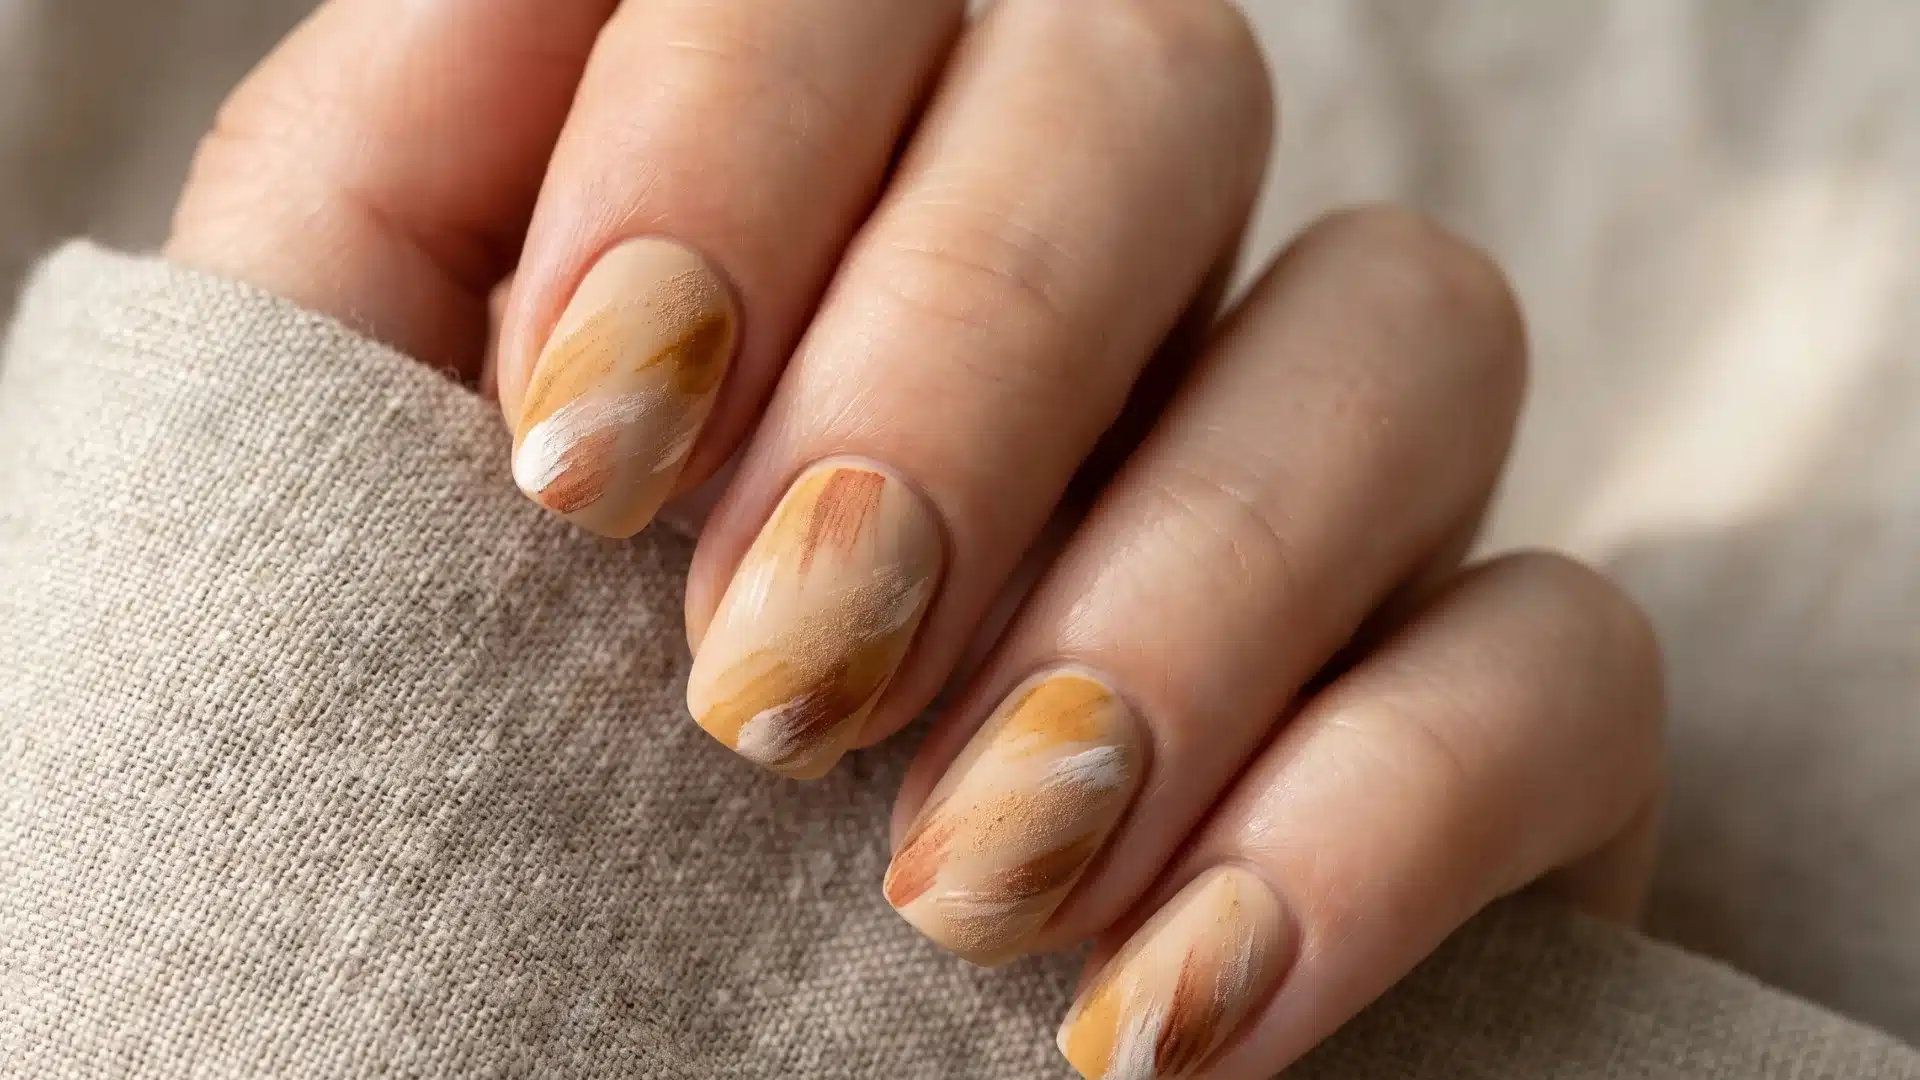
Best for: Abstract nail art fans, neutral tones, and anyone who prefers movement over neat patterns.
Sandstorm abstract nails feature a warm beige base with dry-brush strokes in ochre, rust, and white. This beach nail design mimics windblown sand, shifting subtly with light, which is either charming or mildly inconvenient.
How to Create This Nail Look:
- Apply a warm beige base.
- Add dry brushstrokes in ochre, rust, and white.
- Keep strokes loose and seal lightly.
21. Fossil Imprint
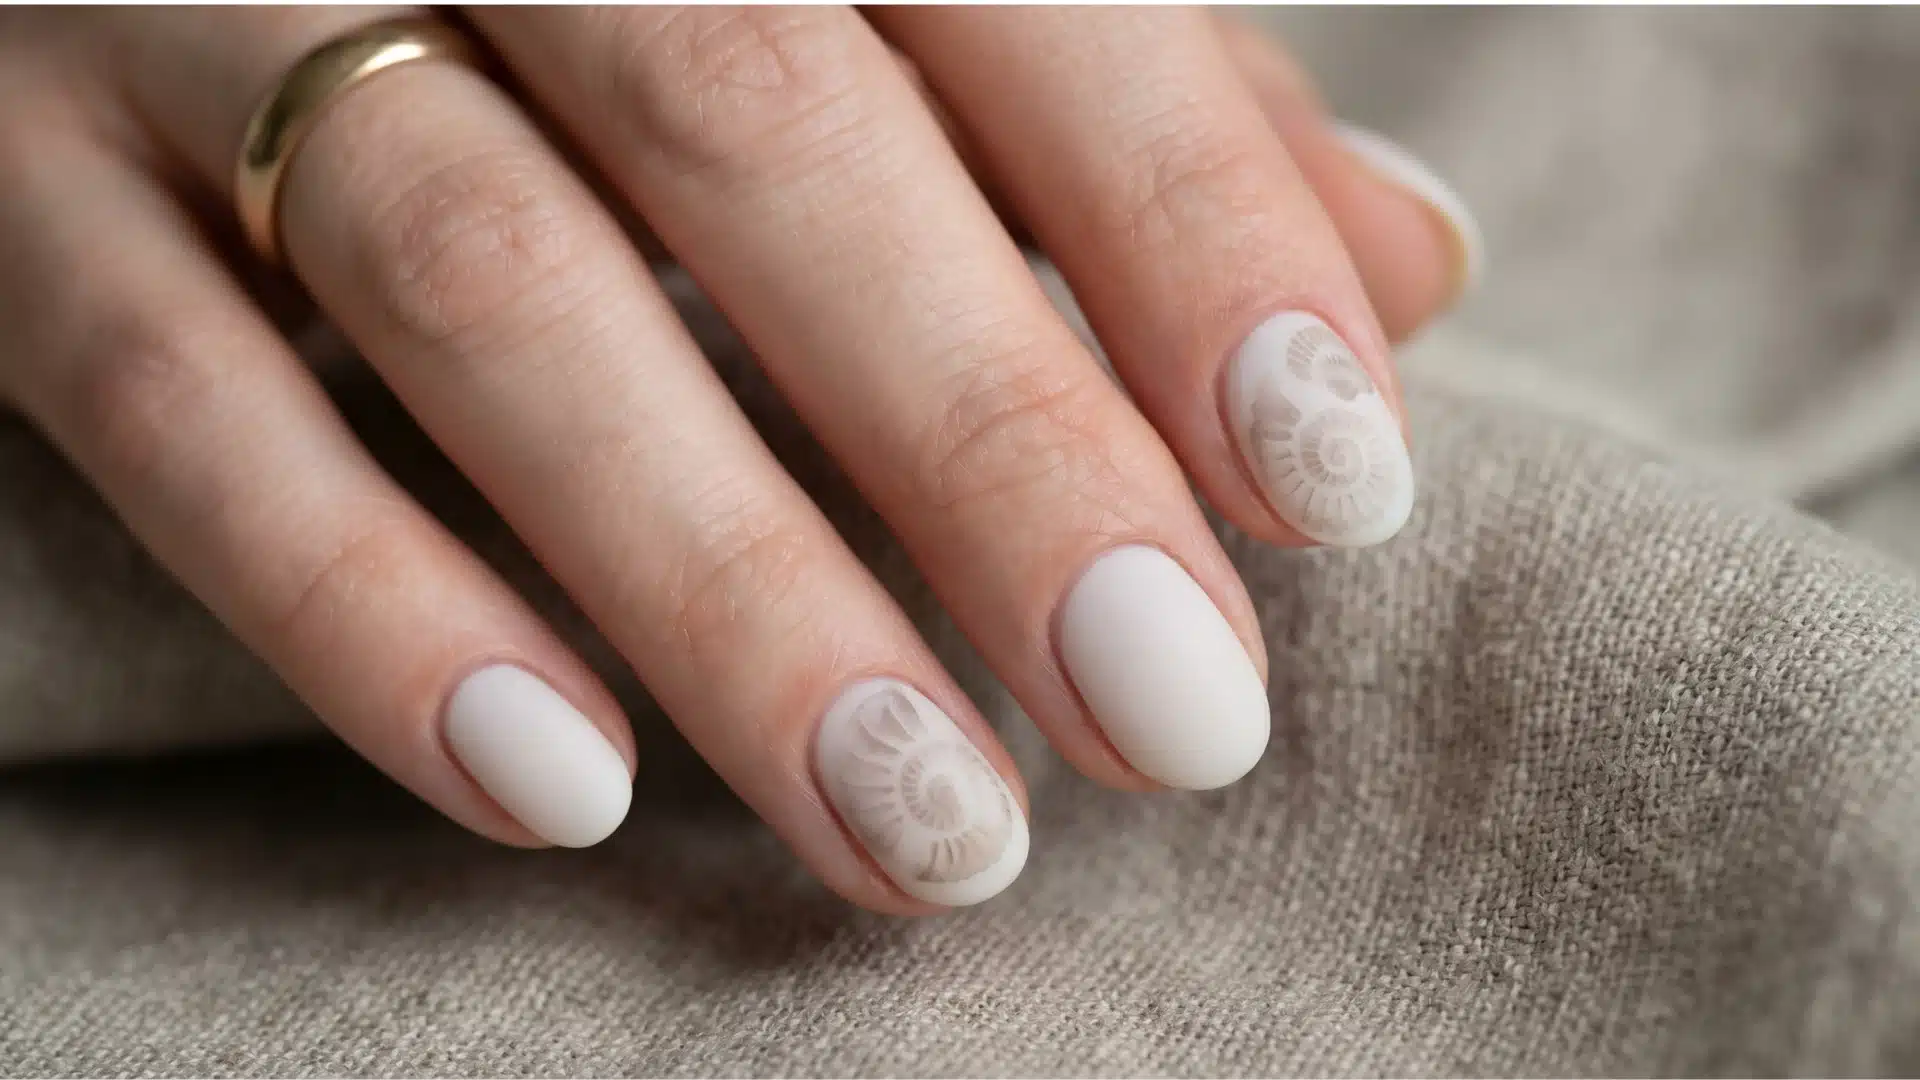
Best for: Subtle nail art lovers, minimal accents, and anyone who prefers detail that waits to be noticed.
Fossil imprint nails keep a pale cream base with one or two soft fossil accents in grey or taupe. This beach nail design stays quiet and watermark-like, which makes it feel considered rather than obvious.
How to Create This Nail Look:
- Apply a pale cream or off-white base.
- Add a faint fossil stamp on accent nails.
- Keep it soft and seal with a matte or gloss top coat.
Tropical Garden Series
Tropical garden nail ideas focus on bold colors, organic shapes, and leafy or floral elements, balanced with enough restraint to keep the design polished while adding fine detailing, soft contrasts, and controlled accents that prevent the look from feeling overly busy or chaotic.
22. Bird of Paradise Accent
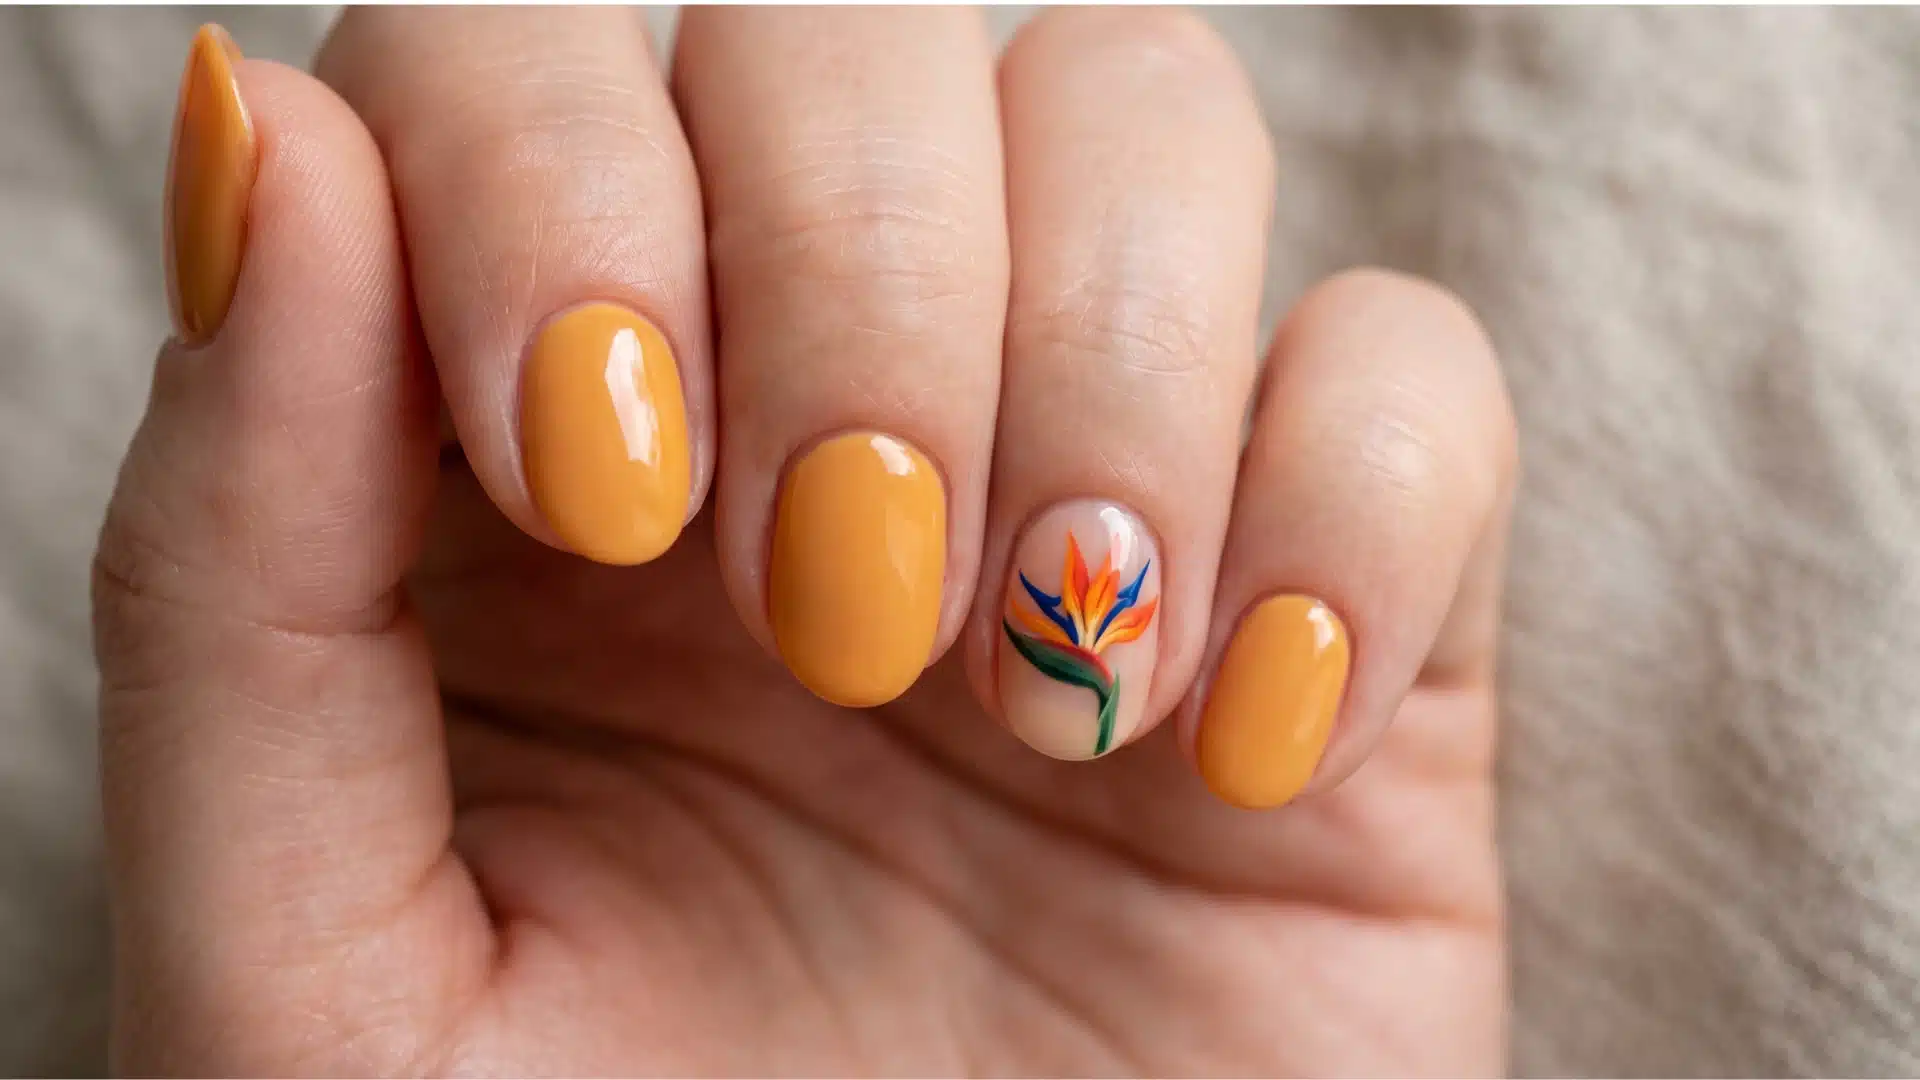
Best for: Tropical nail art lovers, accent nail fans, and anyone wanting color without chaos.
Bird of paradise accent nails use a warm orange or saffron base with one floral accent. The bold petals and clean shape make this tropical nail design look detailed without becoming exhausting.
How to Create This Nail Look:
- Apply a warm orange or saffron base.
- Paint one bird of paradise flower on an accent nail.
- Keep shapes clear and seal with gloss.
23. Banana Leaf Silhouette
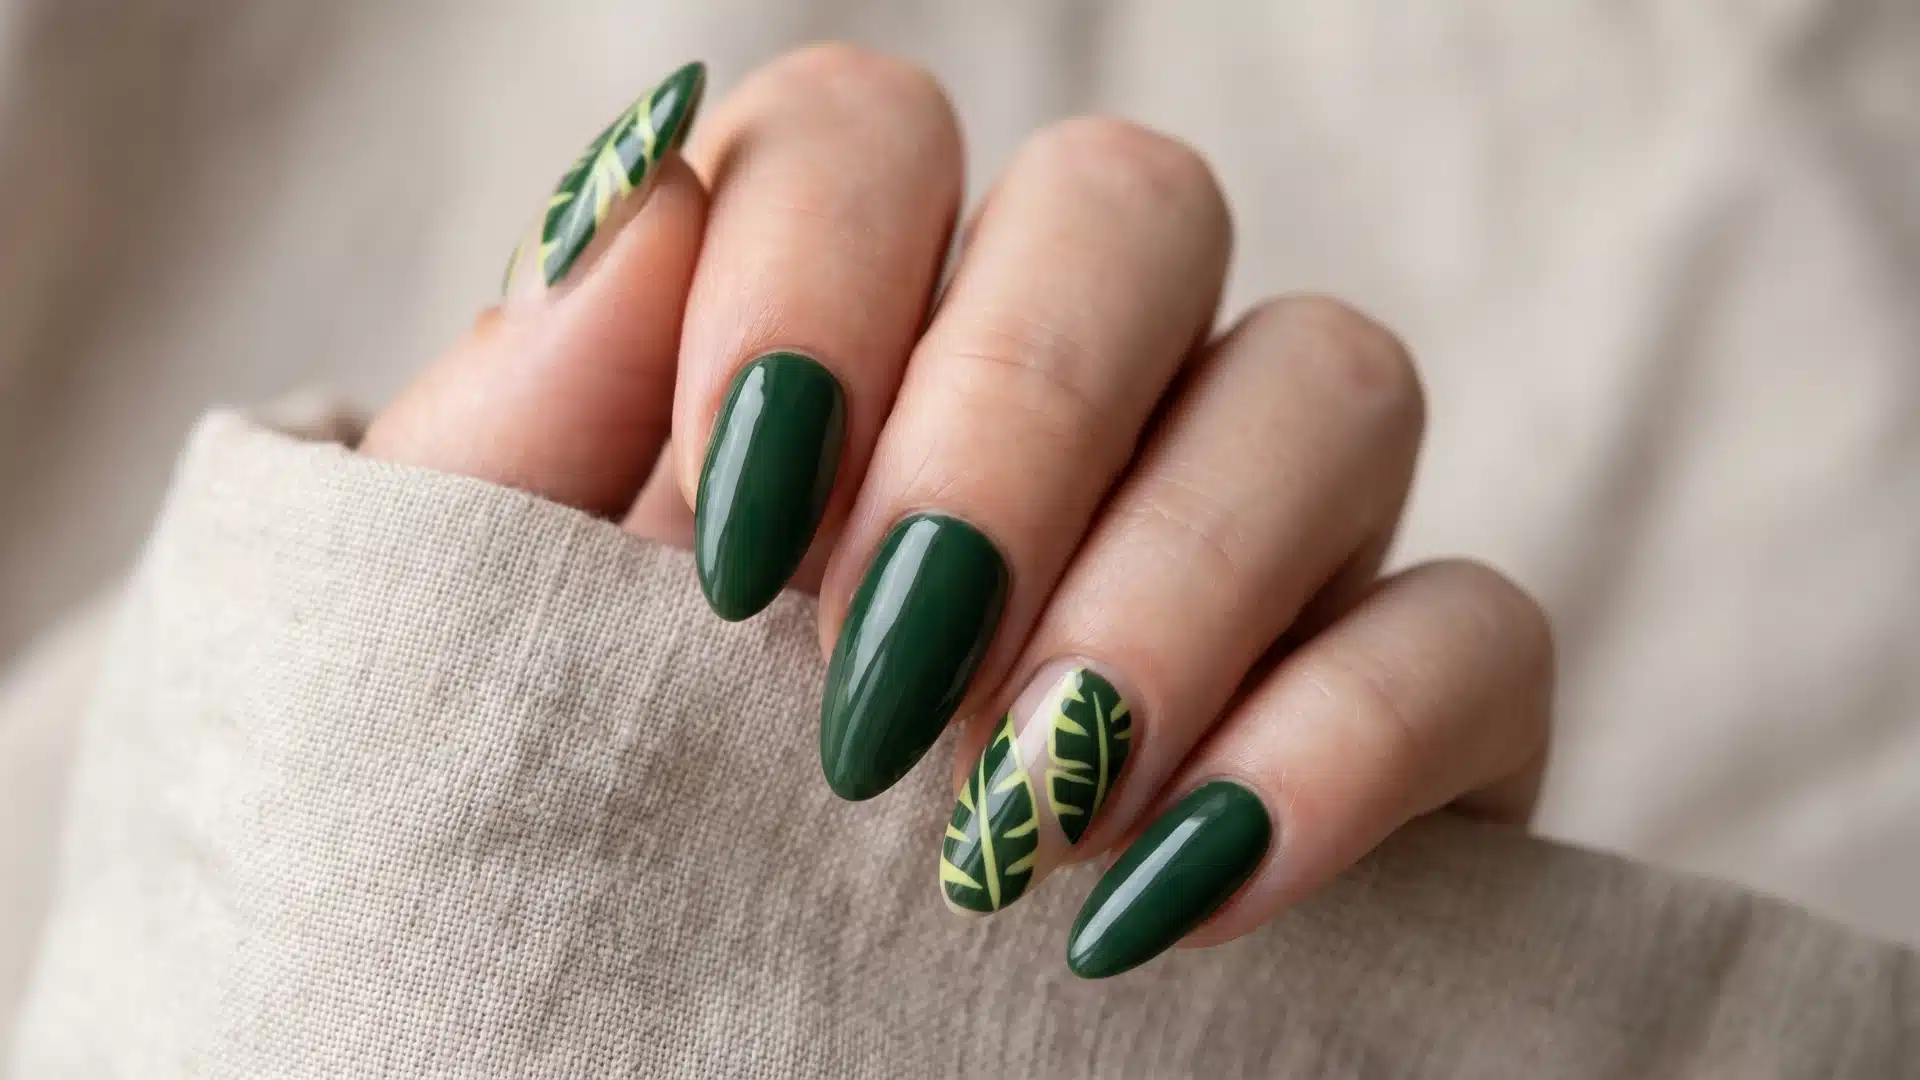
Best for: Bold nail designs, long nails, and anyone who prefers graphic shapes over sweet details.
Banana leaf silhouette nails use a deep green base with lighter leaf shapes cut in using negative space. This tropical nail design stays clean and graphic, which keeps it bold rather than busy.
How to Create This Nail Look:
- Apply a deep forest or hunter green base.
- Create banana leaf shapes using negative space or lighter green.
- Keep edges clean and seal with gloss.
24. Overripe Mango Fades
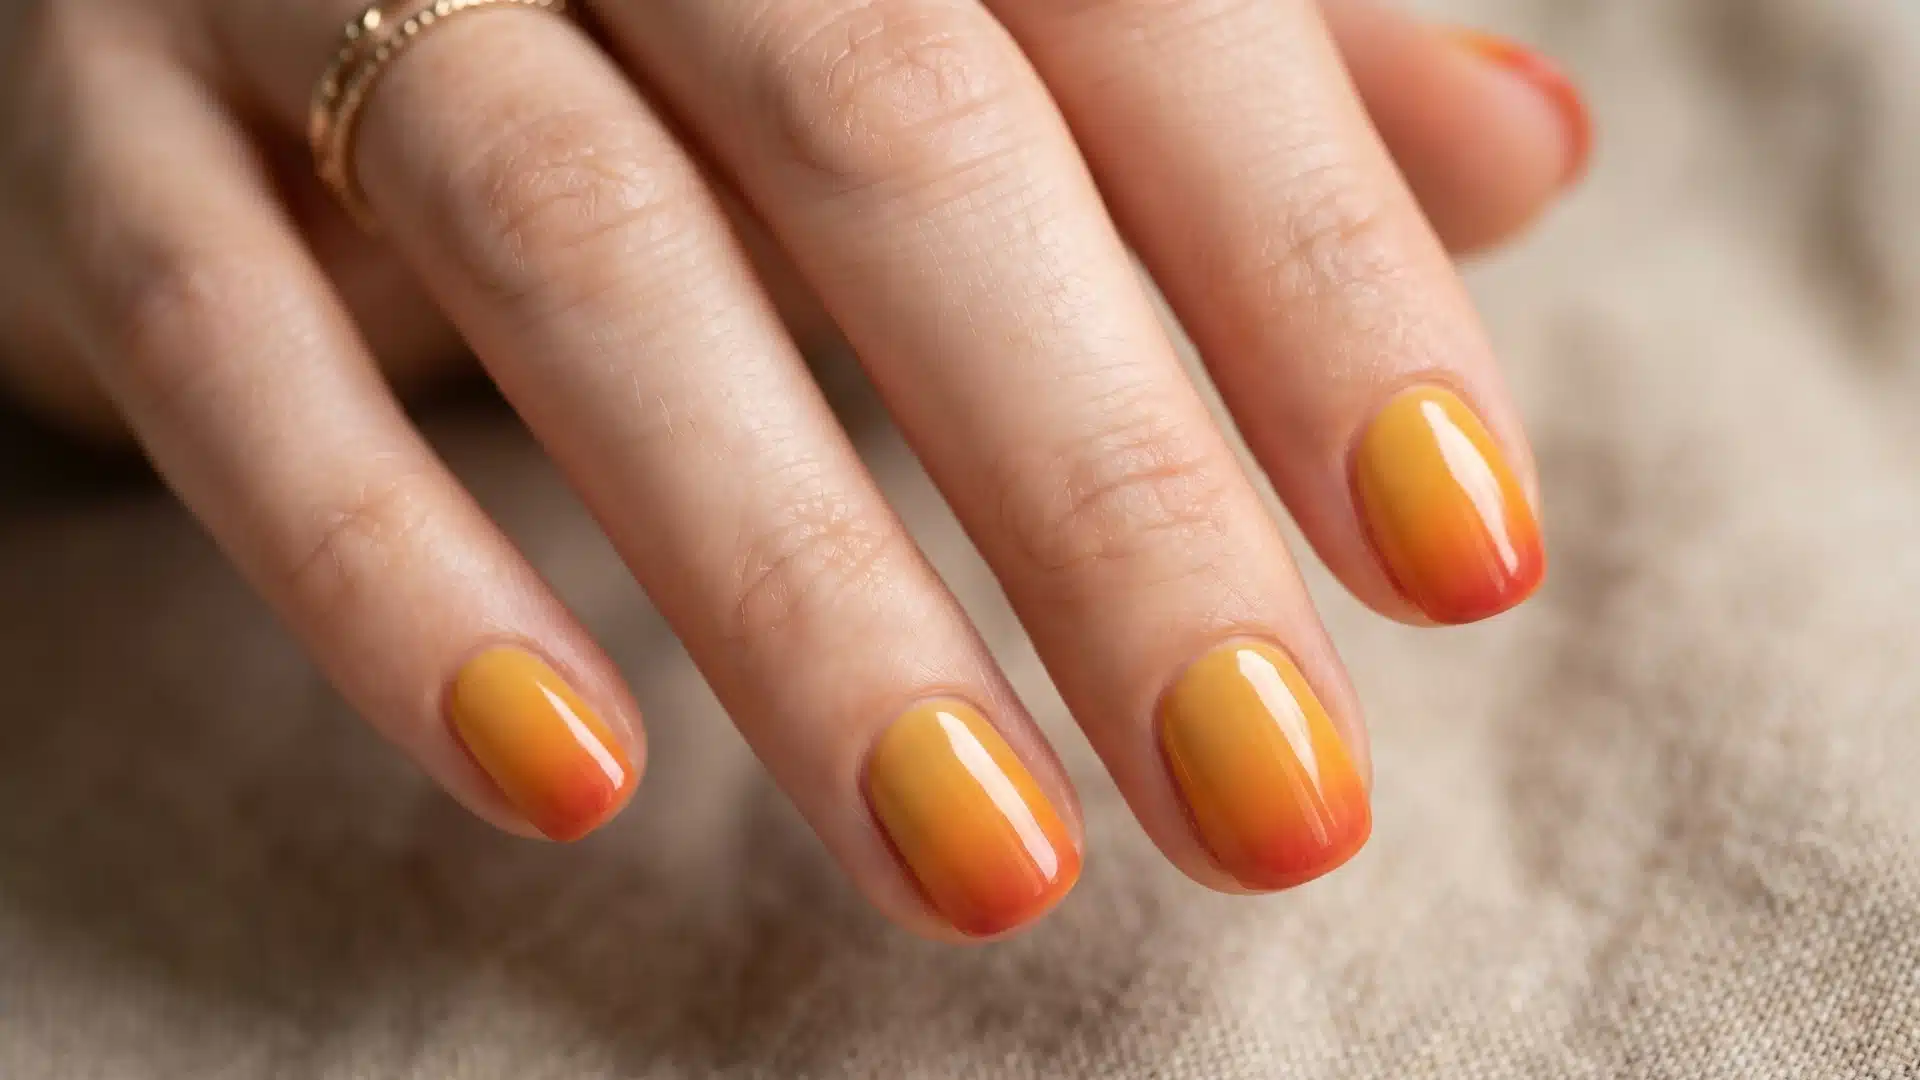
Best for: Color lovers, summer beach nails, and anyone tired of predictable gradients.
Overripe mango fade nails blend from golden yellow to deep orange, with a hint of red at the tips. This beach nail design stays mostly yellow, which keeps it warm and specific rather than overly loud.
How to Create This Nail Look:
- Apply a golden yellow base.
- Blend orange towards the tip with a hint of red.
- Keep the gradient soft and seal with gloss.
25. Frangipani Scatter
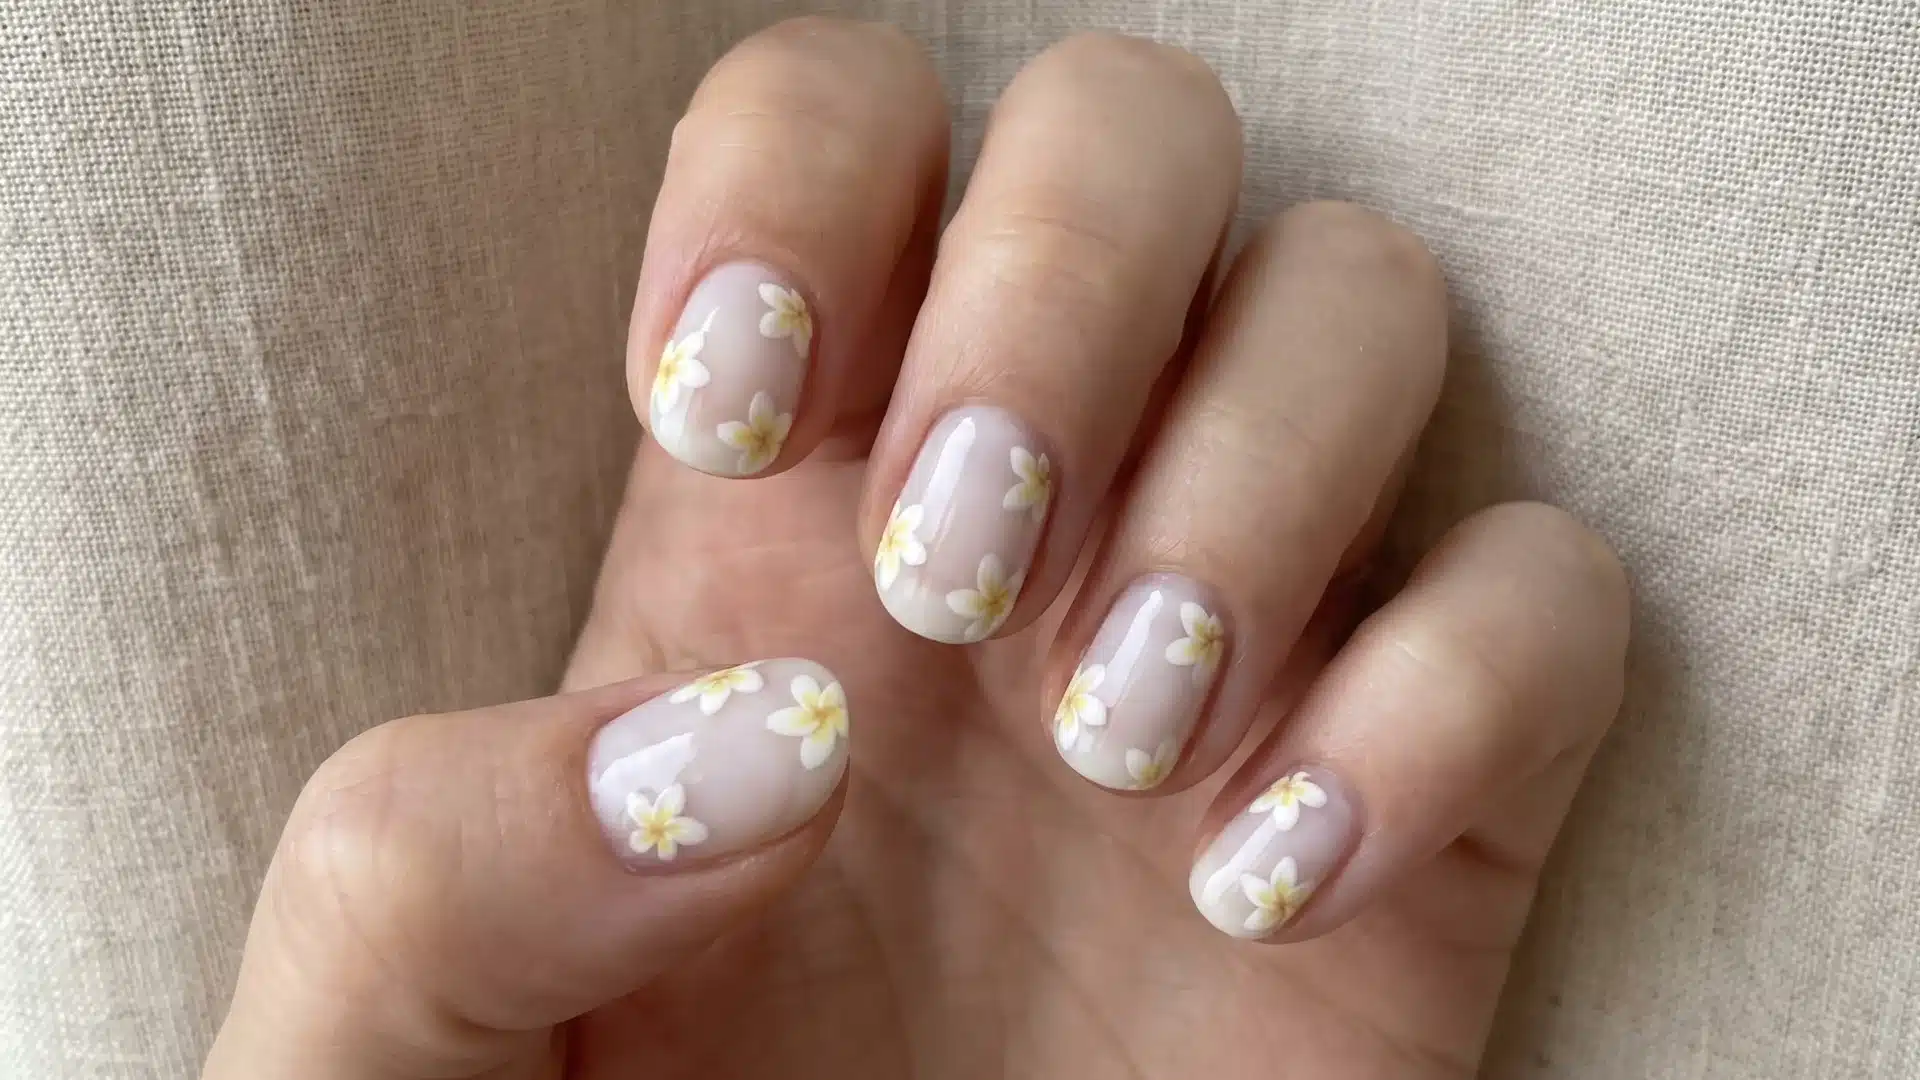
Best for: Cute beach nail designs, soft florals, and anyone who wants detail without clutter.
Frangipani scatter nails use a sheer white or pale blush base with small white flowers and soft yellow centers. The loose placement keeps this tropical nail design looking effortless, while still feeling refined.
How to Create This Nail Look:
- Apply a sheer white or pale blush base.
- Paint small white flowers with yellow centers.
- Scatter them freely and seal with gloss.
26. Green Canopy Nails
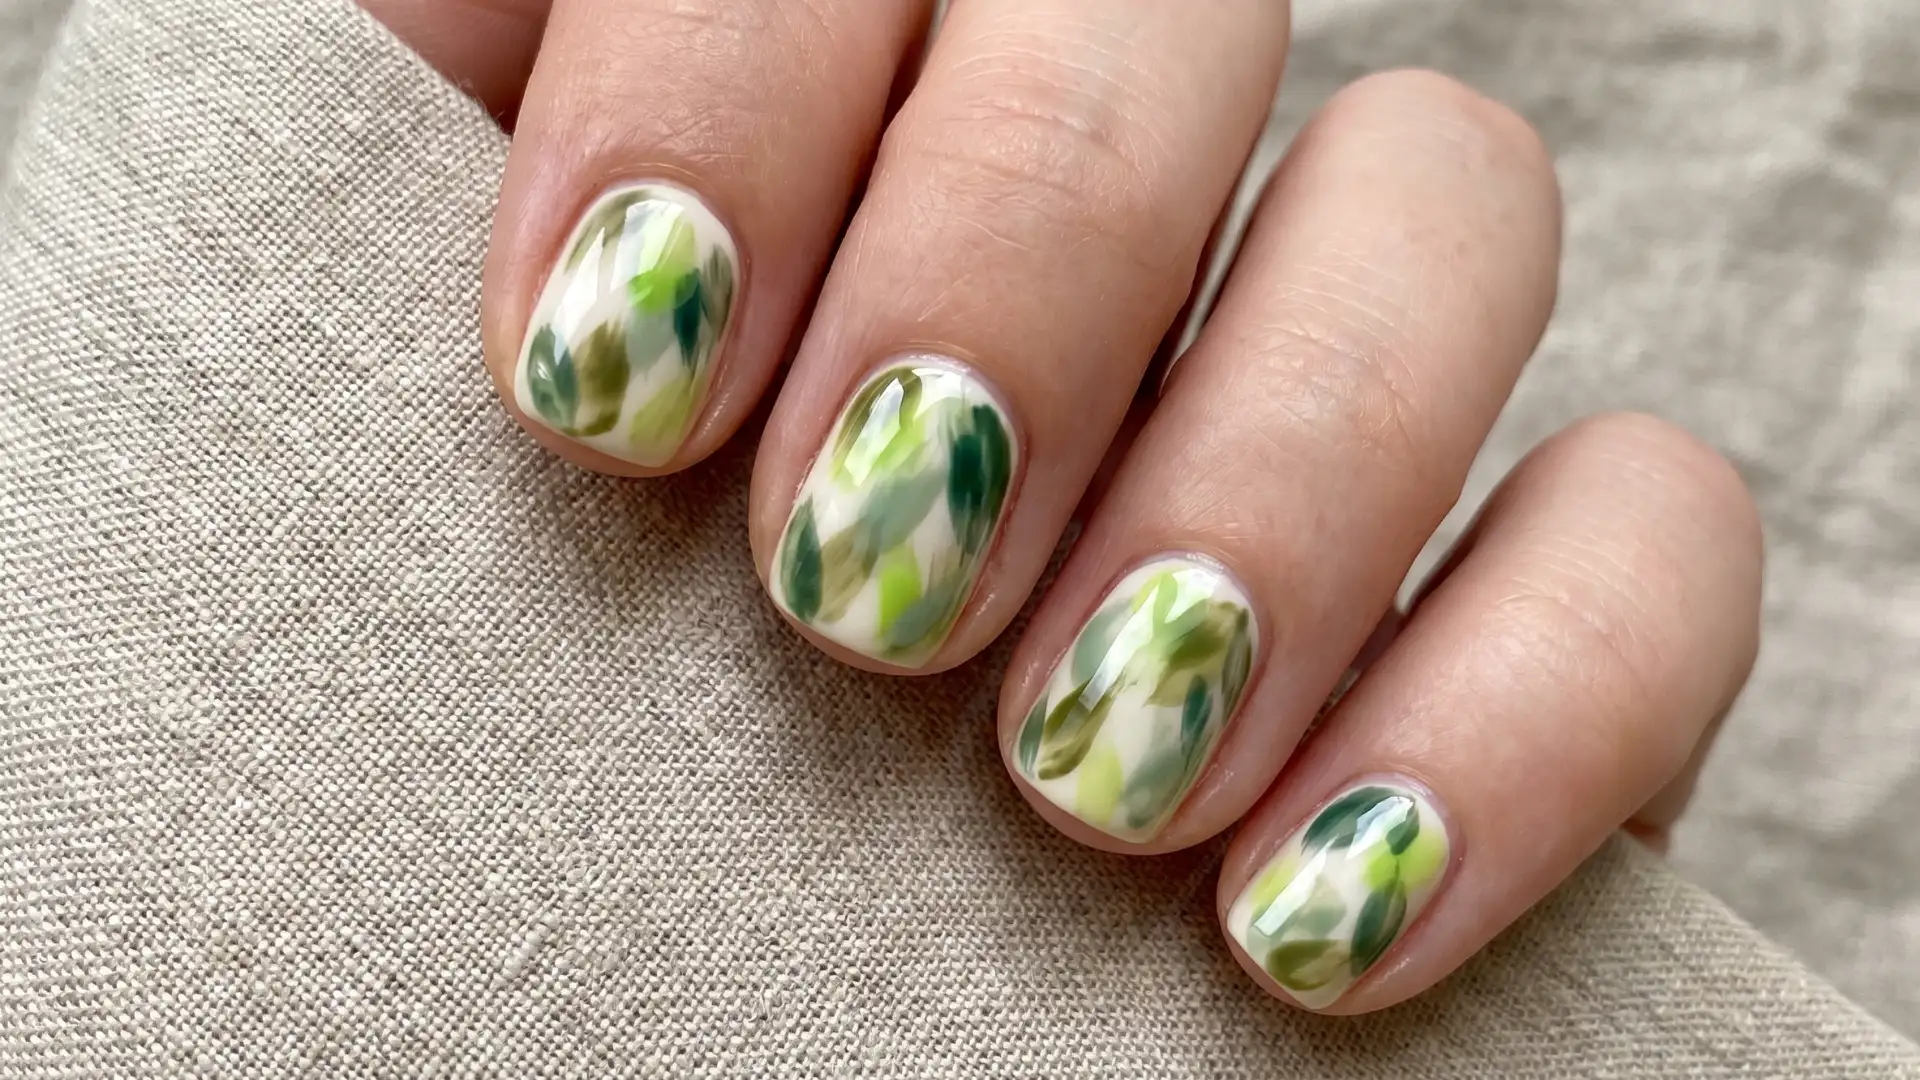
Best for: Artistic nail lovers, layered color fans, and anyone who wants lush without looking crafty.
Green canopy nails layer olive, emerald, lime, and sage strokes over a white base. This tropical nail design mimics filtered light through leaves, and a slight variation keeps it from looking overly organized.
How to Create This Nail Look:
- Apply a white base.
- Add layered green brushstrokes in varied tones.
- Keep strokes uneven and seal with gloss.
27. Vanilla Orchid Tips
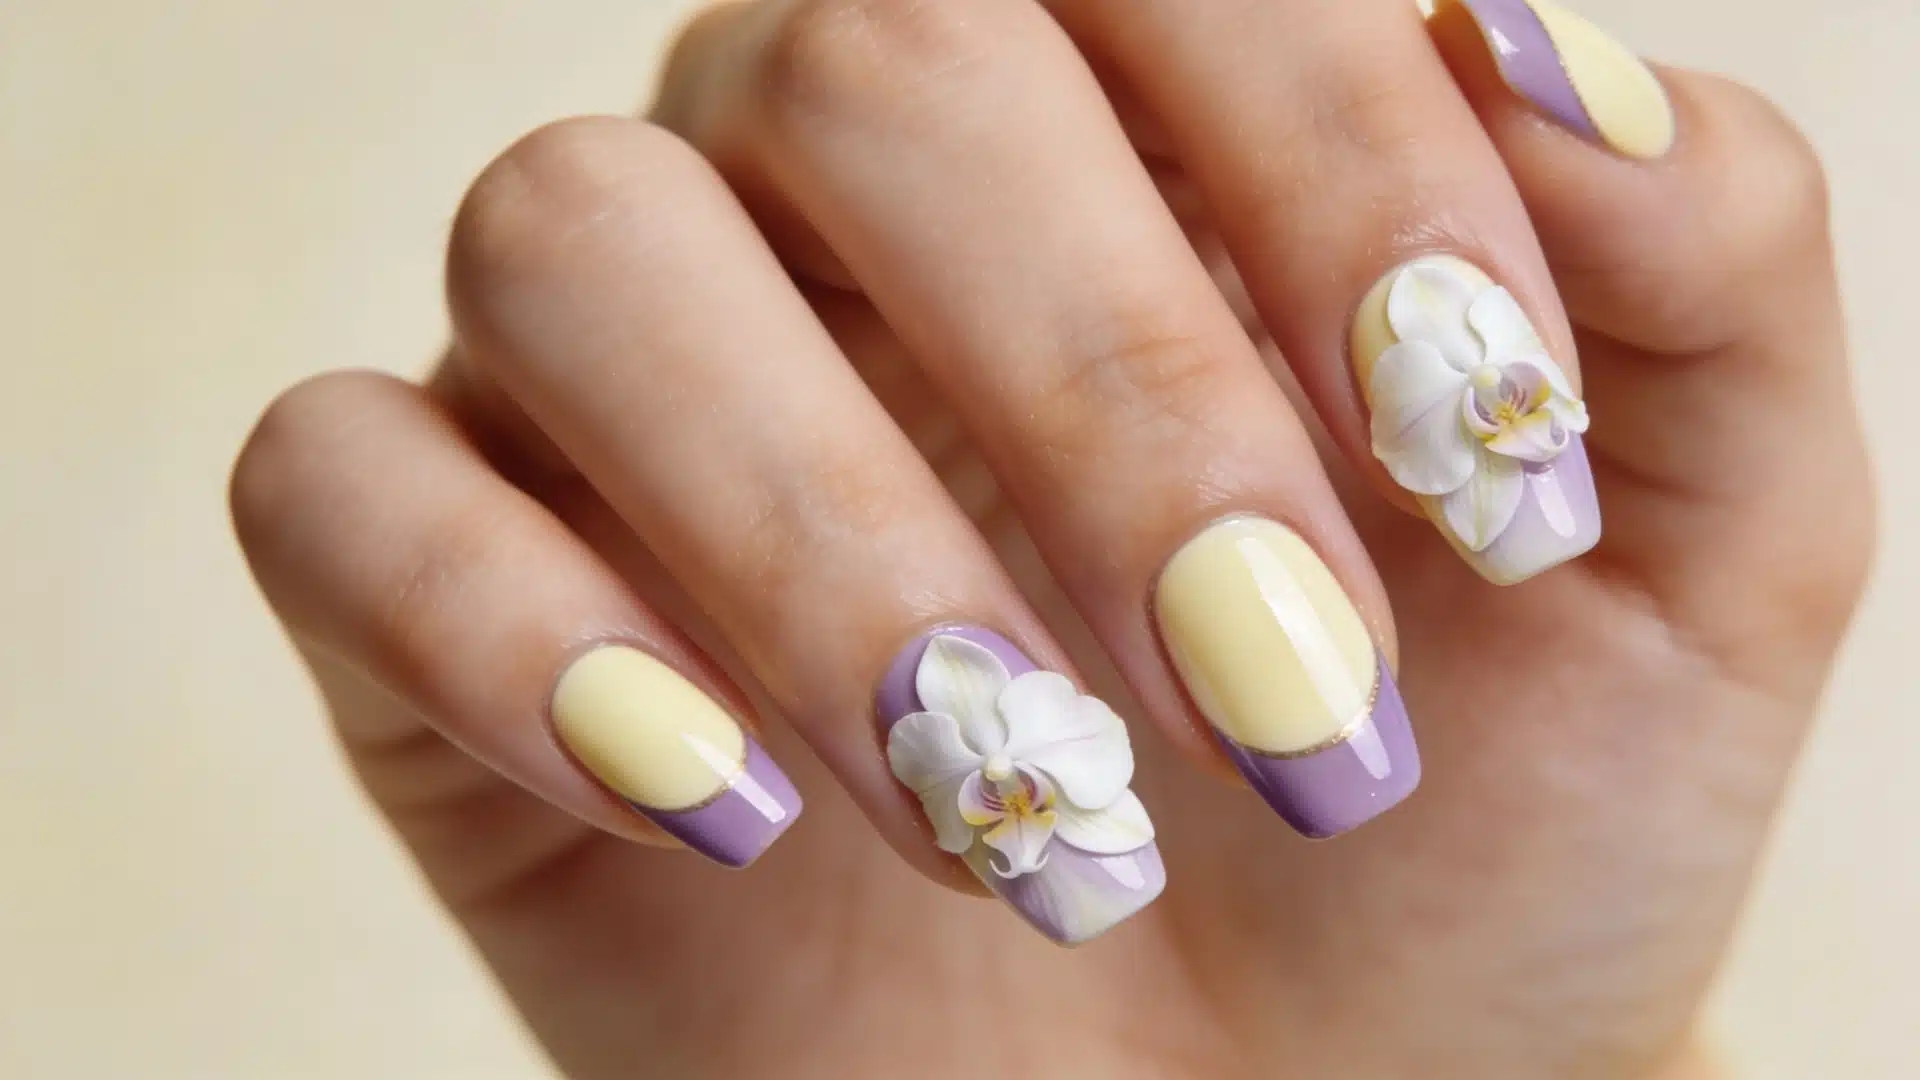
Best for: Refined floral lovers, elegant beach nail designs, and anyone looking to avoid predictable tropical prints.
Vanilla orchid tips nails use a pale cream base with delicate orchid shapes replacing the French tip. This tropical nail design feels more polished and distinct, avoiding the usual overdone floral look.
How to Create This Nail Look:
- Apply a warm vanilla or pale cream base.
- Paint small orchid shapes at the tips.
- Keep details neat and seal with gloss.
28. Jungle Shadow Nails

Best for: Dark nail lovers, subtle patterns, and anyone who prefers quiet detail.
Jungle shadow nails use a dark olive or hunter green base with near-black leaf shapes layered on top. This tropical nail design slowly reveals itself as light shifts, making it far more interesting than it first appears.
How to Create This Nail Look:
- Apply a dark olive or hunter green base.
- Add near-black leaf shapes over it.
- Keep contrast subtle and seal with gloss.
Sunset Palette Series
Sunset palette nail ideas focus on warm, dusky tones, soft gradients, and atmospheric finishes that capture late light with depth rather than obvious brightness, using blended hues, muted shimmer, and subtle transitions for a refined look.
29. Ember Gradient
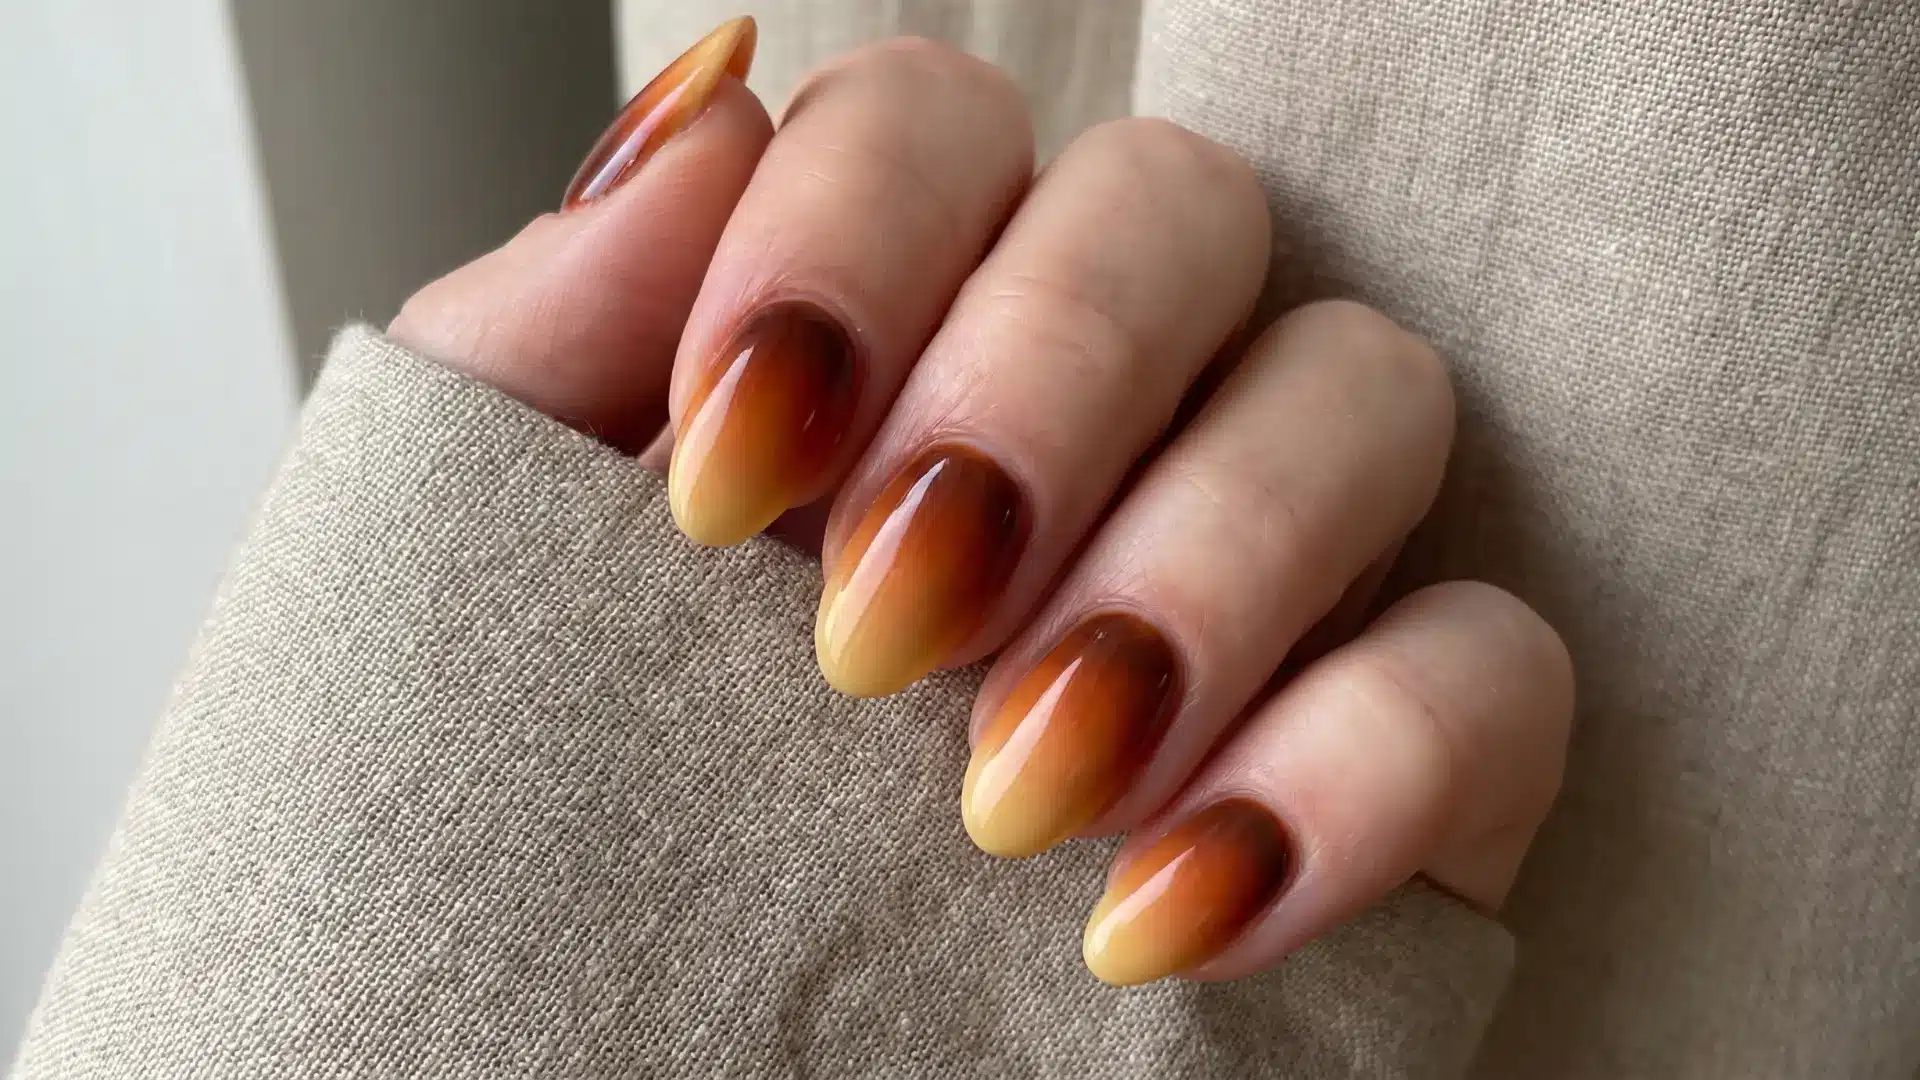
Best for: Warm-toned nails, summer beach nails, and anyone who prefers depth over brightness.
Ember gradient nails blend dark rust into amber and soft yellow. This beach nail design feels like fading fire rather than a loud sunset, which gives it a richer, more flattering finish.
How to Create This Nail Look:
- Apply a dark rust base.
- Blend amber through the middle.
- Fade into soft yellow at the tip and seal.
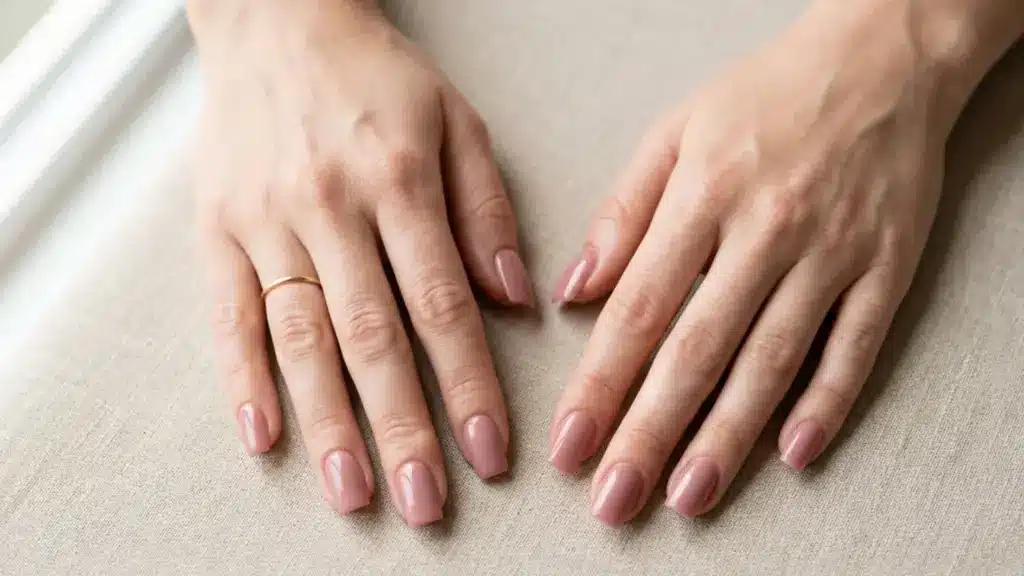
30. Pink Hour Nails
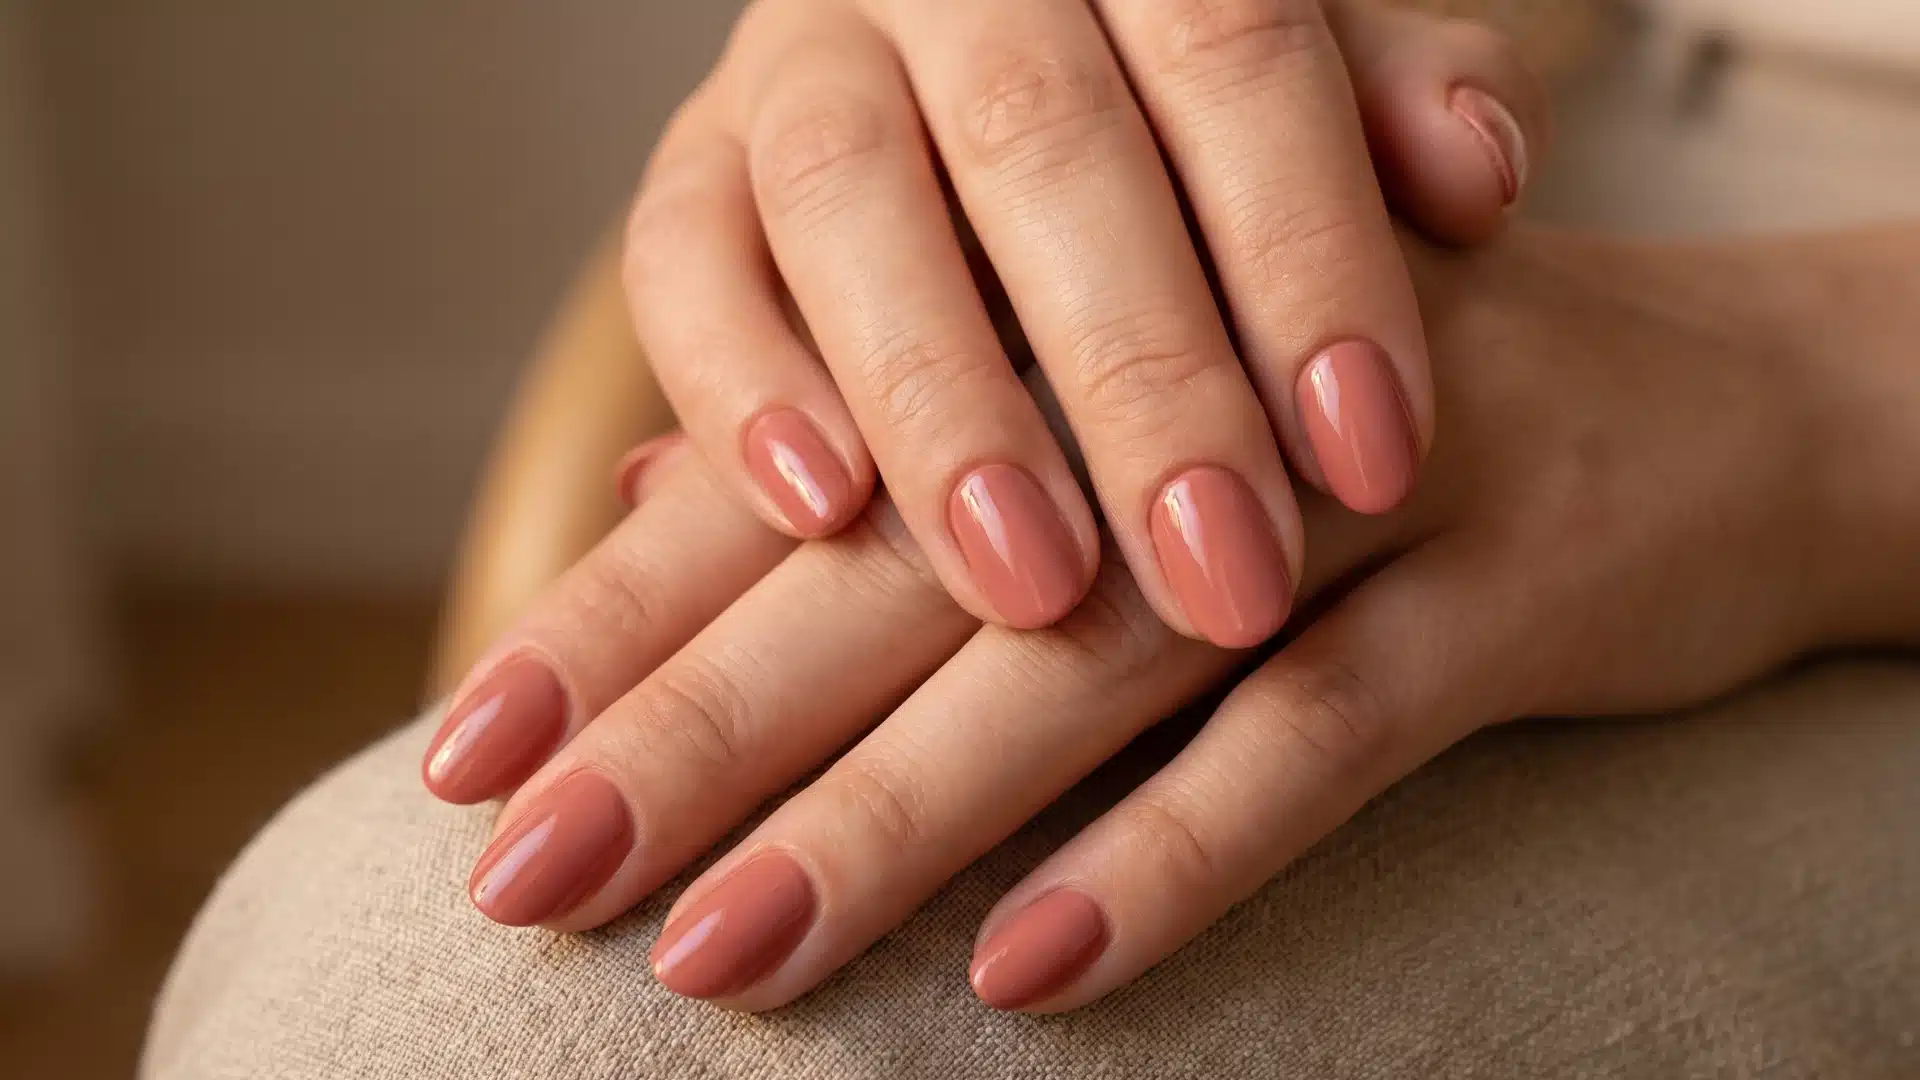
Best for: Minimalists, pink nail lovers, and polished beach vacation nails.
Pink hour nails use a dusty rose shade that sits between coral and mauve. This beach nail design avoids obvious pinks, relying on one well-chosen color to create a clean, editorial finish.
How to Create This Nail Look:
- Choose a dusty rose with warm undertones.
- Apply evenly across all nails.
- Seal with a high-gloss top coat.
31. Dusk Chrome
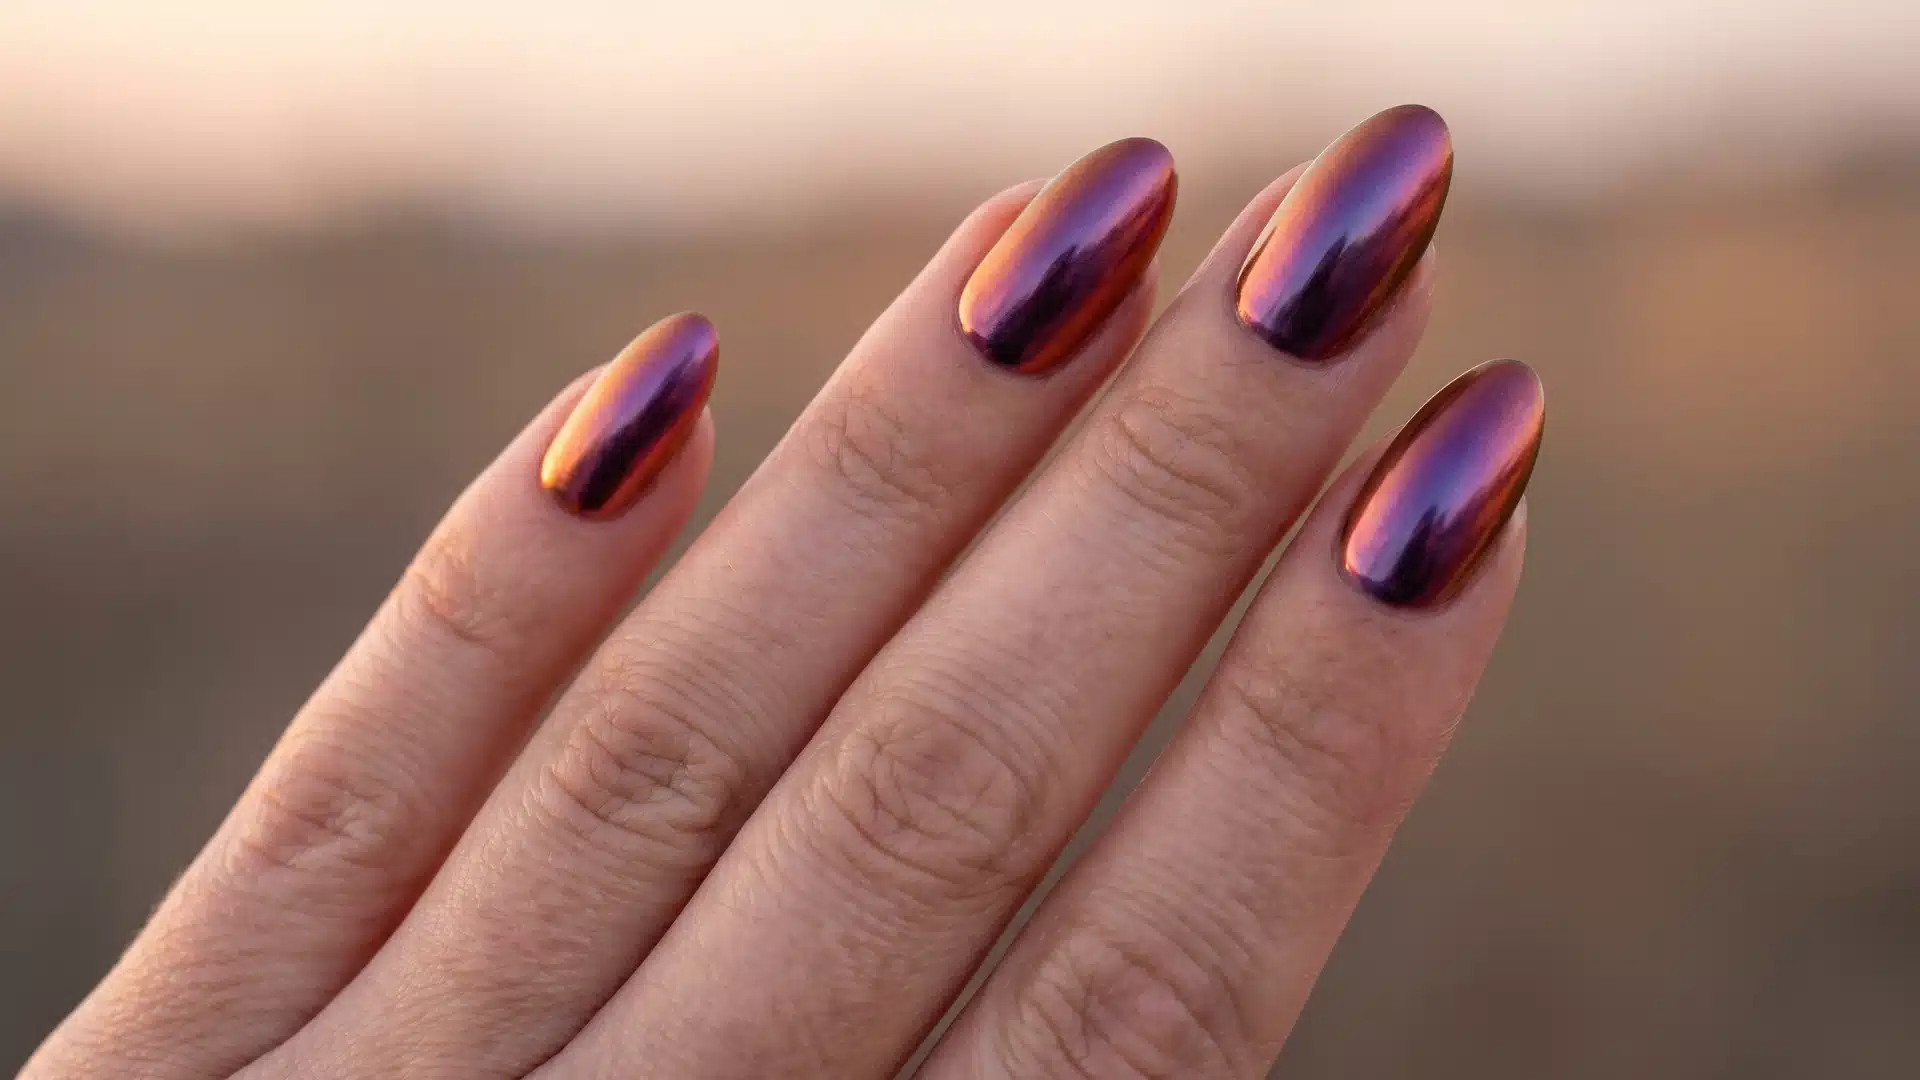
Best for: Chrome nail lovers, evening looks, and beach vacation nails with subtle drama.
Dusk chrome nails use a duochrome finish that shifts between warm copper and deep purple. This beach nail design captures that in-between sunset light, letting the finish do the work instead of adding detail.
How to Create This Nail Look:
- Apply a dark base for depth.
- Add copper-purple duochrome polish.
- Seal with a high-gloss top coat.
32. Horizon Fire Tips

Best for: Sunset nail designs, contrast lovers, and anyone avoiding overly sweet color blends.
Horizon fire tips nails use a dark blue base with a warm orange and pink reverse tip. This sunset nail design keeps the heat at the edge, creating a sharp contrast that feels controlled, not loud.
How to Create This Nail Look:
- Apply a dark blue or indigo base.
- Add an orange to pink ombre at the tip.
- Keep the blend tight and seal with gloss.
33. Afterglow Matte
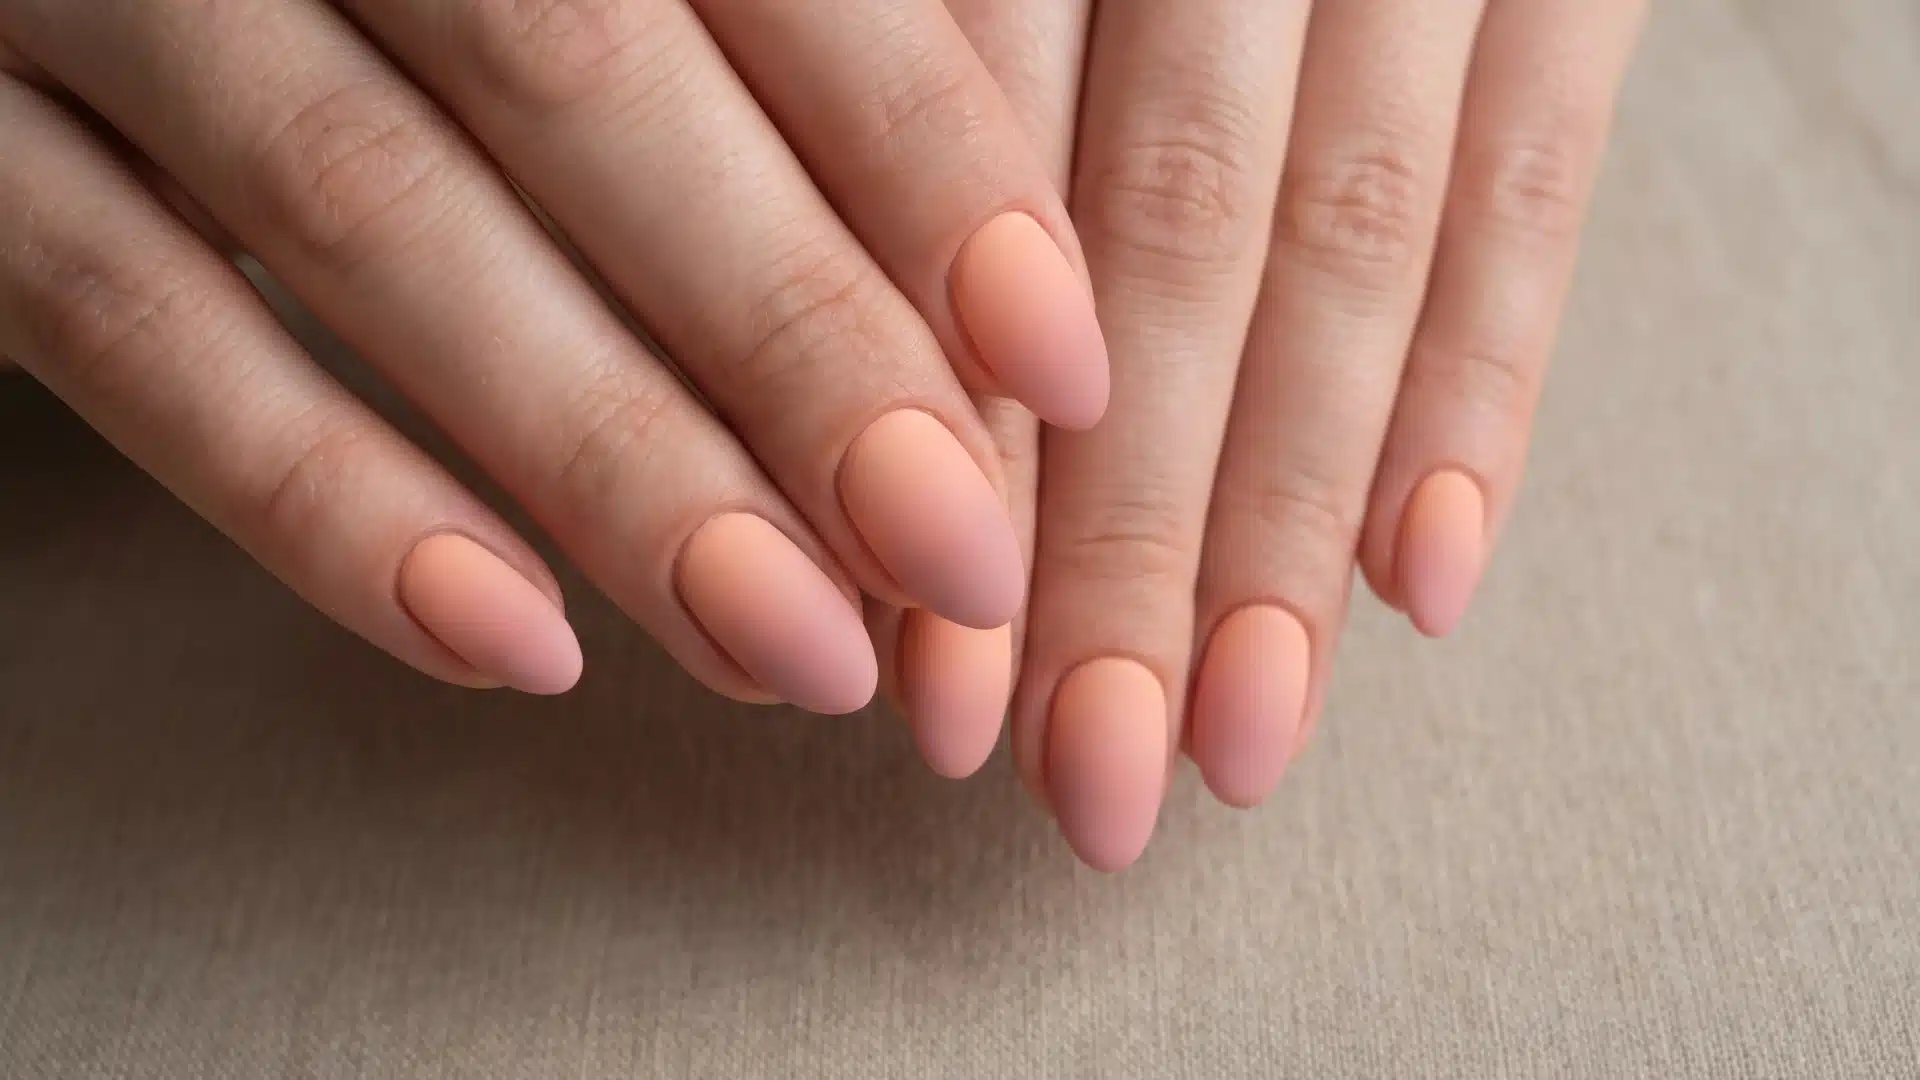
Best for: Soft sunset nails, matte finish lovers, and anyone who prefers subtle warmth.
Afterglow matte nails use a peach-to-blush ombre with a matte finish. This beach nail design softens the color, giving it a dusty, after-sunset look that feels more refined than typical glossy fades.
How to Create This Nail Look:
- Apply a peach base and blend into blush.
- Keep the gradient soft and even.
- Finish with a matte top coat.
Minimal Coast Series
Minimalist coastal nail ideas focus on clean finishes, soft neutrals, and restrained details to create an understated, modern coastal look while incorporating fine lines, subtle textures, and balanced accents that keep the design fresh, simple, and visually calm.
34. Single-Line Coastal
Best for: Minimal nail art fans, neutral tones, and anyone who insists they “do not usually do nails”.
Single-line coastal nails use a pale blush or warm white base with one thin gold line across the middle. This coastal nail design stays restrained and reliable, with slight variation keeping it from looking overly precise.
How to Create This Nail Look:
- Apply a pale neutral base.
- Add a thin horizontal gold line.
- Keep it slightly varied and seal with gloss.
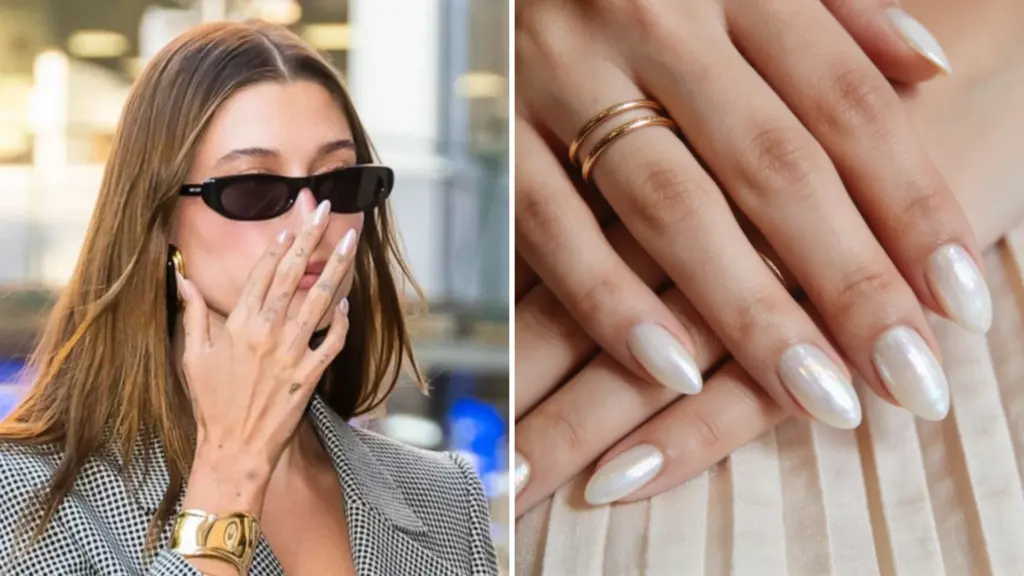
35. Glazed Oyster Nails
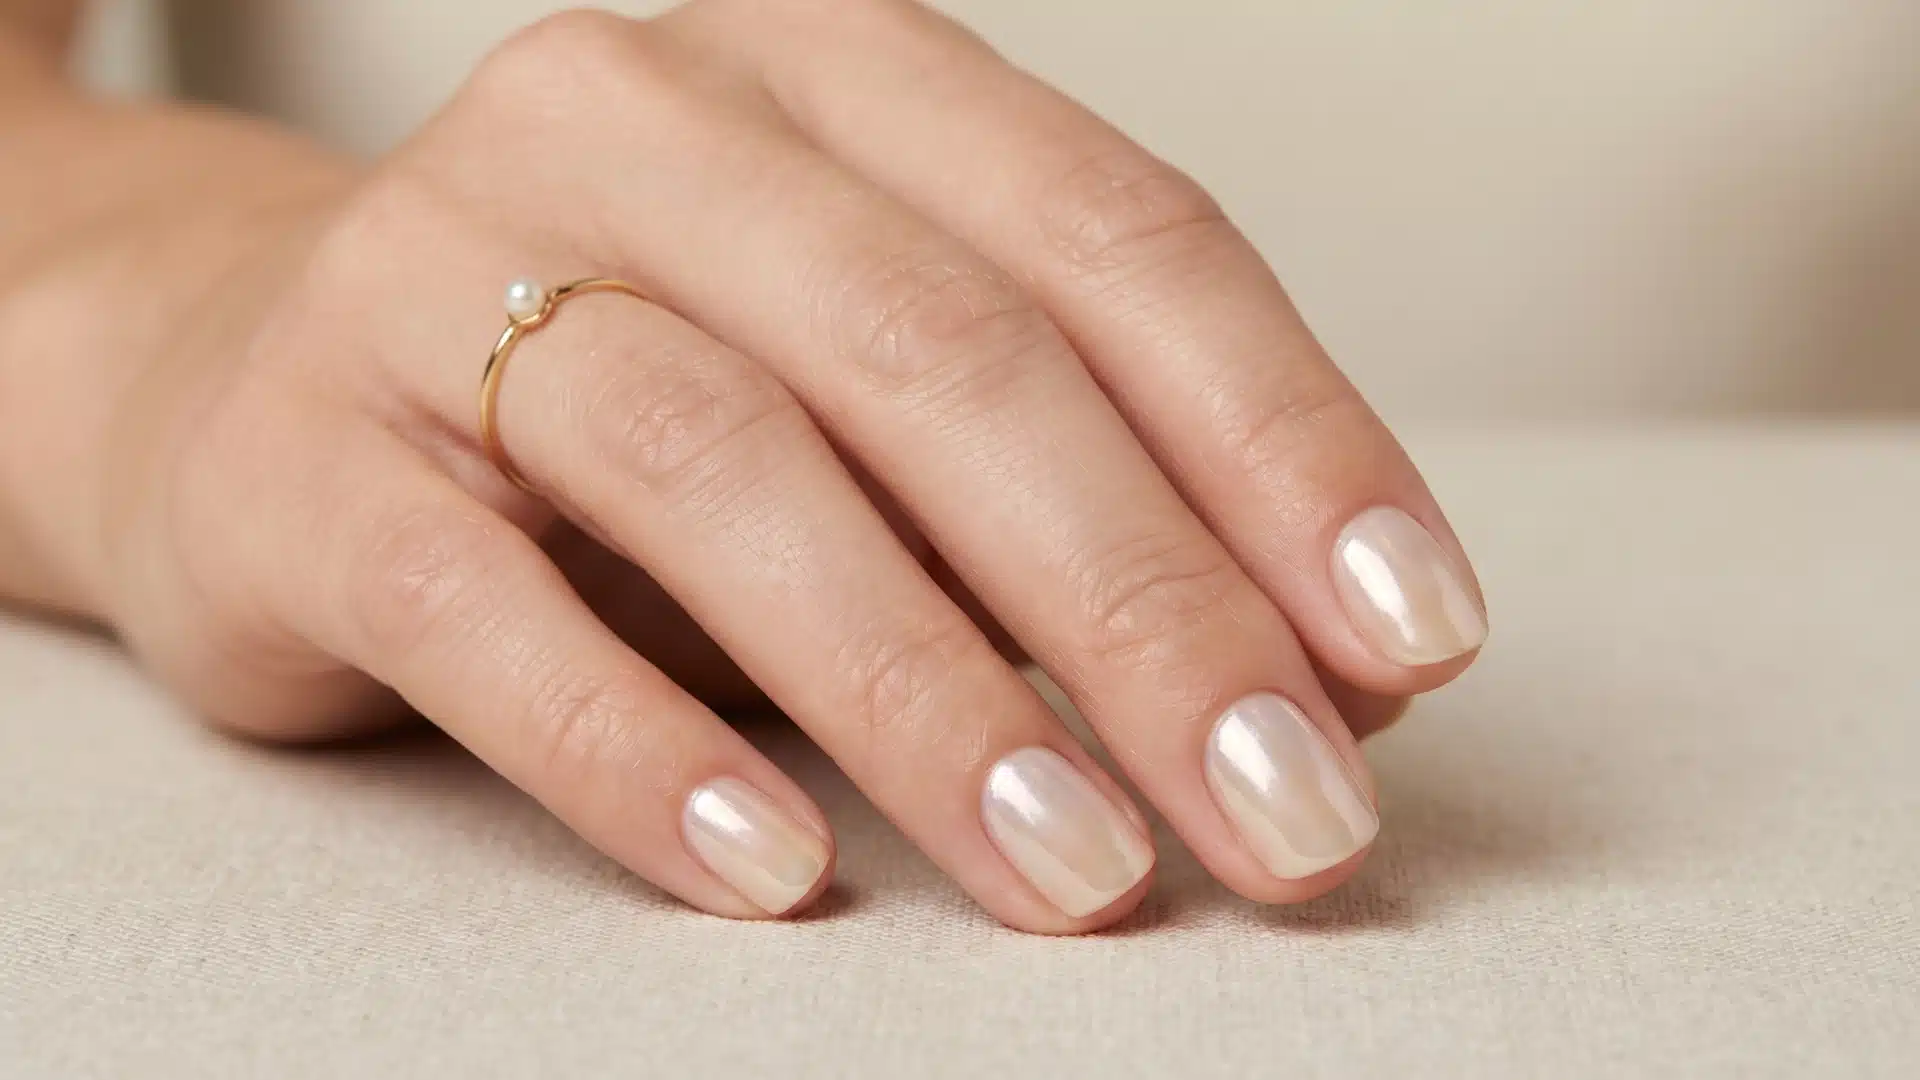
Best for: Minimalists, glossy nail lovers, and understated coastal aesthetic nails.
Glazed oyster nails use a sheer iridescent top coat in pale champagne or off-white over a natural nail. This coastal nail design shifts between cream, pink, and silver, giving a glossy, quietly expensive finish.
How to Create This Nail Look:
- Prep nails with a ridge-filler or a clear base.
- Apply a sheer iridescent top coat.
- Build light layers and seal with gloss.
36. Salt Flat Nails
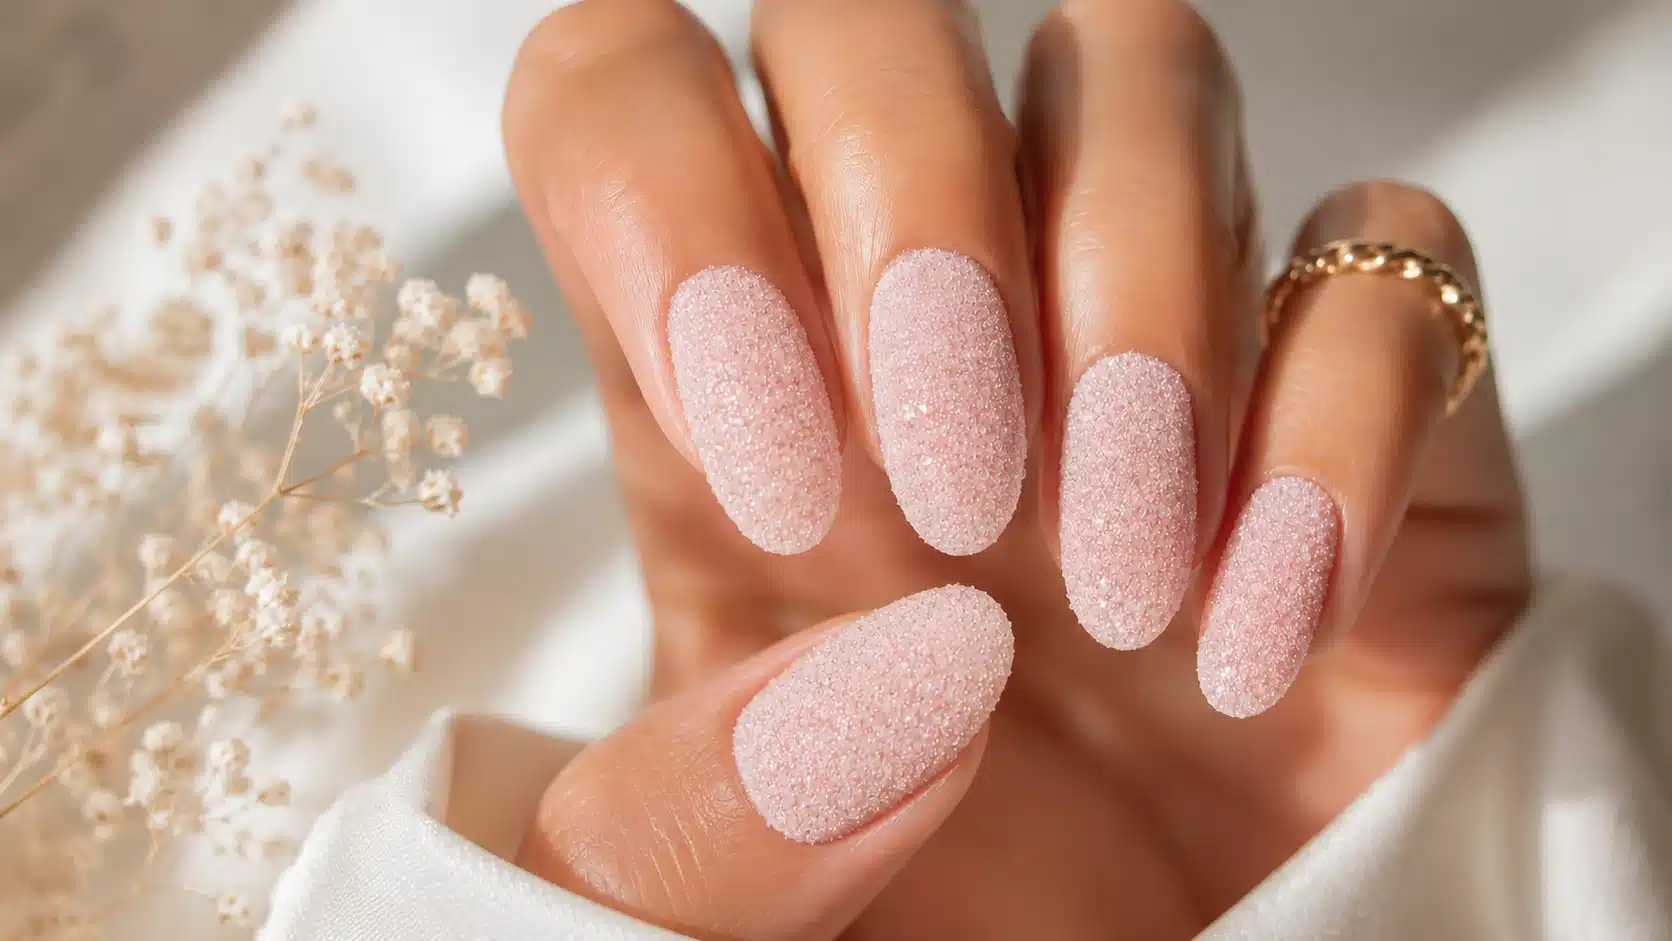
Best for: Minimal nail lovers, sharp shapes, and anyone comfortable with zero margin for error.
Salt flat nails use a pure white base with an ultra-matte finish. This minimal beach nail design looks stark and slightly unreal, making it striking when done well and painfully obvious when not.
How to Create This Nail Look:
- Apply a pastel pink gel or regular nail polish as the base color.
- While the polish is still wet, sprinkle fine sugar nail powder evenly.
- Cure under a UV lamp or let it dry fully without adding a top coat.
- Shape nails into a soft almond style for a clean finish.
37. Two-Tone Tide
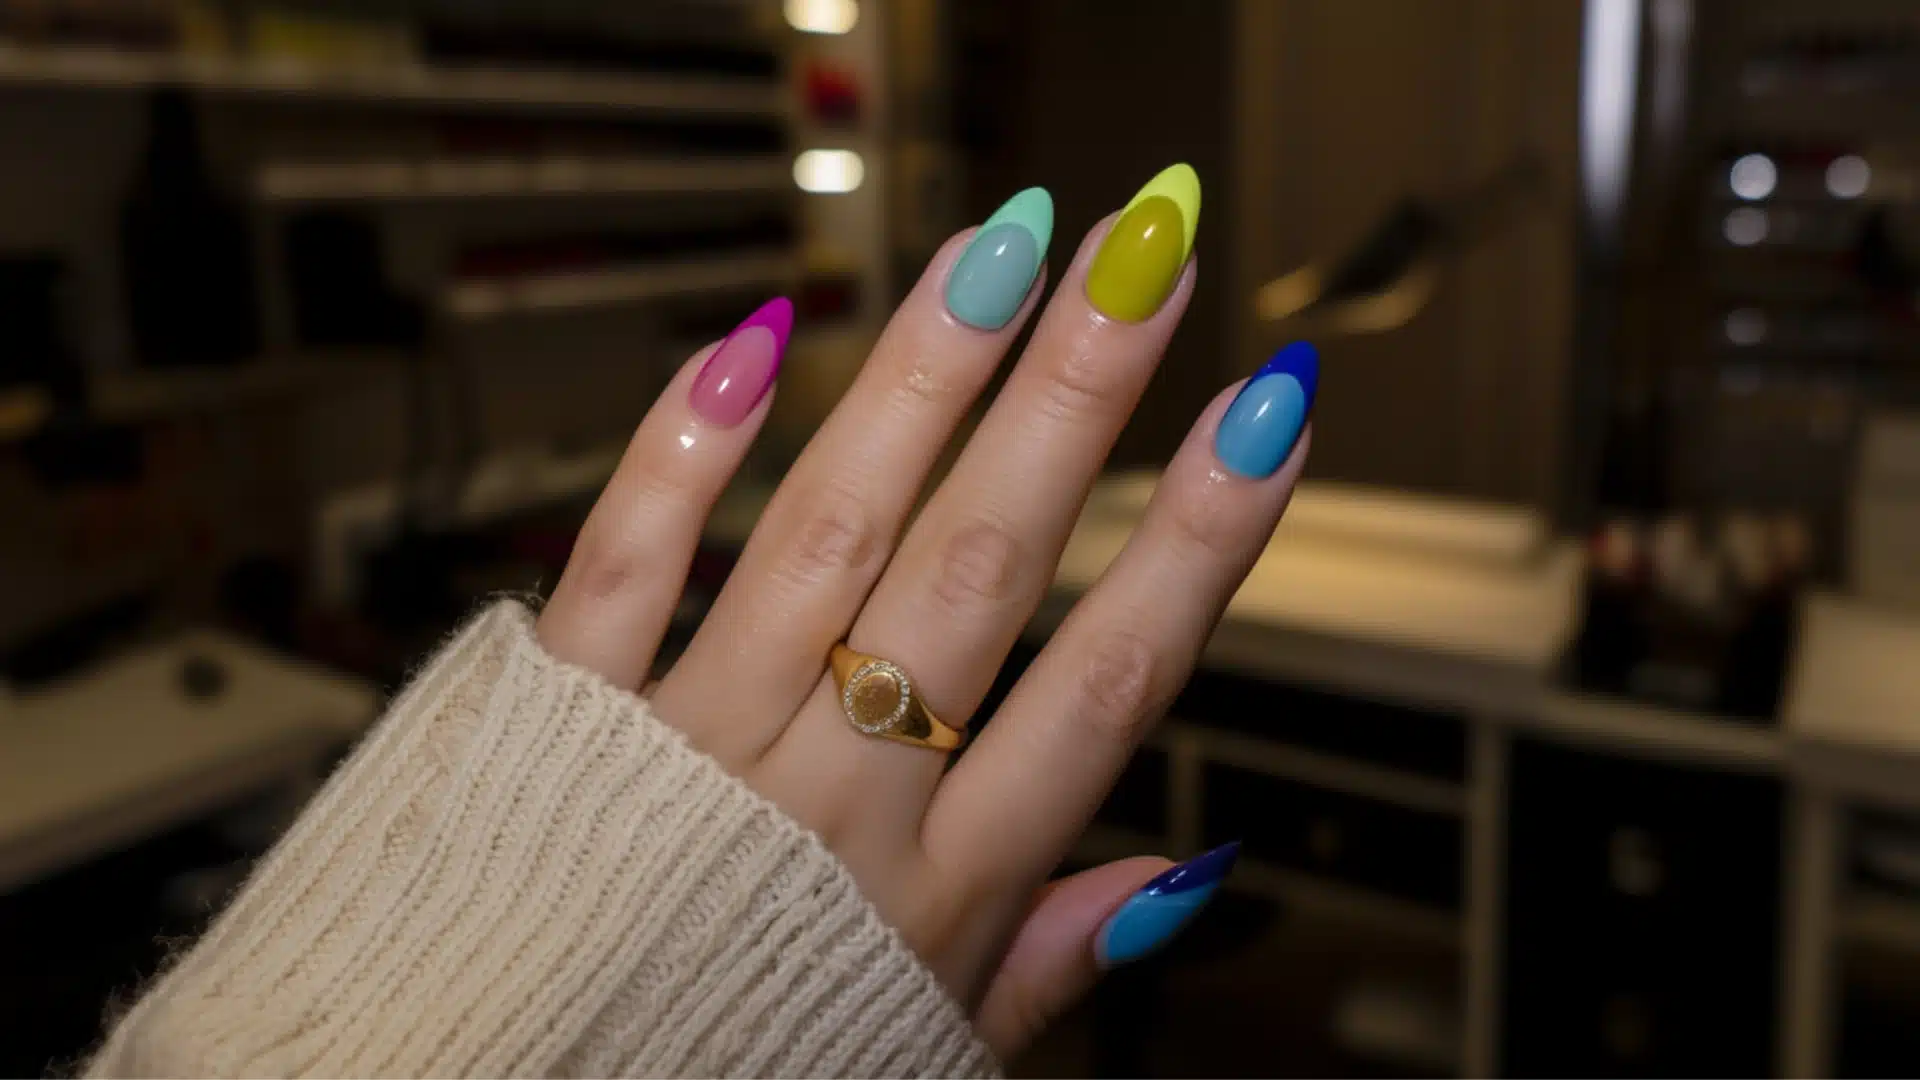
Best for: Minimal color lovers, subtle contrast, and anyone open to something slightly different.
Two-tone tide nails use one shade on each hand, kept close but not identical. This beach nail design feels intentional and quietly modern, with just enough contrast to be noticed.
How to Create This Nail Look:
- Choose two closely related shades.
- Apply one color per hand.
- Keep tones balanced and seal with gloss.
How to Make Vacation Beach Nail Designs Last a Full Week
Long-lasting beach nails need a gel base coat, two thin color coats, and a gel top coat cured under a UV lamp. It is not exciting advice, but it works.
If you are doing your nails at home without a lamp, use a gel-hybrid top coat over regular polish. It provides good chip protection, though it will not last as well against saltwater, sunscreen, and rough sand.
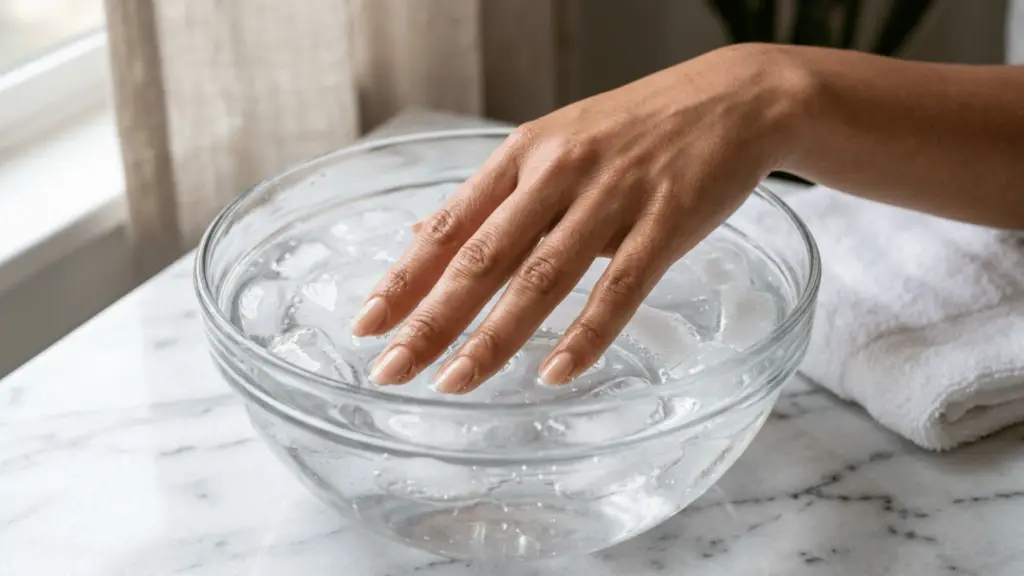
How to Make Them Last:
- Add a thin layer of clear top coat every 2 to 3 days
- Use cuticle oil every night
- Take rings off before swimming
- Use lotion sunscreen on your hands instead of spray
- Avoid sandals for a few hours after a pedicure
- Keep nails away from rough sand when possible
- Pat hands and feet dry after swimming instead of leaving polish wet
Conclusion
Nails feel like a small decision before a trip, but they keep showing up once you are there. In the water, around a drink, in photos you did not plan, your hands are part of it all.
A good manicure has a quiet way of making everything look more put-together. Even a slow beach day feels more intentional, which makes it worth the time you put in before you leave.
That is why I take beach nails seriously, even when the idea is simple. The right design does not need to be loud; it just needs to feel fresh and still look right by day five.
It should hold up through sun, saltwater, sand, and everything in between. These designs do exactly that.
Tell me your destination in the comments, and I will match you with one.
Frequently Asked Questions
Can I Mix Two Designs from Different Series on The Same Hand?
Yes, but keep them in the same color family to keep the overall look cohesive. Mixing warm tropical shades with cooler ocean tones usually looks less intentional and more like a rushed decision.
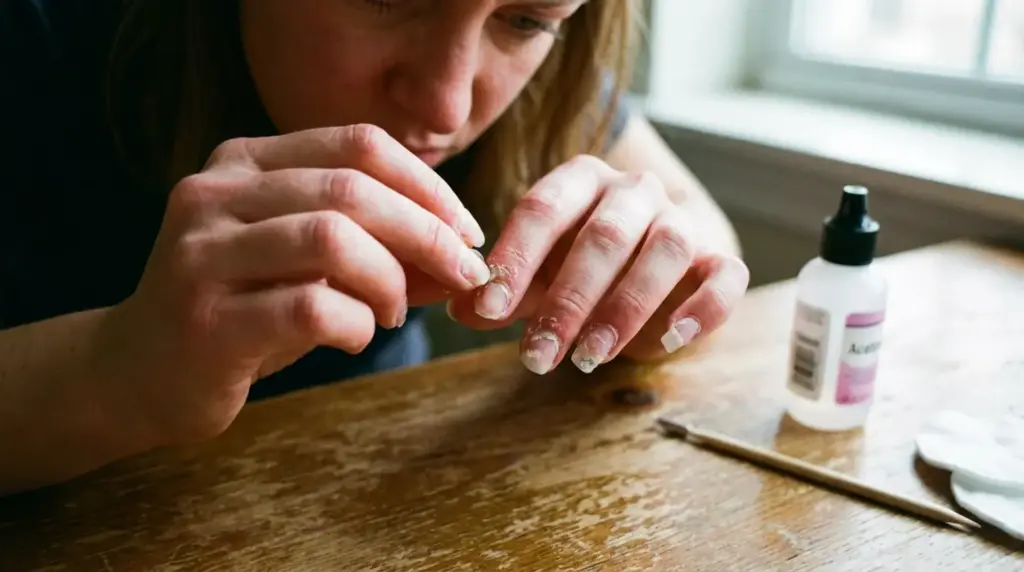
How Do I Remove Glitter or Textured Designs, Like Salt-Crystal Tips, without Damaging My Nails?
Soak a cotton pad in acetone, press it against the nail, wrap it in foil, and leave it for 12 to 15 minutes before removing. Avoid scraping early, as glitter and textured finishes can lift in pieces and damage the nail. Follow up with a strengthening treatment and give your nails a few days to recover.
Will Any of These Designs Work on Very Short Nails?
Yes, some designs work better on very short nails, especially single-line coastal, glazed oyster, salt flat, and dune ombre. Detailed designs lose clarity, so minimal styles or soft gradients look more intentional.