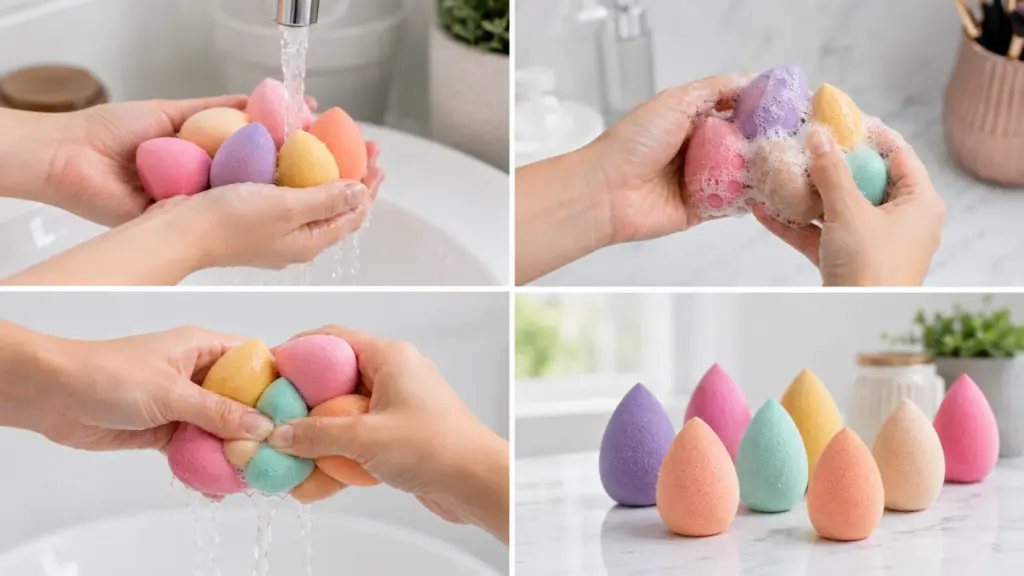
What stays trapped inside a makeup sponge after several uses?
Foundation, concealer, facial oils, moisture, and product residue can collect deep within reusable sponges, affecting how clean and soft they feel.
Knowing how to clean makeup sponges properly helps remove that buildup and keeps them ready for regular use. The same basic cleaning approach works for many reusable cosmetic sponges, including Beautyblender sponges.
In my treatment room, a dirty sponge is one of the most common reasons a client’s foundation looks patchy by midday, and it’s an easy fix.
You’ll learn an everyday washing method, ways to handle stubborn stains, suitable cleanser options, proper drying steps, common cleaning mistakes, and clear signs that it’s time to replace your sponge.
Why Cleaning Your Makeup Sponge Matters for Your Skin
A dirty makeup sponge holds onto oil, dead skin cells, and old product long after you rinse it, and that buildup can transfer bacteria straight back onto your face with every use.
FDA’s cosmetic contamination research points to bacteria and fungi building up in tools and products alike, sometimes leading to skin or eye infections.
Reusable sponges are typically made from an open-cell, porous foam rather than a sealed silicone surface, so product and moisture soak in deeper and sit there longer than they would on a smoother tool. That’s part of why sponges and foundation brushes need slightly different care routines even though they touch the same skin.
“I ask clients to picture their sponge like a washcloth left damp in a gym bag. “It’s not just about the makeup on the surface; it’s what’s growing underneath it that causes breakouts.”
How to Clean Makeup Sponges: Step-by-Step
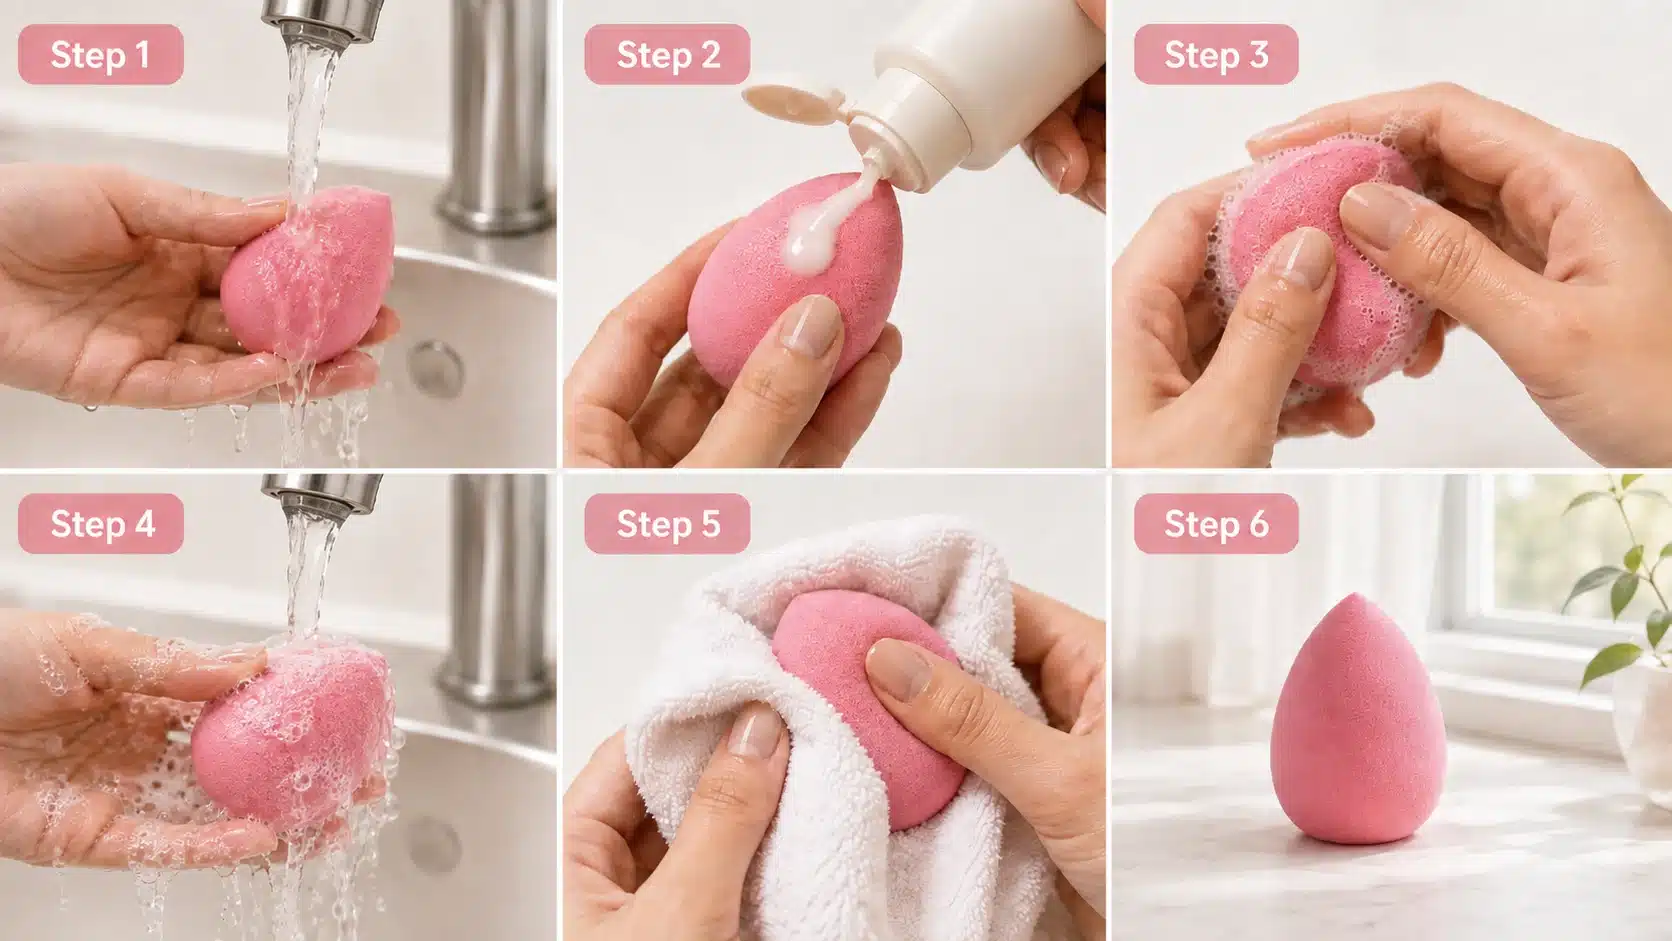
Cleaning a reusable makeup sponge takes only a few minutes once it’s part of your routine. Use a gentle cleanser, warm water, and careful handling to remove buildup while protecting the sponge’s texture
- Wet the Sponge: Soak the sponge with warm water until fully saturated. Squeeze gently to loosen trapped foundation, concealer, and product residue.
- Apply Cleanser: Add a small amount of sponge-safe cleanser to stained areas. Avoid using too much product, as it can make rinsing difficult.
- Massage Gently: Press and release the sponge repeatedly to work the cleanser through the foam. Avoid twisting, stretching, or harsh scrubbing to prevent damage.
- Rinse Thoroughly: Wash the sponge under running water while squeezing gently. Continue until the water runs clear and no soap residue remains.
- Remove Excess Moisture: Press the sponge between your hands or use a clean towel to absorb extra water. Do not wring or twist it.
- Dry Completely: Place the sponge in an open, clean area with good airflow. Store it only after it is completely dry to prevent moisture buildup.
Stick with this routine consistently, and you’ll notice the difference immediately: smoother blending, better hygiene, and a sponge that lasts longer between replacements.
The routine holds up across sponge types, though washing a Beautyblender specifically tends to take a little longer since its foam holds more water than most materials.
What Can You Use to Clean Makeup Sponges?
The safest cleanser depends on the sponge’s material, construction, and care instructions. A gentle option is usually best, but some reusable sponges may tolerate different cleansers better than others.
| Cleaner | Good for | Main consideration |
|---|---|---|
| Makeup sponge cleanser | Routine washing | Made specifically for cosmetic tools |
| Gentle liquid cleanser | Everyday cleaning | Rinse thoroughly to remove residue |
| Mild solid soap | Heavy makeup buildup | Rub and squeeze the sponge gently |
| Gentle shampoo | Possible alternative | Check the sponge’s care instructions first |
| Dish soap | Heavy oily residue in some cases | Not recommended by every manufacturer |
| Strong household cleaners | Generally avoid | May damage foam or leave unwanted residue |
A specialty sponge cleanser can be useful, but it is not essential for every reusable sponge. When general cleaning advice conflicts with product directions, follow the manufacturer’s care instructions first.
Tip: When trying a new cleanser, use a small amount first and rinse the sponge thoroughly. If the foam feels stiff, sticky, or changed afterward, stop using that cleanser.
The same warm-water approach carries over well if you’re also cleaning your makeup brushes, since both tools respond to gentle, repeated pressing.
How to Clean Different Types of Reusable Makeup Sponges
Reusable makeup sponges share a similar cleaning routine, but their shape and construction affect how you handle them. Thin edges, pointed tips, fabric coverings, and attached parts often need gentler cleaning and careful drying.
1. Teardrop and Egg-Shaped Blending Sponges
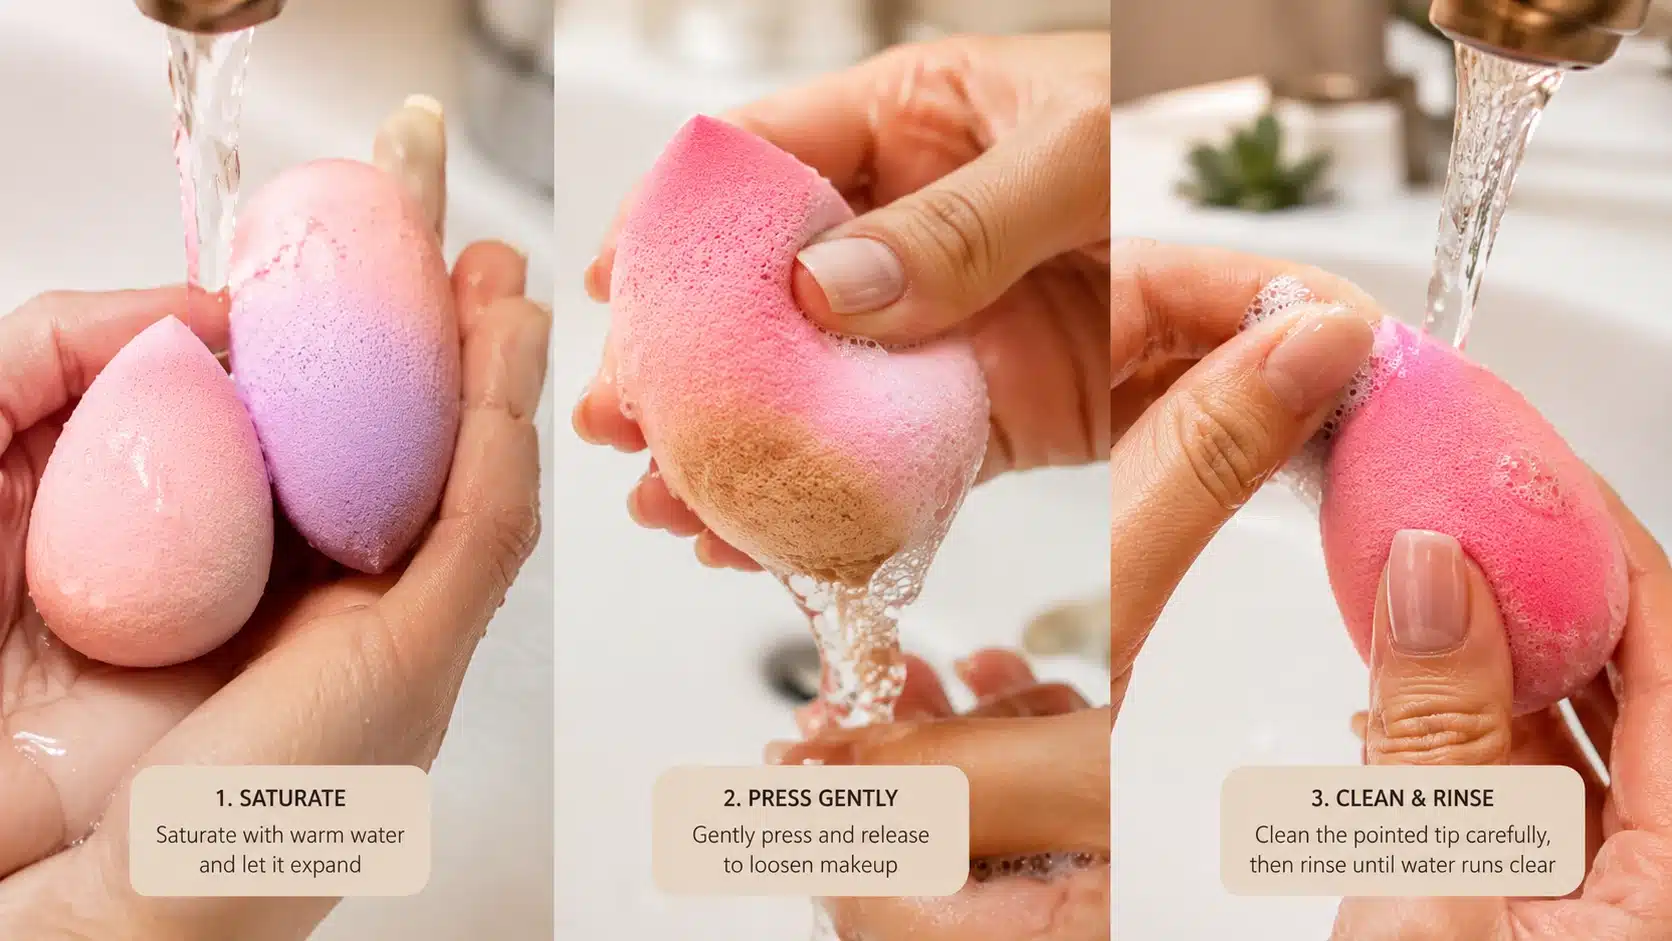
These commonly used blending sponges have rounded surfaces and pointed tips for applying makeup in different areas. Clean the narrow ends and curved sections carefully, as product buildup often collects in these harder-to-reach areas.
Since this shape is often shared at makeup counters or passed between friends, FDA’s cosmetic applicator guidance is a useful reminder that another person’s germs can linger in the foam.
Steps to clean:
- Soak the sponge in warm water and let it fully expand before applying cleanser.
- Gently press and release the sponge to remove foundation and other makeup residue without twisting.
- Rinse the pointed tip and rounded areas thoroughly until the water runs clear.
2. Reusable Wedge Makeup Sponges
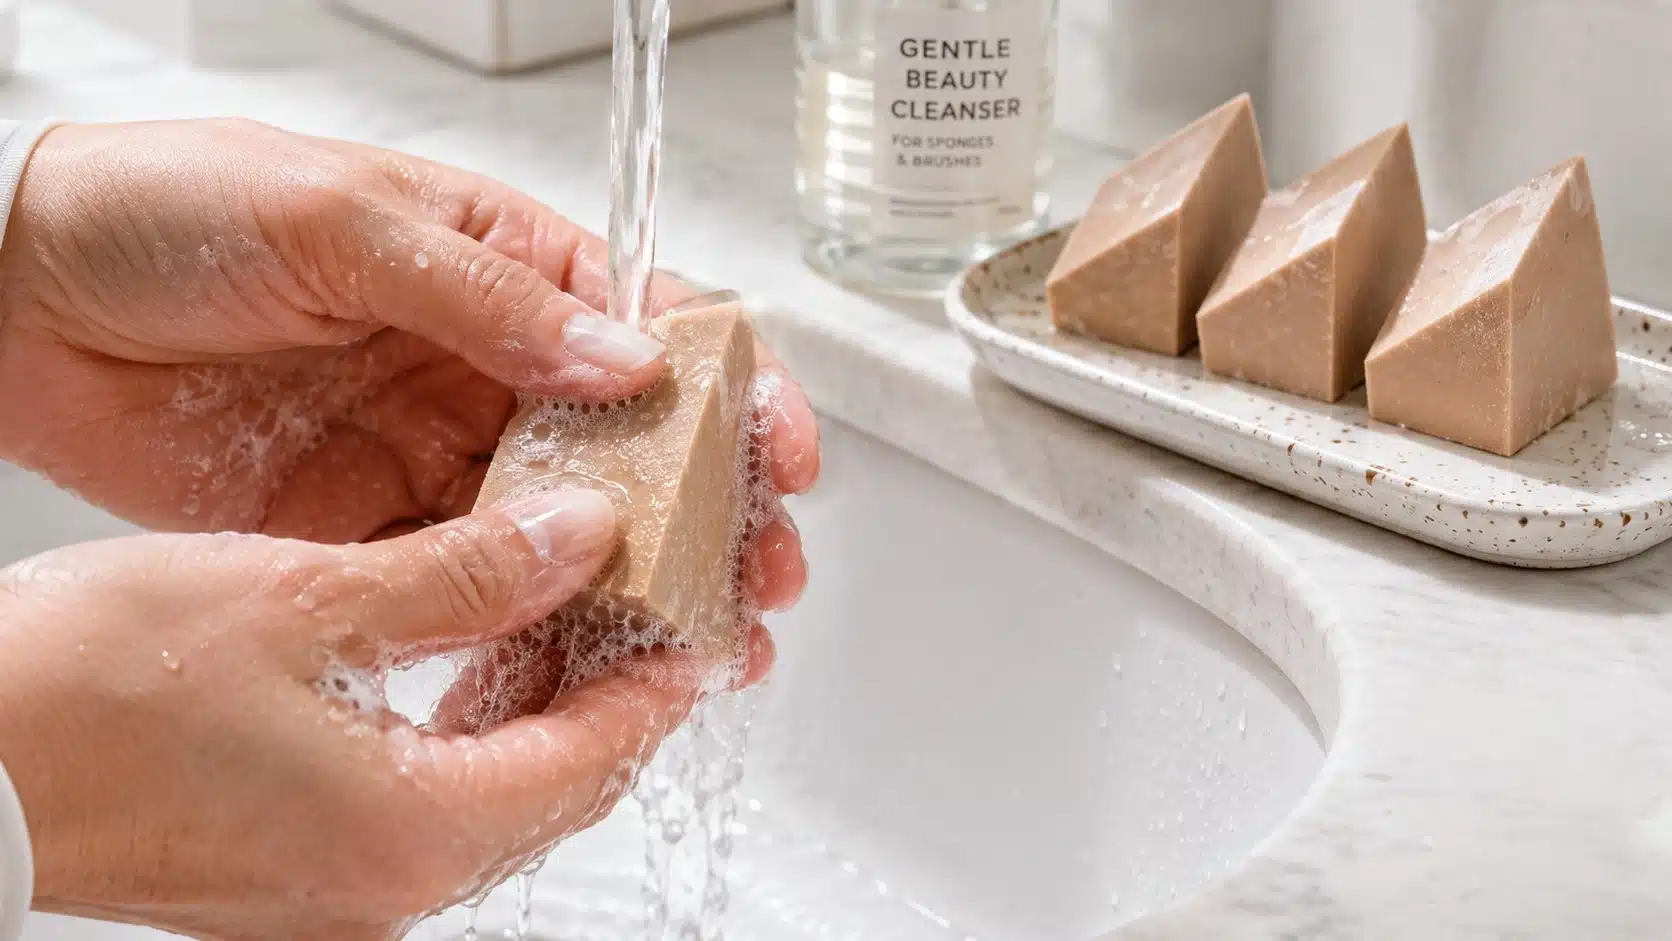
Wedge makeup sponges feature flat surfaces and sharp edges that help with precise makeup application. Their corners can hold extra product, so clean carefully to remove residue without weakening the foam.
Steps to clean:
- Wet the entire wedge sponge, then apply a small amount of gentle cleanser to all surfaces.
- Press along the flat sides and narrow edges to loosen trapped makeup buildup.
- Rinse completely and confirm the sponge is designed for reuse before regular washing.
3. Flat Makeup Sponges and Cosmetic Puffs
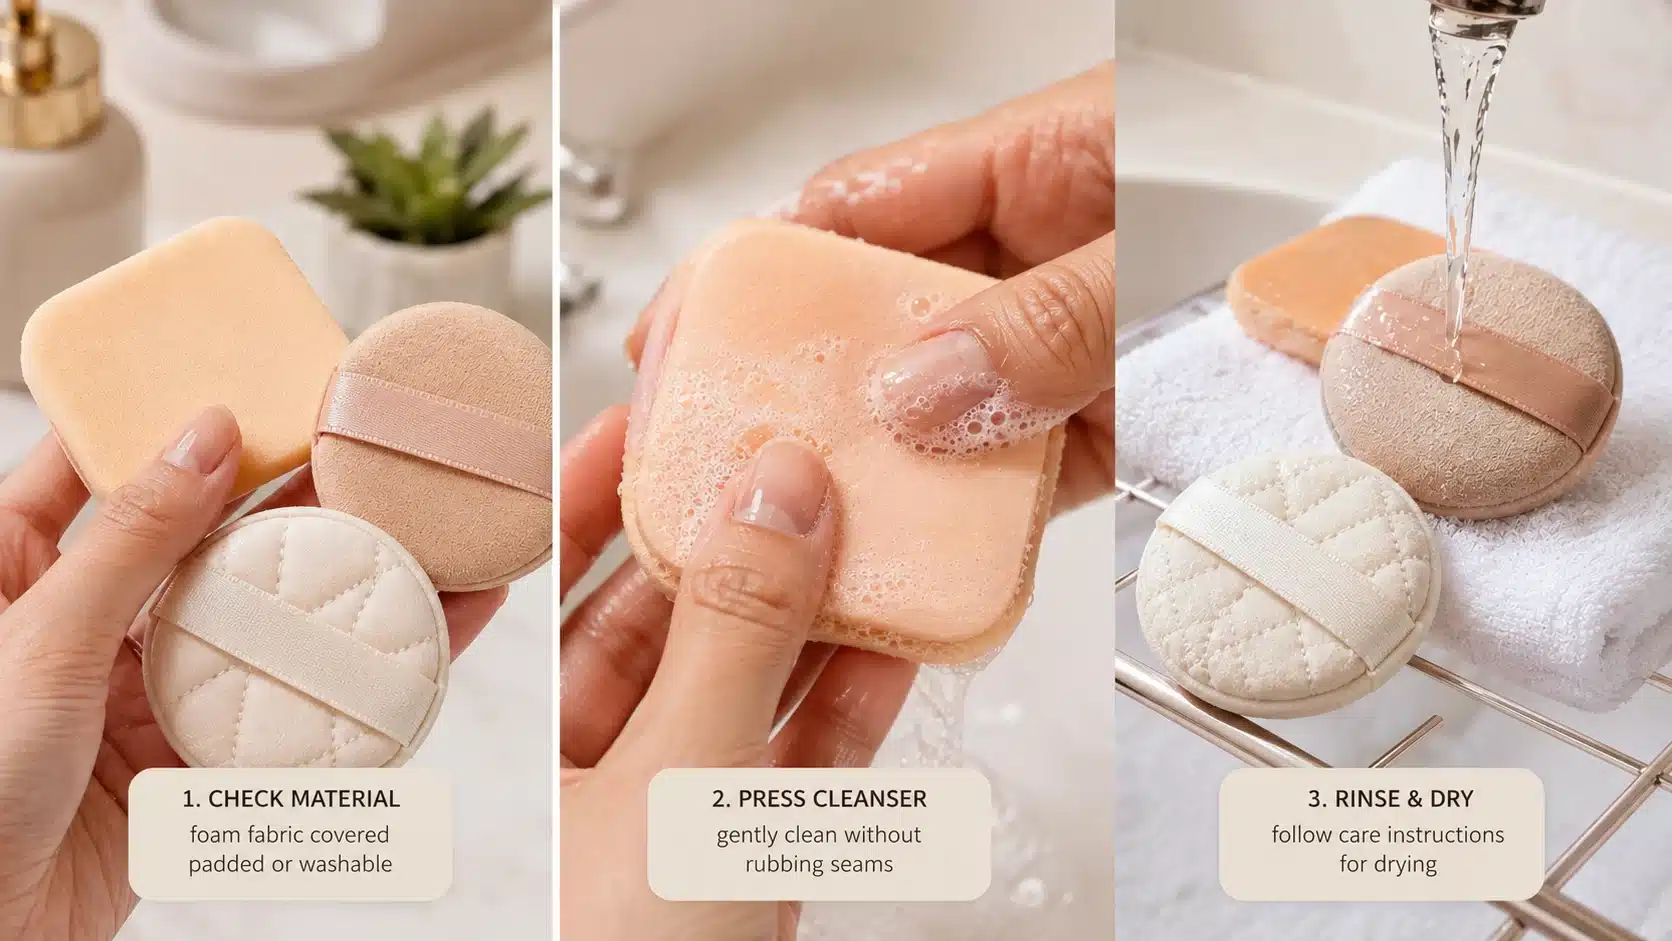
Flat sponges and cosmetic puffs are available in different materials, including foam, fabric-covered, and padded styles.
Their construction affects how they should be washed, especially around stitched or layered sections. For puffs specifically, choosing a brush or sponge often comes down to finish and how each feels on skin.
Steps to clean:
- Check the material and care instructions before applying any cleaning method.
- Work cleanser gently over the surface, avoiding harsh rubbing that may damage seams or coverings.
- Rinse well and allow the sponge or puff to dry fully before storing.
4. Sponges with Handles or Attached Parts
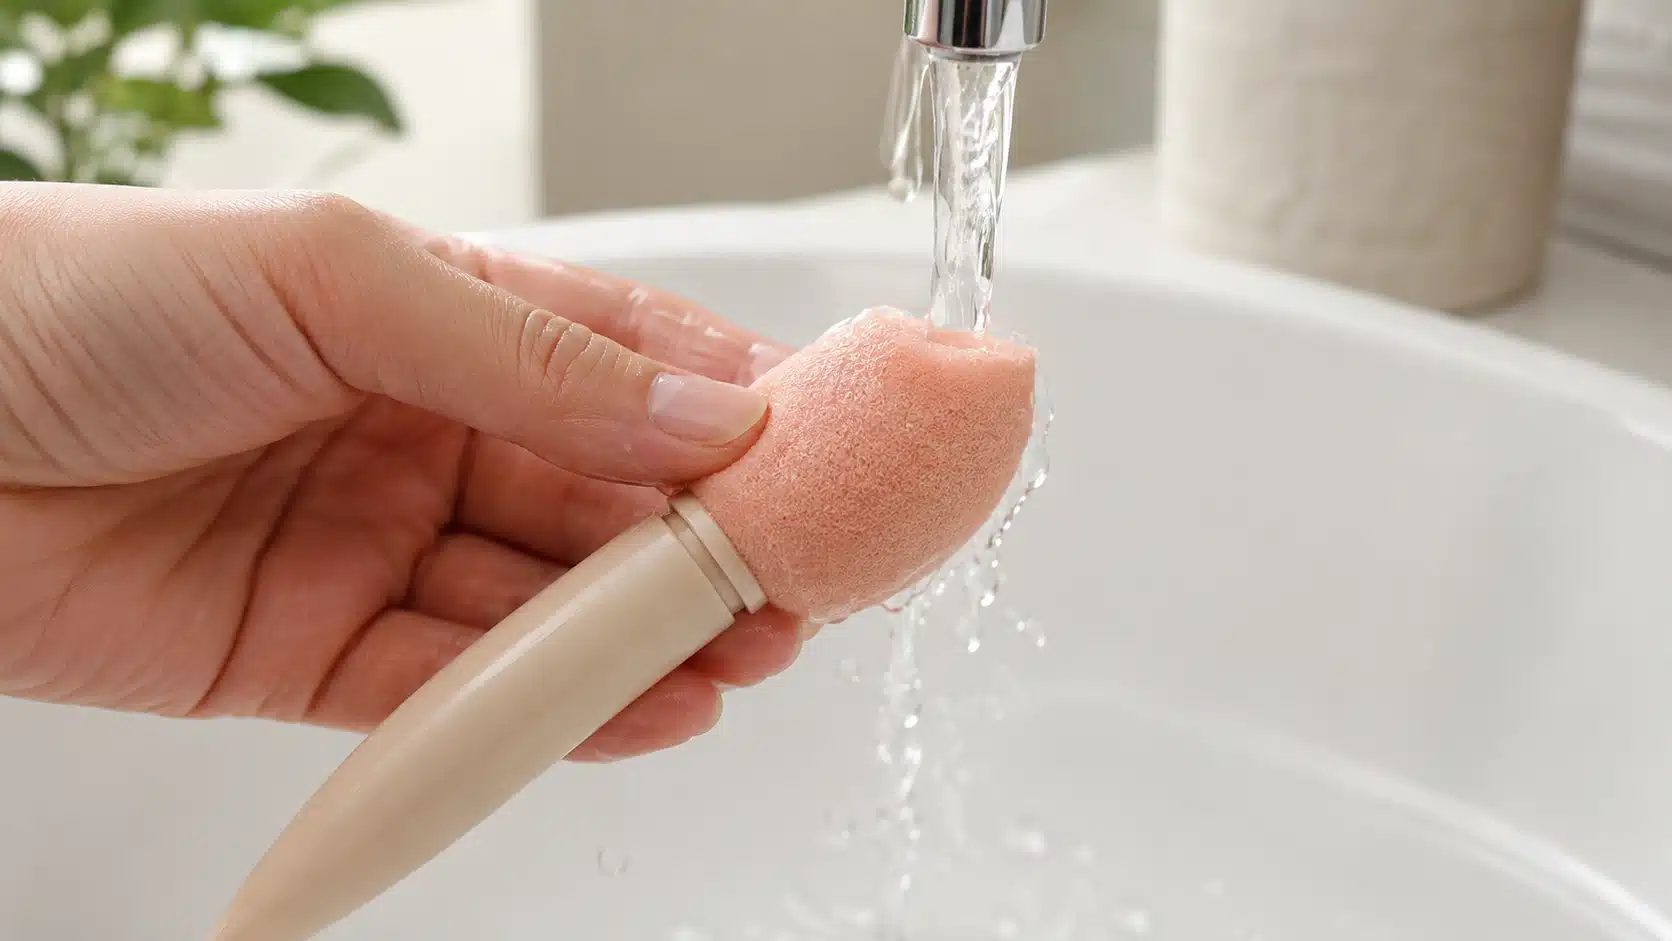
Some makeup sponges include handles, grips, or connected components that require extra attention during cleaning. Protecting these areas helps prevent loose attachments, damaged joints, or weakened adhesive connections.
Steps to clean:
- Clean the sponge section carefully, avoiding unnecessary soaking of the handles or attached parts.
- Apply gentle pressure around seams and connection points to prevent loosening.
- Follow manufacturer instructions for washing and drying to maintain the sponge’s condition.
Gentle handling matters regardless of sponge style. Cleaning each shape according to its construction helps remove makeup effectively while reducing unnecessary stress on foam, seams, edges, and attachments.
How to Remove Stubborn Makeup from Sponges
Deeply absorbed liquid and cream makeup may not lift in one wash. A second gentle cleaning cycle often works better than using stronger pressure.
Per the cosmetic shelf-life guidance, applicators pick up fresh bacteria and fungi with each use, which is one more reason regular washing matters as much as the technique itself.
- Fully wet the sponge: Saturate it with warm water so the foam softens and trapped makeup loosens.
- Apply cleanser to stained areas: Focus a small amount directly on sections with heavy foundation or concealer buildup.
- Press cleanser through the foam: Gently squeeze and release the sponge to move cleanser deeper without stretching or twisting it.
- Rinse thoroughly: Hold the sponge under clean running water and continue pressing until residue begins to wash away.
- Repeat if needed: Apply more cleanser and repeat the process instead of scrubbing harder, which can damage softer foam.
- Soak only when suitable: If the sponge care instructions allow soaking, use it for stubborn buildup rather than assuming every sponge can handle it.
A small amount of coconut or olive oil worked in before your cleanser can also help break down heavy, dried-in foundation, since oil lifts oil-based product more effectively than water alone.
Follow it with your usual cleanser to wash the oil back out, or it will leave the sponge feeling greasy.
How Often Should You Clean Makeup Sponges?
Clean frequently used reusable makeup sponges after each use, especially when they come into contact with liquid or cream makeup.
Beautyblender also recommends washing its sponge after every use, but the right routine can vary depending on usage, skin needs, and product type.
| Usage | Suggested cleaning schedule |
|---|---|
| Used every day | Clean after every use, ideally daily |
| Used 3–4 times a week | Clean every 1–2 days of use |
| Used 1–2 times a week | Clean after each use |
| Used on breakout-prone or irritated skin | Clean after every use |
| Used professionally or on multiple people | Clean and sanitize appropriately between clients |
| Deep cleaning routine | Aim for at least once every 7 days if the brand recommends a separate deep clean |
No single schedule fits every sponge. How often you wash yours should reflect how often you use it, what products it comes into contact with, and its care instructions.
How to Dry Makeup Sponges After Washing
Washing removes makeup and residue, but drying matters just as much. Porous foam can retain moisture, so give your sponge adequate airflow before storing it.
- Gently press out excess water without twisting or wringing the sponge tightly.
- Blot the sponge with a clean, dry towel to remove additional surface moisture.
- Place it in an open, well-ventilated area where air can circulate around it.
- Avoid sealing a damp sponge inside a makeup bag, drawer, or closed container.
- Keep it off dirty bathroom counters or other surfaces that may transfer residue.
- Store the sponge only after it feels adequately dry inside and on the surface.
Proper drying helps keep reusable makeup sponges fresher between uses and reduces the chance of trapped moisture, unwanted odor, or buildup developing during storage.
Makeup Sponge Cleaning Methods to Avoid
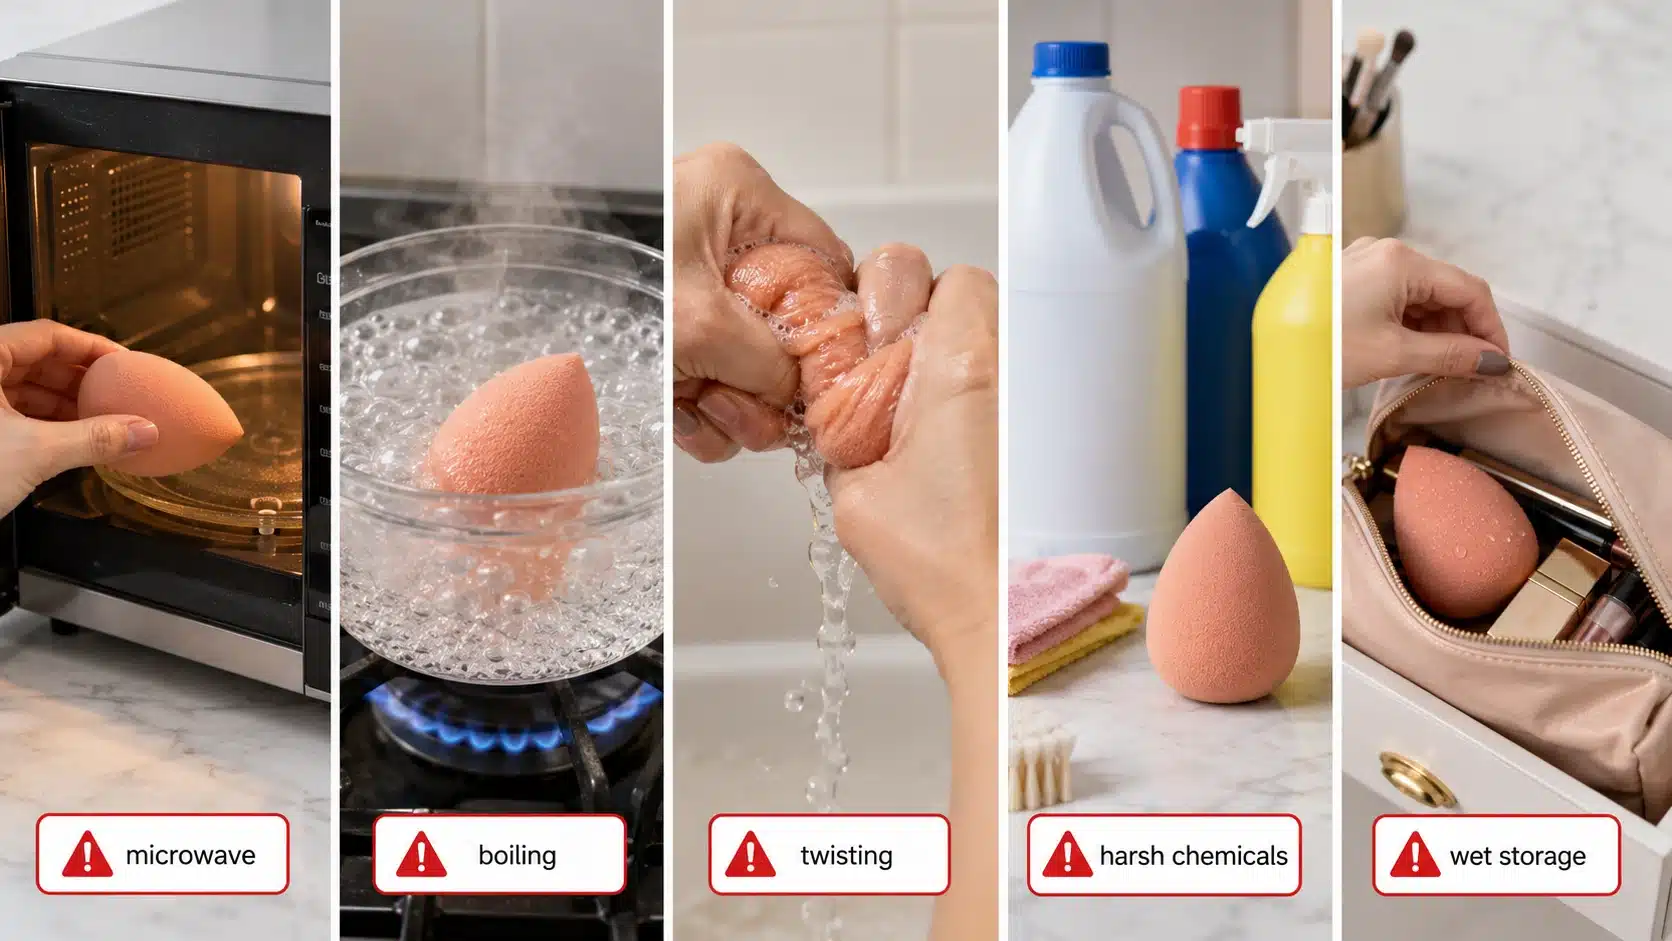
Some cleaning shortcuts may seem convenient but can shorten a sponge’s lifespan or create unnecessary safety risks. Gentler methods are usually better for routine care.
| Cleaning Mistake | Why Avoid It | Better Alternative |
|---|---|---|
| Microwaving a Makeup Sponge | Heat can damage foam and create burn risks. | Use warm water and cleanser unless the brand approves microwaving. |
| Boiling Makeup Sponges | Extreme heat may weaken sponge material. | Clean with warm water and a gentle cleanser instead. |
| Aggressive Twisting and Wringing | Forceful handling can stretch or tear the sponge. | Press and squeeze gently to remove residue and water. |
| Using Harsh Household Chemicals | Strong cleaners may damage foam and leave residues. | Choose a sponge-safe cleanser for regular washing. |
| Storing a Wet Sponge | Trapped moisture can affect sponge freshness. | Let it air dry fully before storing. |
When a cleaning hack involves high heat, strong chemicals, or excessive force, check the sponge’s care instructions first. Simple washing and proper drying are usually safer choices.
When Should You Replace a Makeup Sponge Instead of Cleaning It?
Regular washing can remove makeup and residue, but it cannot restore a sponge forever. Replace it when wear, odor, or structural changes remain even after thorough cleaning.
- Tears or splits: Replace the sponge if cracks or torn areas continue to widen during use.
- Crumbling foam: Discard it when small pieces begin breaking away from the surface.
- Permanent loss of shape: Replace it if the sponge stays flattened, stretched, or misshapen after drying.
- Hardened areas: Firm or stiff patches can signal material breakdown or trapped buildup.
- Persistent unpleasant smell: Replace the sponge if odor remains after proper washing and complete drying.
- Suspected mold: Stop using the sponge if you notice unusual spots or growth that may indicate mold.
- Texture changes: Replace it if the foam no longer feels soft or returns to its normal texture.
- Poor performance: A sponge that stops blending evenly or absorbing product normally may be past its useful stage.
I tell clients to trust their hands over the calendar here. A sponge that still feels soft and bounces back after three months can outlast one that turns firm in three weeks.
The Last Squeeze
Keeping reusable makeup sponges clean comes down to a few simple habits: wash them gently, rinse thoroughly, dry them completely, and store them only when dry.
Choosing the right cleanser, handling different sponge types correctly, treating stubborn stains carefully, and avoiding harsh cleaning methods can also help protect the material.
Knowing how to clean makeup sponges properly also makes it easier to spot when a sponge is stained, damaged, or ready to be replaced.
Have a makeup sponge cleaning method that works well for you? Comment below and share your thoughts or favorite cleaning routine.
Frequently Asked Questions
Can You Wash Makeup Sponges with Micellar Water?
Micellar water may help loosen light makeup residue, but it is not a substitute for thorough washing with water and a suitable cleanser.
Should You Wash a New Makeup Sponge Before First Use?
If the manufacturer allows washing, a quick rinse and clean before first use can remove dust or residue from packaging and handling.
Can You Share a Makeup Sponge with Someone Else?
Avoid sharing makeup sponges because they come into direct contact with skin, makeup, oils, and moisture that can transfer between users.