The prettiest nails are not always the loudest ones because one clean line can look richer than ten gems on each finger.
Minimalist nail designs use soft colors, small details, and open space to make your hands look neat without trying too hard.
I grew up in a salon. Not the fancy kind where you scroll your phone under a ring light. The kind where my aunts debated Polish brands over the hum of LED lamps and the smell of base coat.
I learned early that the nails drawing the most compliments weren’t the elaborate sets. They were the ones who looked considered.
One clean line on a nude base. A micro tip so thin it almost wasn’t there. That restraint stayed with me.
This list is the one I wish I’d had when I started experimenting at home. Some minimalist nail designs, grouped by approach, with the tools and technique details you actually need.
What Actually Makes a Nail Design Minimalist?
Minimalism in nail art isn’t about doing less for the sake of it. It’s about choosing one thing and letting it work. Three qualities tend to define a truly minimalist nail design.
- A neutral or muted base: The foundation is almost always a nude, sheer, soft color, or clean white. Nothing that competes with the detail on top.
- One design element, maybe two: A single line, a dot, a foil piece, or a finish effect. The moment you add a third competing detail, you’ve crossed out of minimalist territory.
- Clean, precise application: This is the one people underestimate. A wavy line on a smudged base isn’t minimalist. It’s just unfinished. Minimalist nail art is actually harder to hide mistakes in than heavily decorated sets, so prep and technique matter as much as the design itself.
- Shape awareness: Minimalist designs work on every nail length. A short square nail with a single black line is minimalist. So is a long almond with a pearl cluster at the base. The scale adjusts; the principles stay the same.
- Restraint as a decision: Nothing is left there by accident. Every element is placed on purpose, and what isn’t there is just as intentional as what is.
Minimalist French Tip Variations
The French manicure has been reworked more times than any other nail style, and it keeps coming back because a clean tip against a natural base is genuinely hard to improve on.
These range from barely-there to quietly bold.
These days, unusual French manicure variations have moved well beyond traditional white, with colored tips in terracotta, forest green, and deep mauve gaining ground across salons.
1. Classic Micro-French Tip
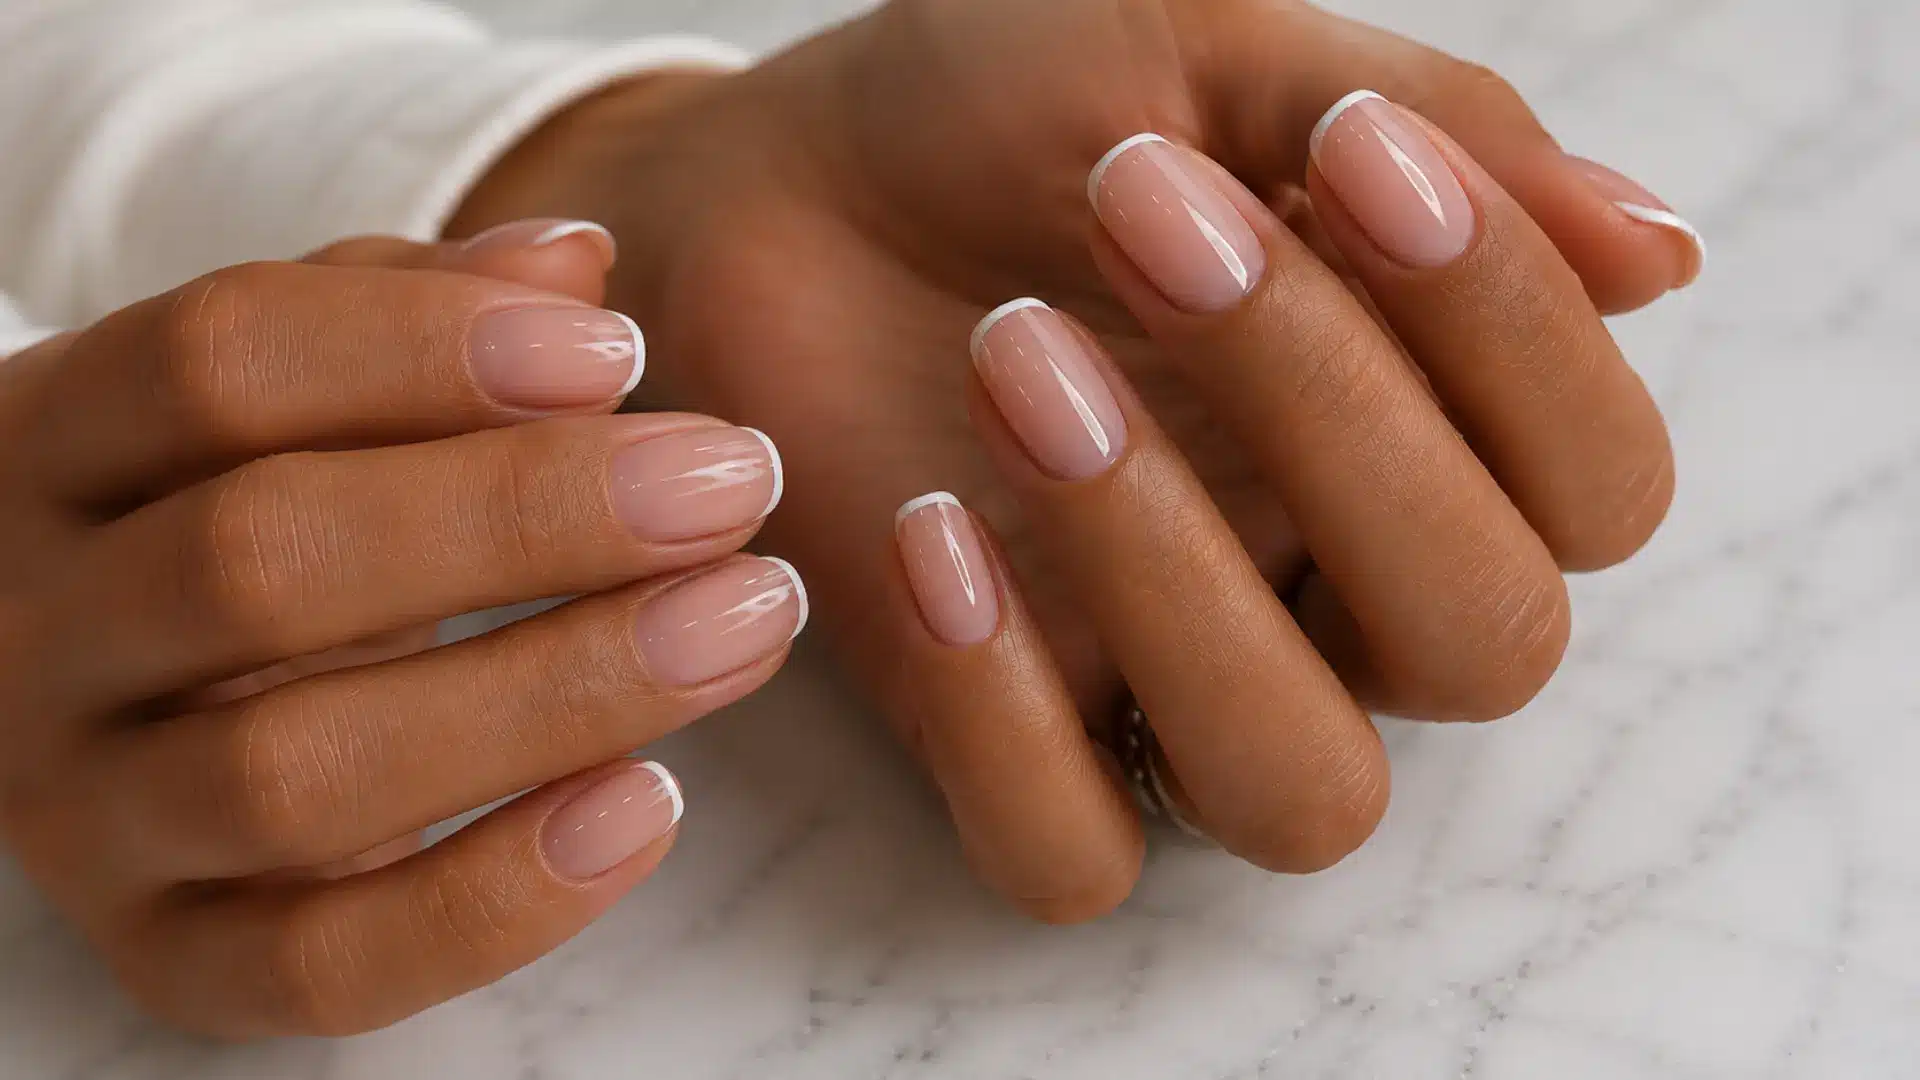
The micro-French is a thin white tip so precise it reads like a hairline. A traditional French tip sits at around 2 to 3mm. The micro version sits at 1mm or less.
The result is subtle enough that most people won’t identify it as nail art. They’ll just notice your hands look clean and well-tended.
- Best nail shape: Short almond, oval, or squoval
- Tools needed: Thin liner brush or nail art pen, white gel paint or polish
- Difficulty: Easy with a little practice
- Finish: Glossy top coat to seal the line
Apply the tip in a single slow stroke. If your hand shakes, rest your brush hand against a table edge and move your nail toward the brush rather than the other way around.
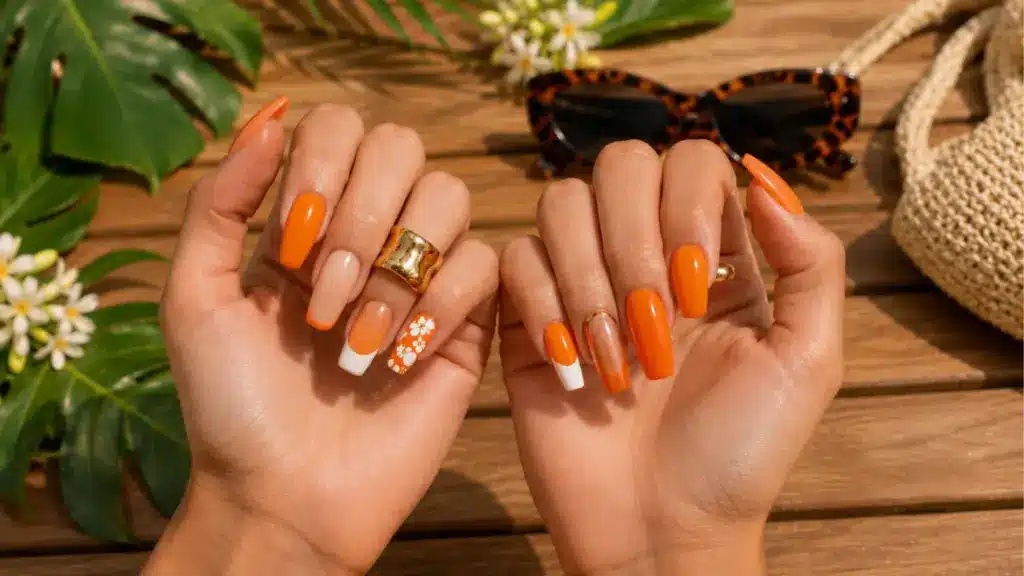
2. Colored French Tip
The classic white tip was swapped for a muted shade. Terracotta, deep forest green, mauve, and dusty rose are the ones getting the most attention right now.
None of them screams. They add a quiet edge to an otherwise familiar format.
- Best nail shape: Almond, coffin, or oval
- Tools needed: Liner brush, colored gel or polish in your chosen shade
- Difficulty: Easy to medium
- Finish: Matte or glossy. Green and terracotta wear particularly well matte.
Stick with muted shades rather than saturated ones. A terracotta tip on a sheer nude base feels like an extension of your skin tone. A neon orange tip on the same base is a different conversation entirely.
3. Reverse French / Half-Moon Nail
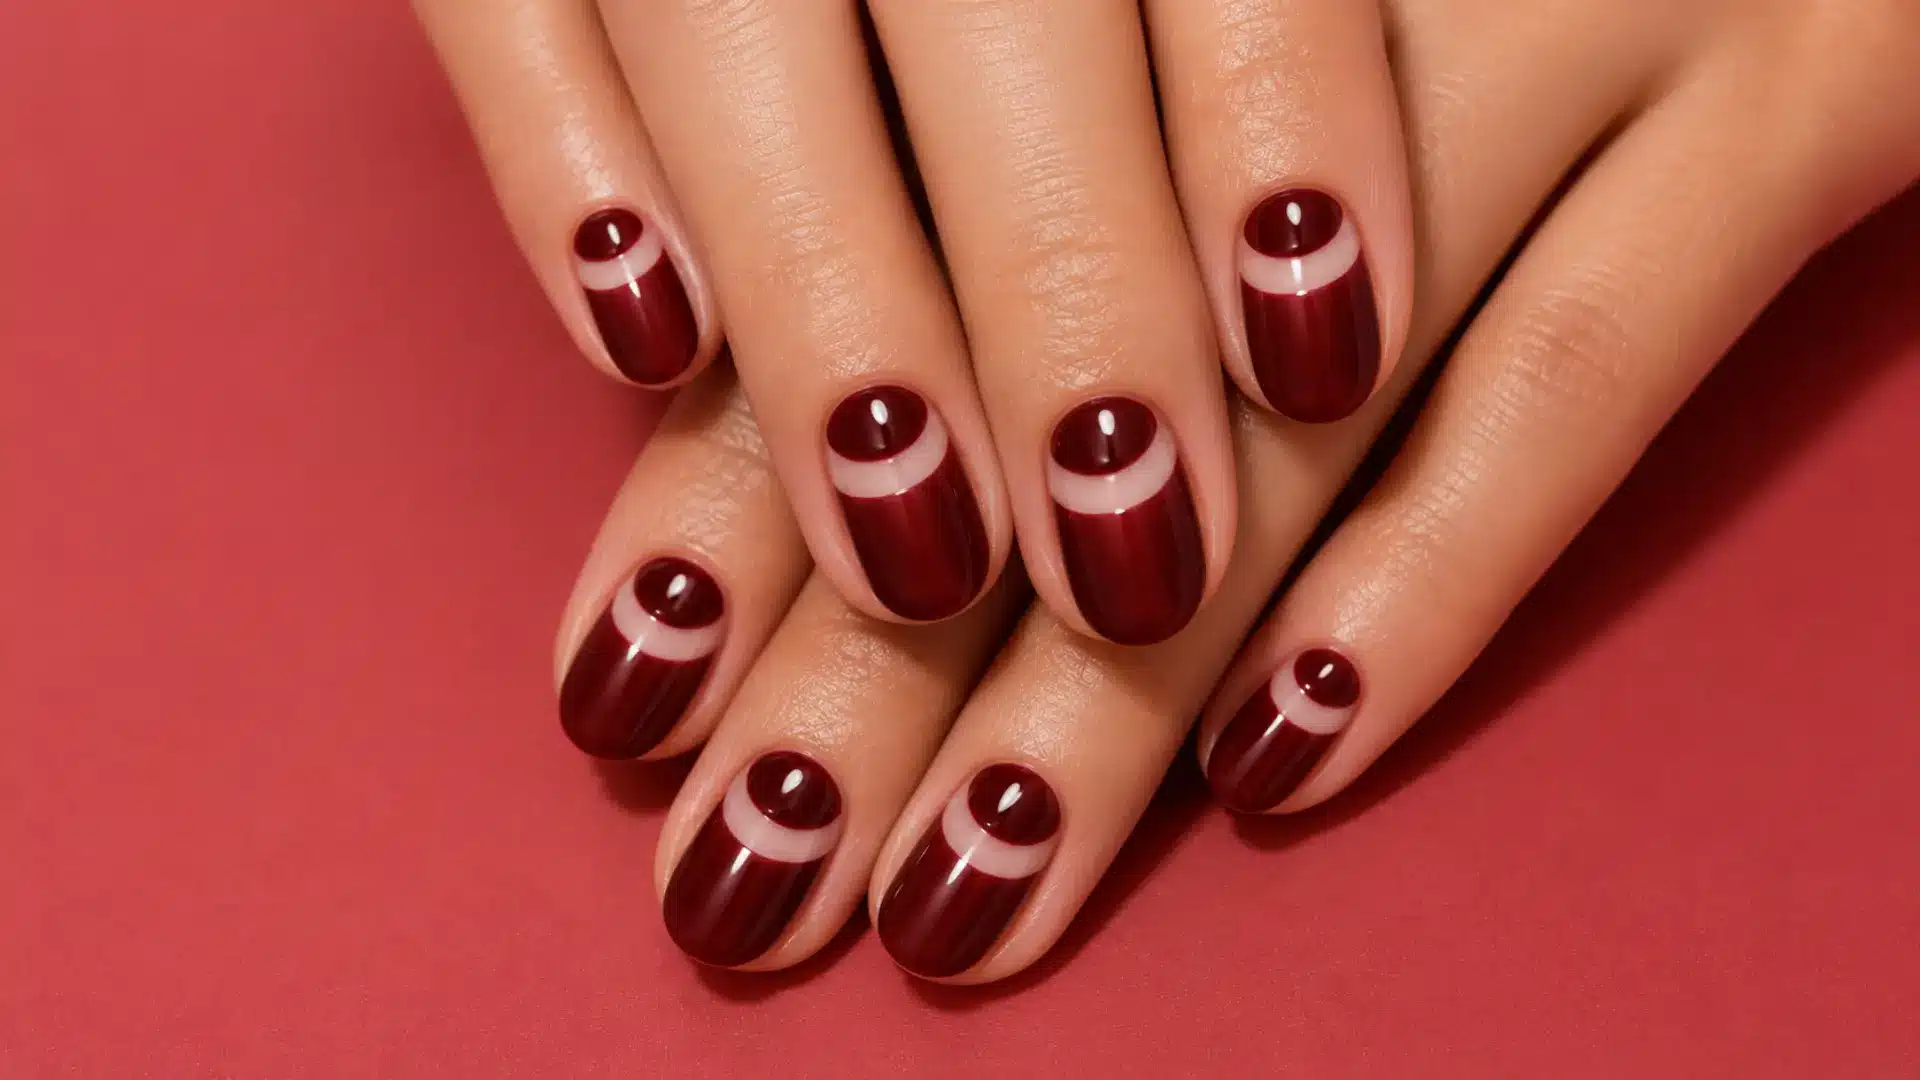
Instead of the tip, the accent sits at the base. Paint the lunula (the small half-circle where the nail meets the skin) in a contrasting shade while leaving the rest of the nail sheer or neutral.
It reads geometric without requiring any geometric skill.
- Best nail shape: Oval or round. The half-moon shape follows the natural curve.
- Tools needed: Round hole reinforcer stickers for masking, or a curved liner brush
- Difficulty: Medium
- Finish: Glossy
A deep burgundy or cream half-moon against a bare or sheer-pink nail is a very clean combination.
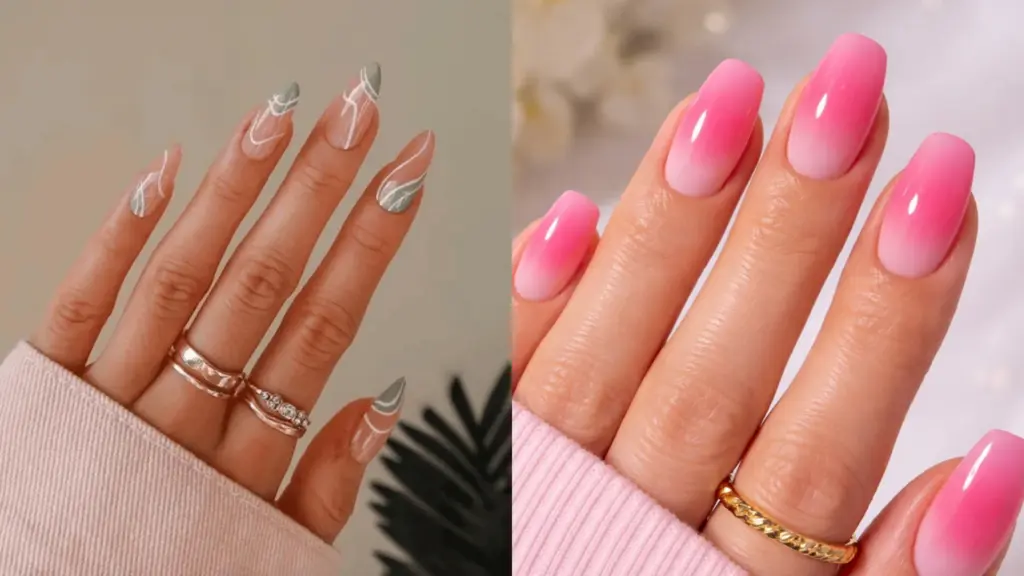
4. Baby Boomer Ombré French
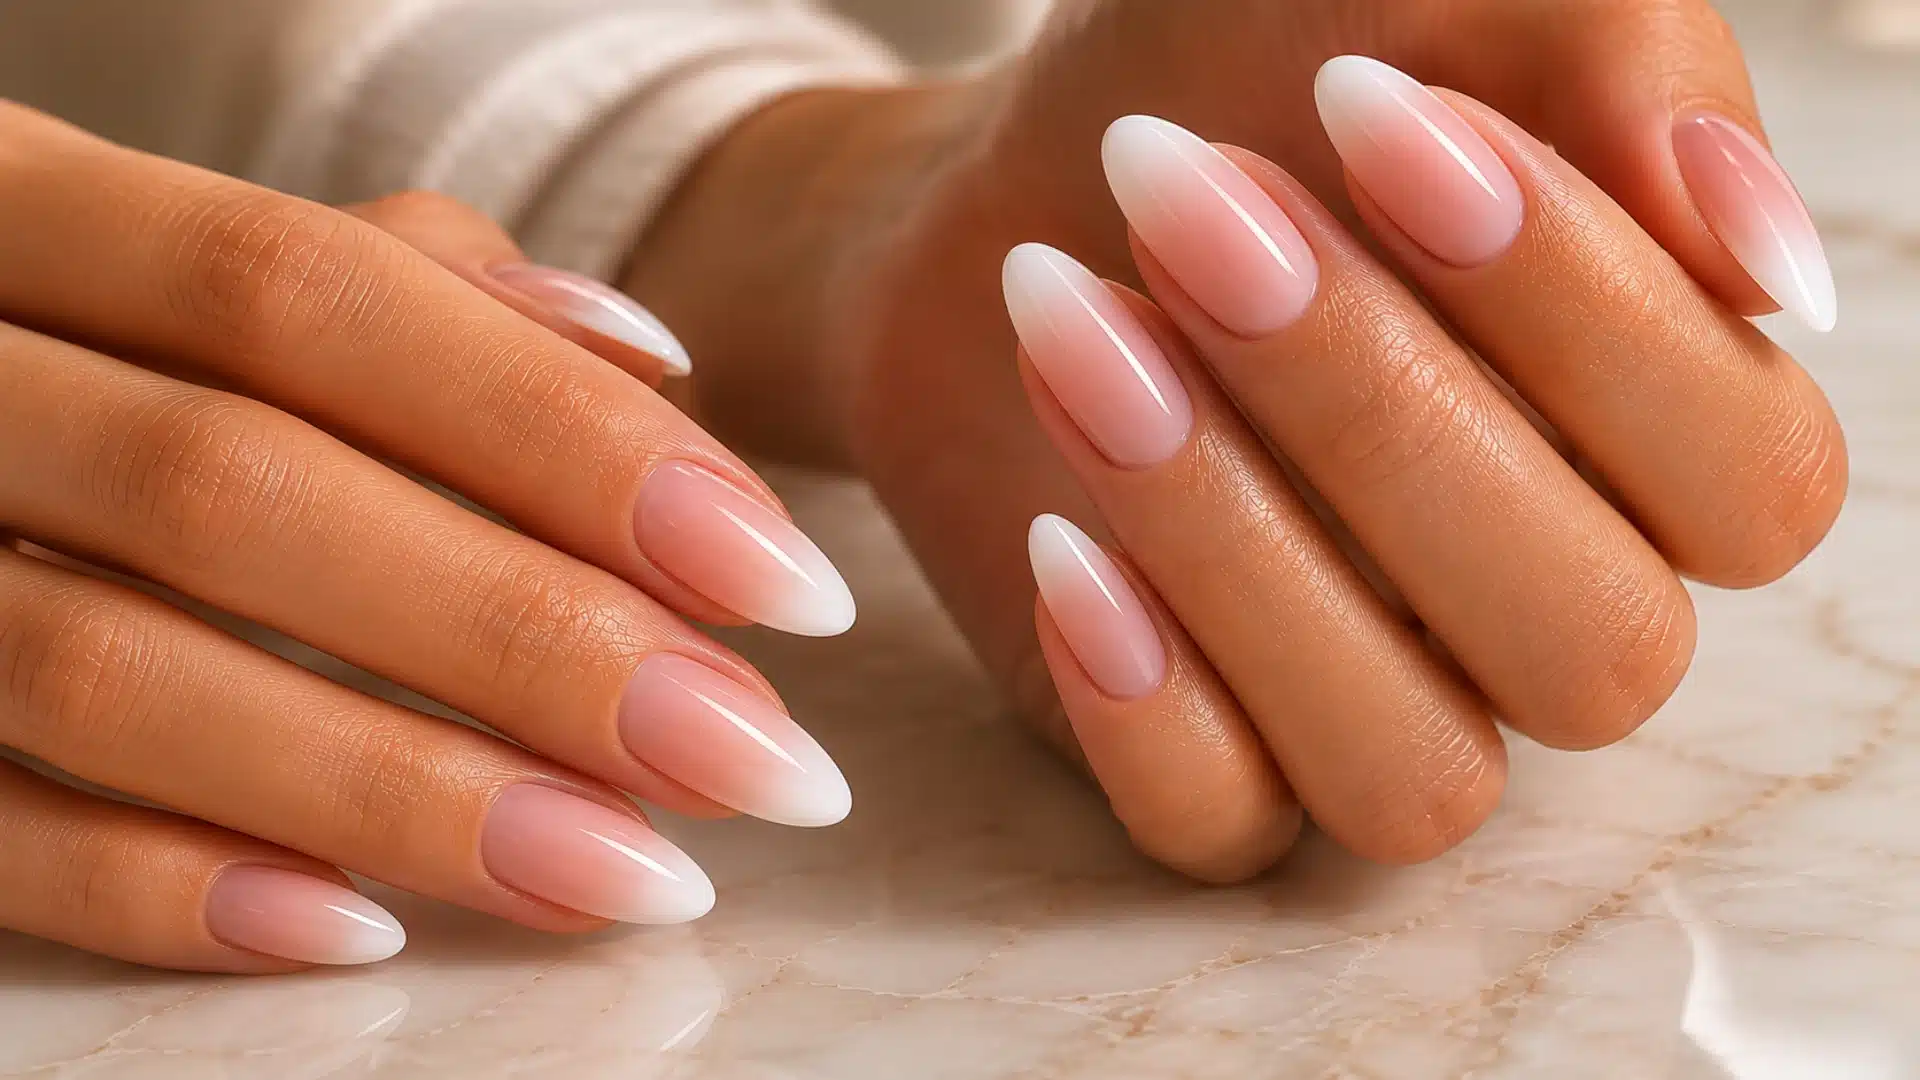
A gradient that fades from soft blush pink at the base to creamy white at the tip, with no clear line between them. It reads as a softened French.
The “baby boomer” name comes from the fact that it mimics a naturally healthy nail at its best.
- Best nail shape: Almond, stiletto, or longer oval
- Tools needed: Makeup sponge, sheer pink and white polish, top coat
- Difficulty: Medium. The blend takes a couple of tries.
- Finish: High-gloss for a traditional look, or a soft satin for something more current
Dab the sponge lightly and build gradually. A heavy first pass gives you stripes, not a gradient.
5. Frosted French
A softer version of the French where both base and tip are milky rather than stark white. Sheer pink base, barely-there white tip, and a glassy finish.
The frosted quality comes from a high-shine top coat that makes the whole nail look hydrated.
- Best nail shape: Any. This is one of the most versatile designs in the list.
- Tools needed: Sheer pink or nude base, milky white for the tip, high-gloss top coat
- Difficulty: Easy
- Finish: Glossy, almost wet-looking
This wears beautifully in spring. For more ideas that use this kind of softened, milky palette, elegant spring nail designs cover a lot of ground.
Glazed and Sheer Base Nails
No patterns, no lines. Just finish. The quiet luxury movement in nail trends is built largely on this cluster: nails that look expensive without being decorated. The secret is finish quality over design complexity.
6. Milky White Glazed Nails
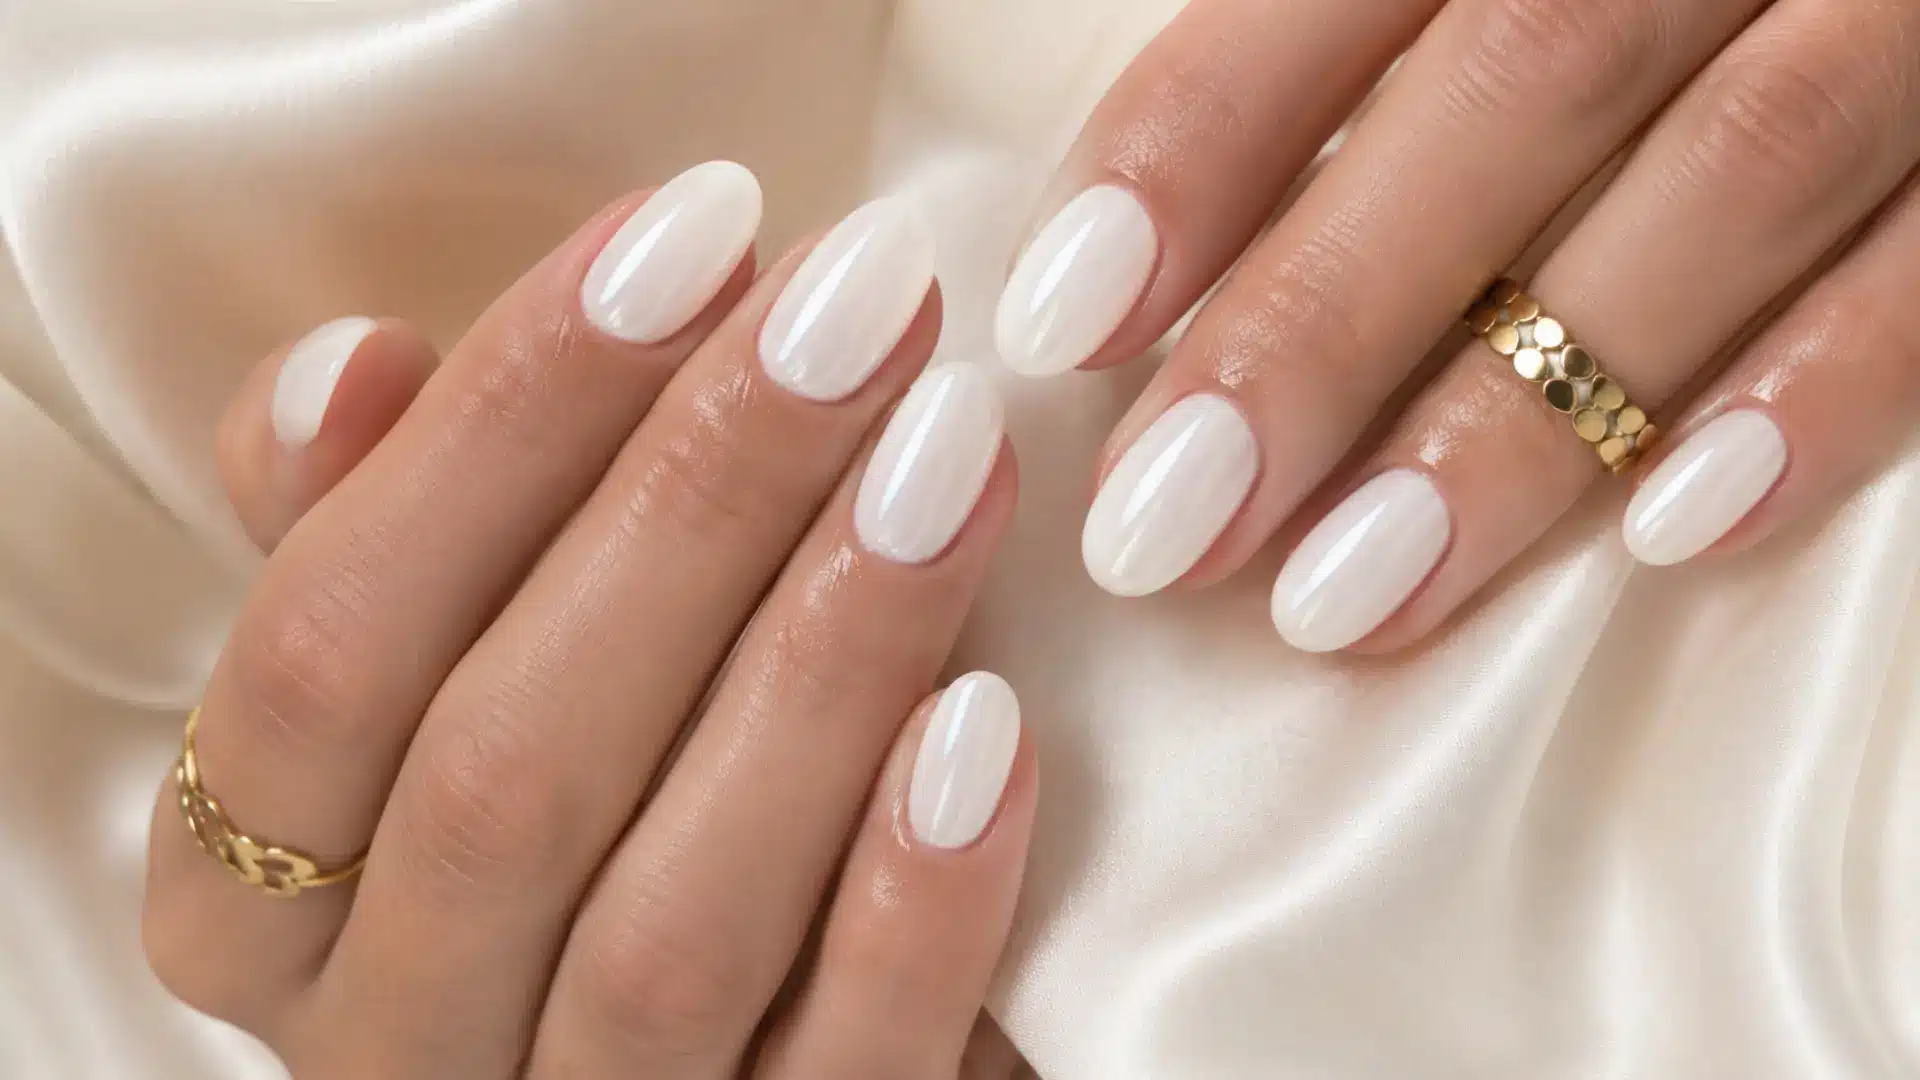
A full coat of milky, slightly opaque white with a glassy top coat over it.
The milky quality comes from a semi-sheer formula that lets a hint of the natural nail show through, making the finish look like the nail is glowing from within rather than painted.
- Best nail shape: All shapes, particularly round or oval
- Tools needed: Milky white polish or gel. Look for “semi-sheer” or “jelly” in the formula description.
- Difficulty: Very easy
- Finish: High-gloss
Two thin coats work better than one thick one. Thick coats can look chalky on milky formulas.
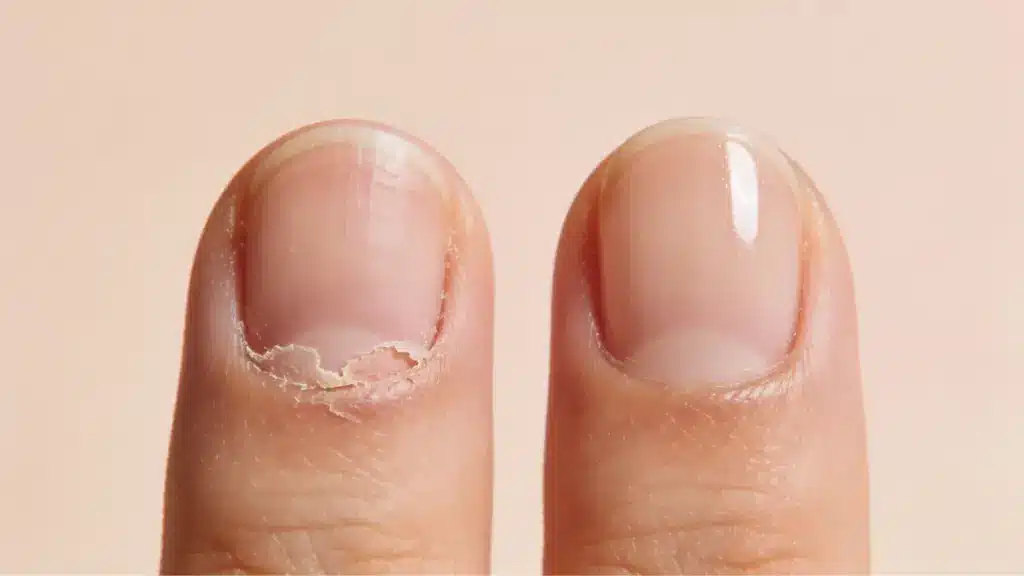
7. Sheer Nude Jelly Nails
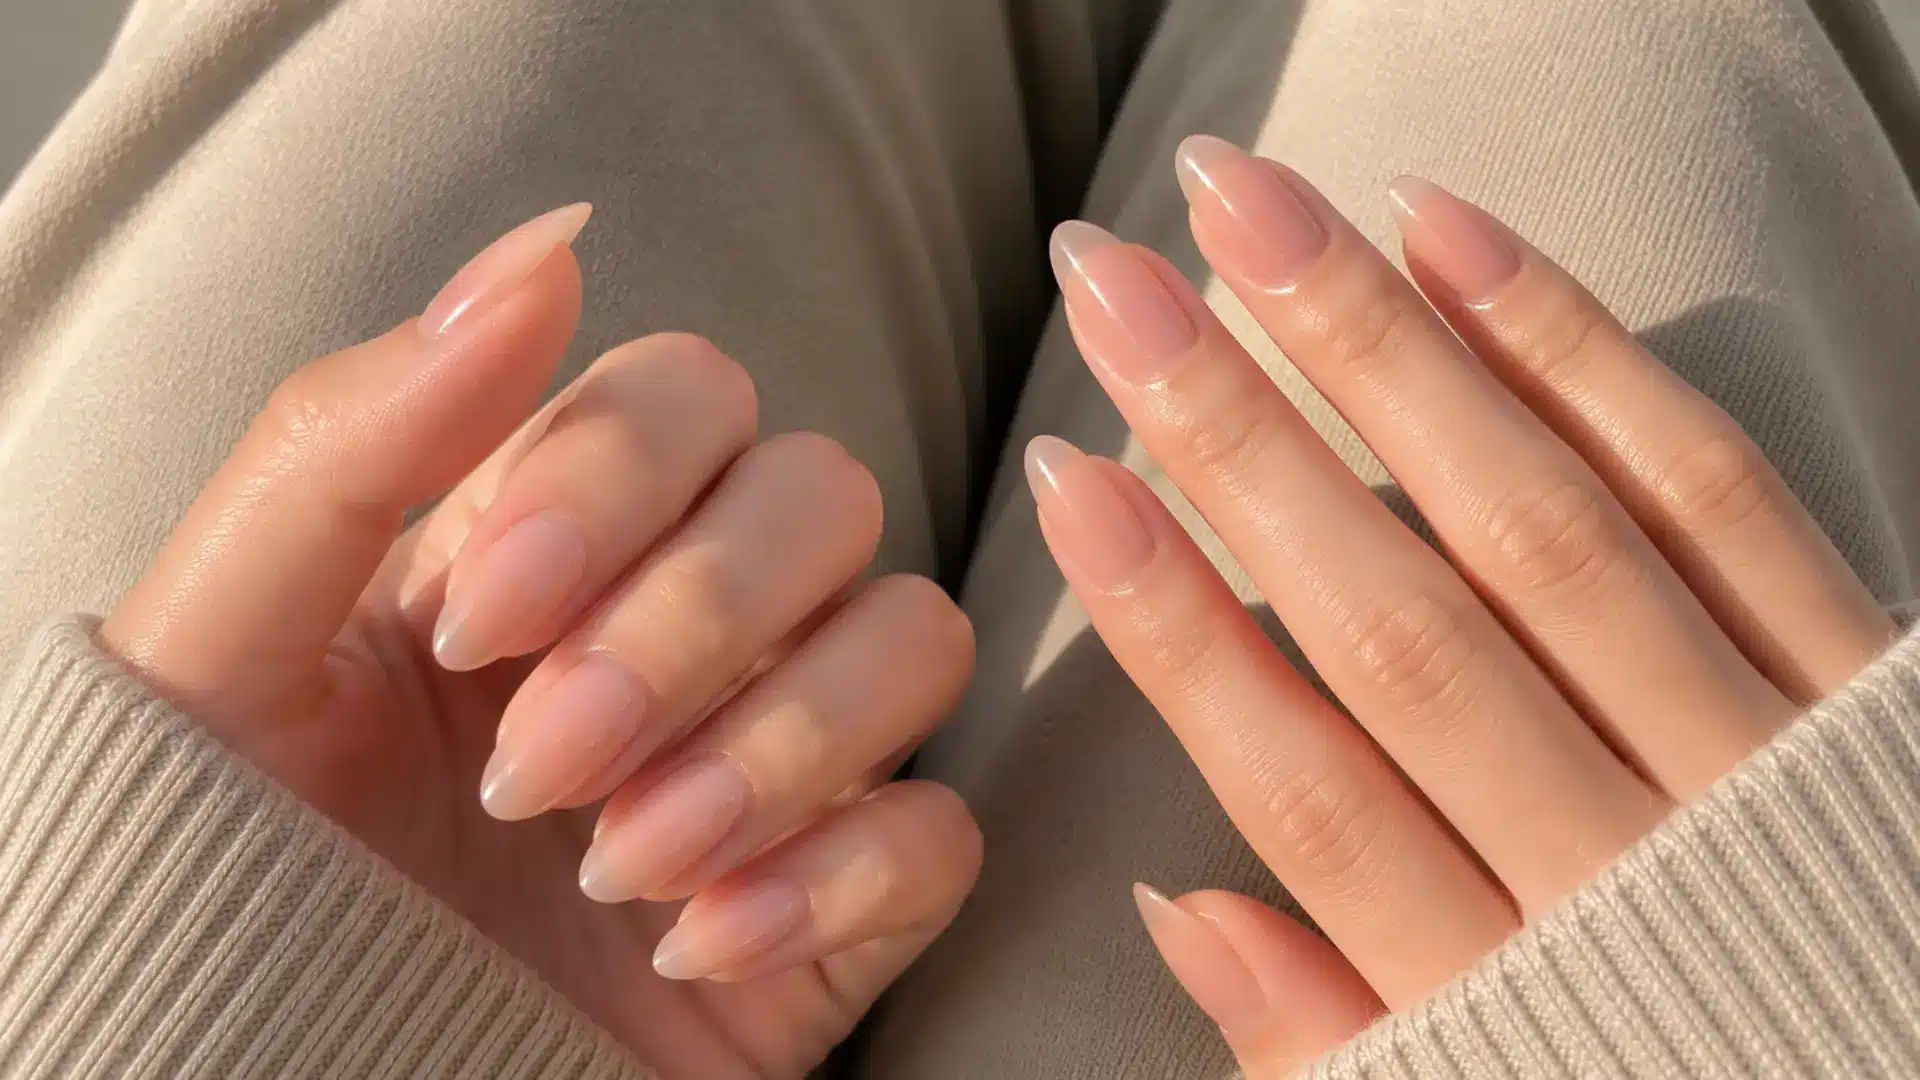
A jelly-finish nude or blush that sits transparent on the nail, staining it with a faint wash of color. The nail bed shows through fully. The effect is a polished version of bare nails: present, clean, and understated.
“Soap nails” fall into this same family: a single sheer coat applied over perfectly prepped, ridge-free nails, with no color build-up at all.
The trend picked up significant traction over the past couple of years because it is genuinely one of the fastest minimalist looks to execute at home.
- Best nail shape: Short and medium lengths, any shape
- Tools needed: Jelly or sheer formula polish in a skin-tone-adjacent shade
- Difficulty: Very easy
- Finish: Glossy
Pick a shade one or two tones lighter than your skin tone for the most flattering result. For deeper skin tones, a warm caramel jelly reads cleaner than a cool pink one.
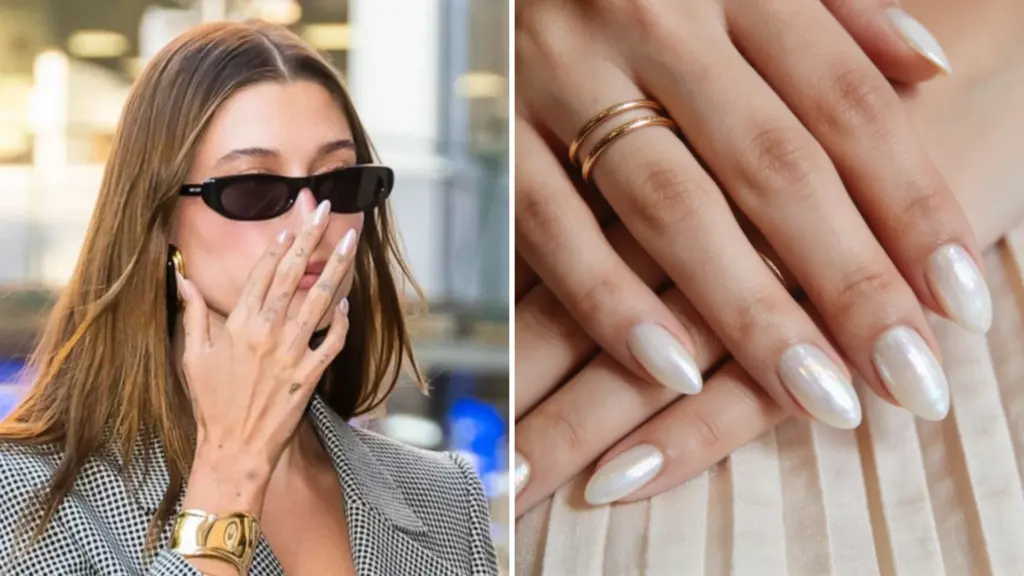
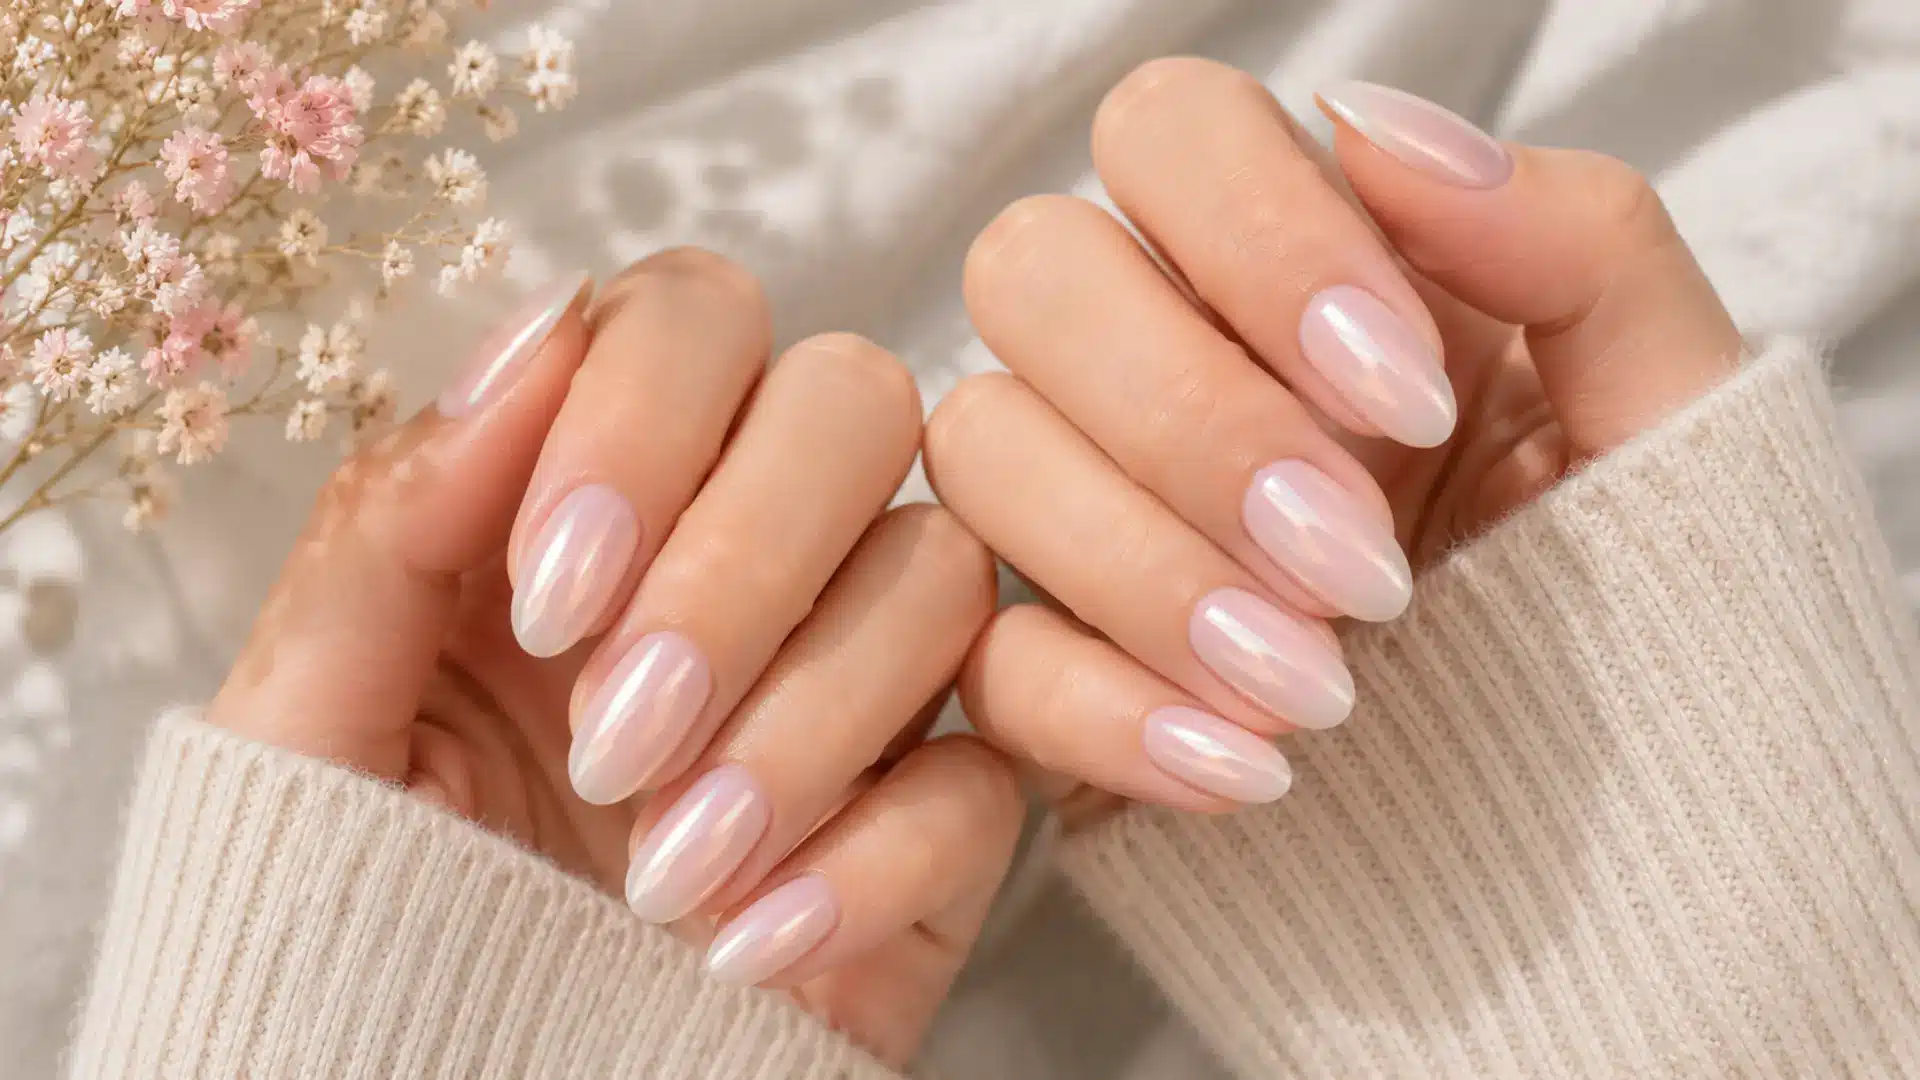
8. Glazed Donut Nails
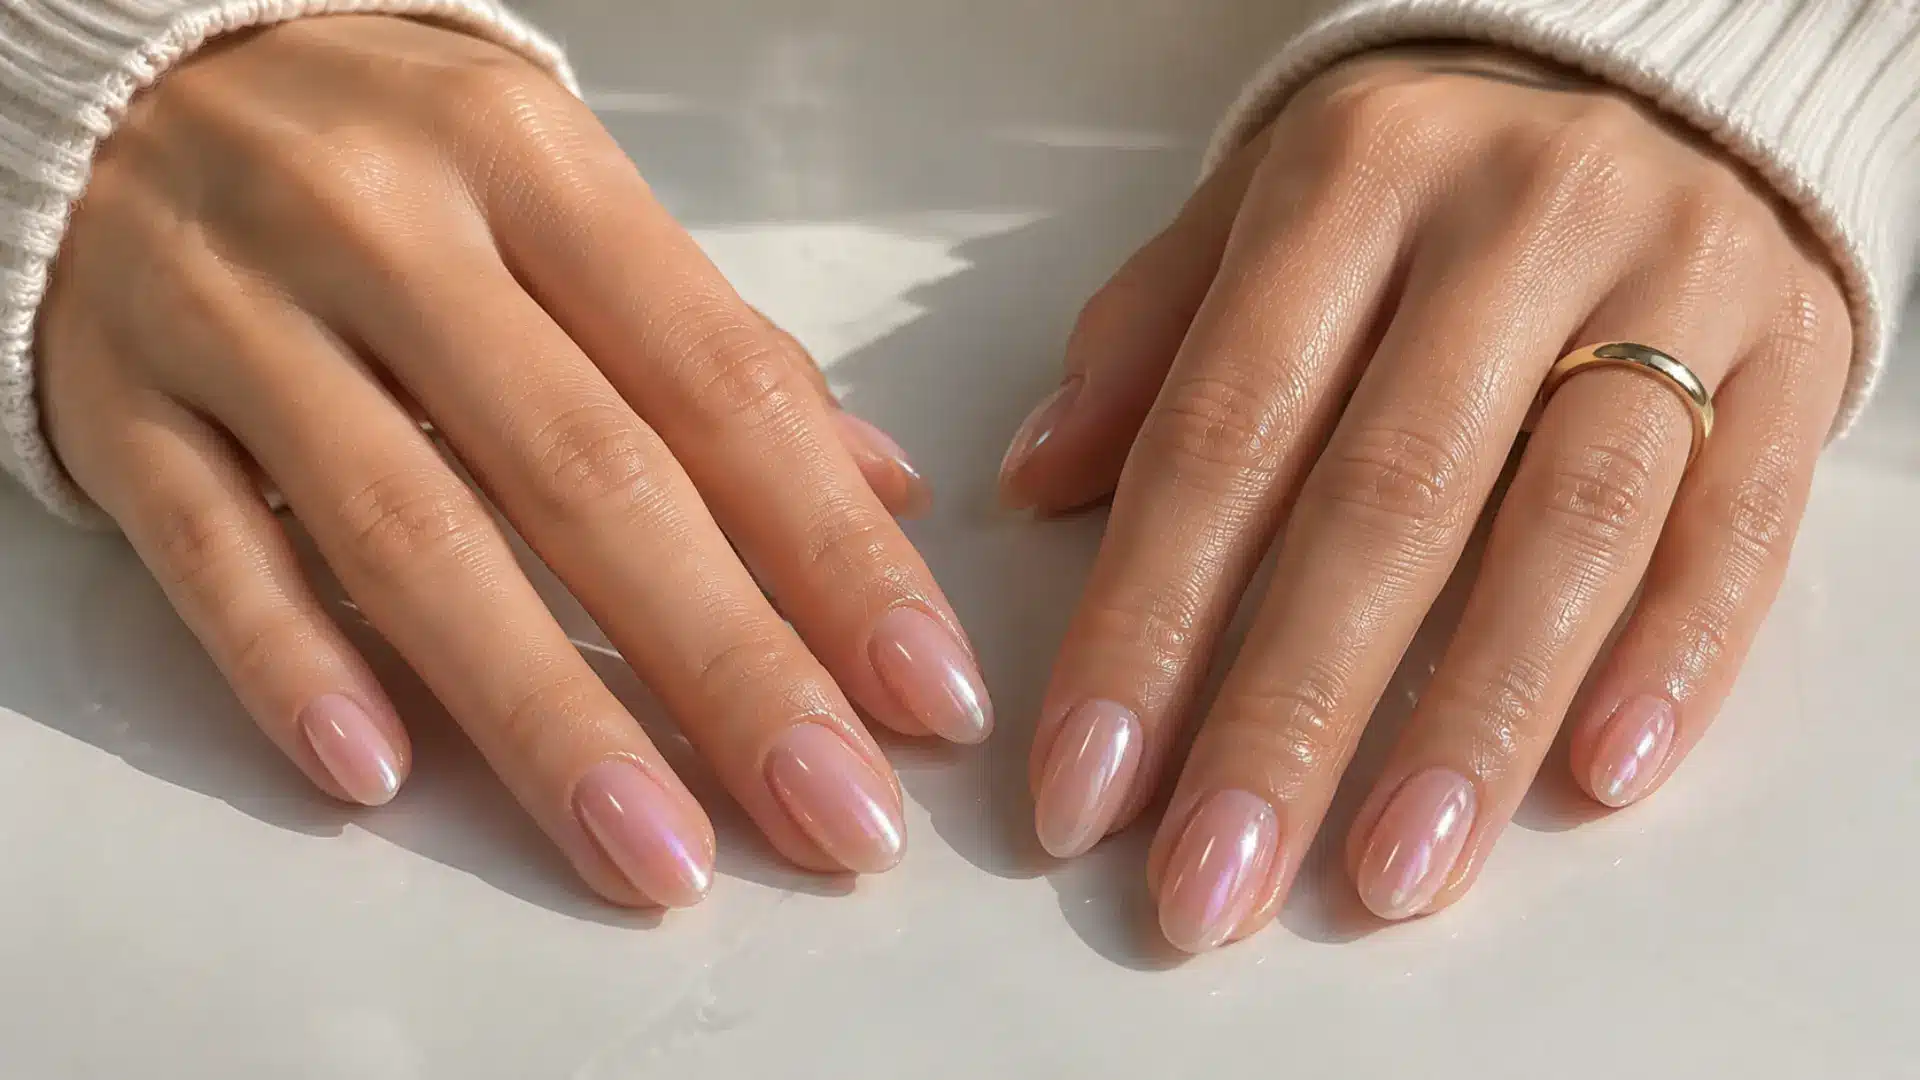
Nude or pink base with chrome powder buffed over the top coat while still tacky, giving a mirror-like shine without the full metallic commitment.
The name captures the look: a warm, lit-from-within gloss that reads effortless.
- Best nail shape: All shapes. The shine flatters any length.
- Tools needed: Nude or pink gel base, chrome powder, silicone applicator, or sponge eyeshadow brush
- Difficulty: Easy with the right powder
- Finish: Chrome over high-gloss top coat
Apply the chrome powder to a sticky, uncured top coat layer for the best adhesion and the clearest shine.
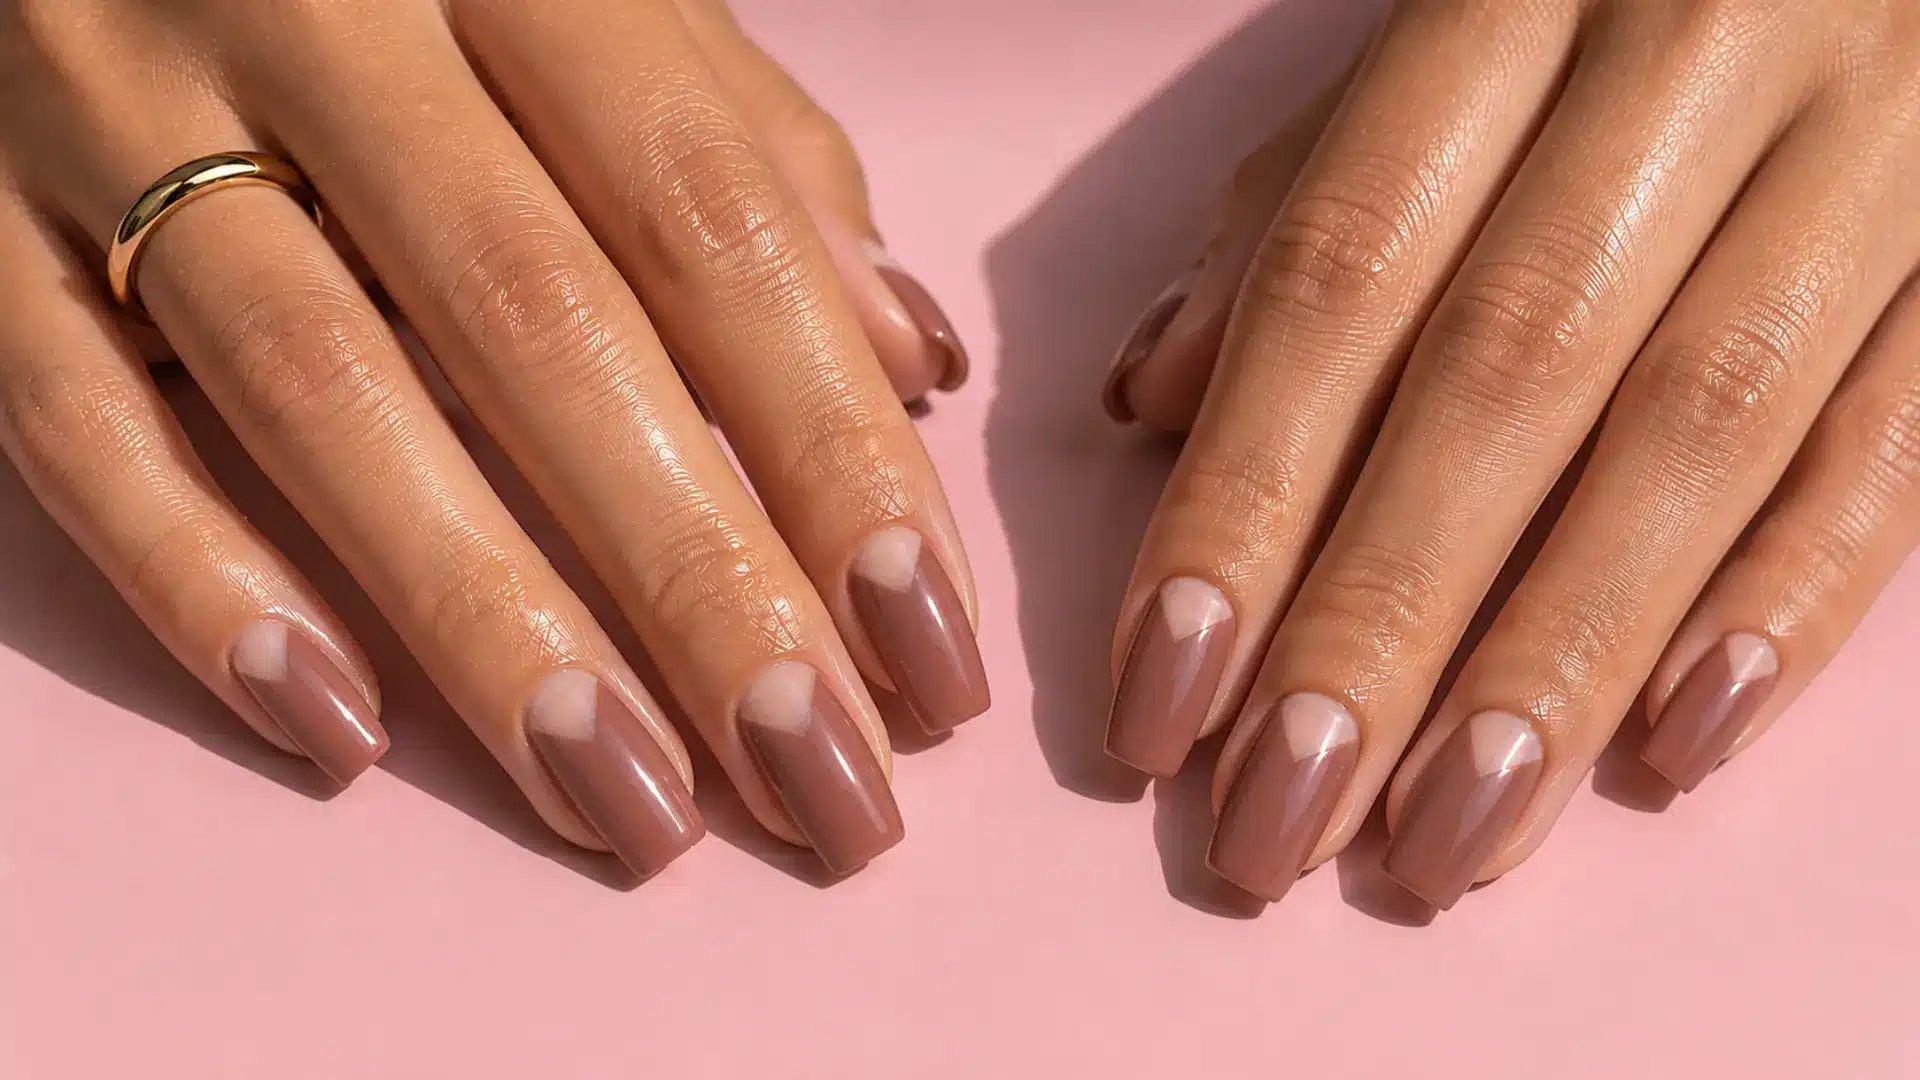
9. Almond Chrome Nails
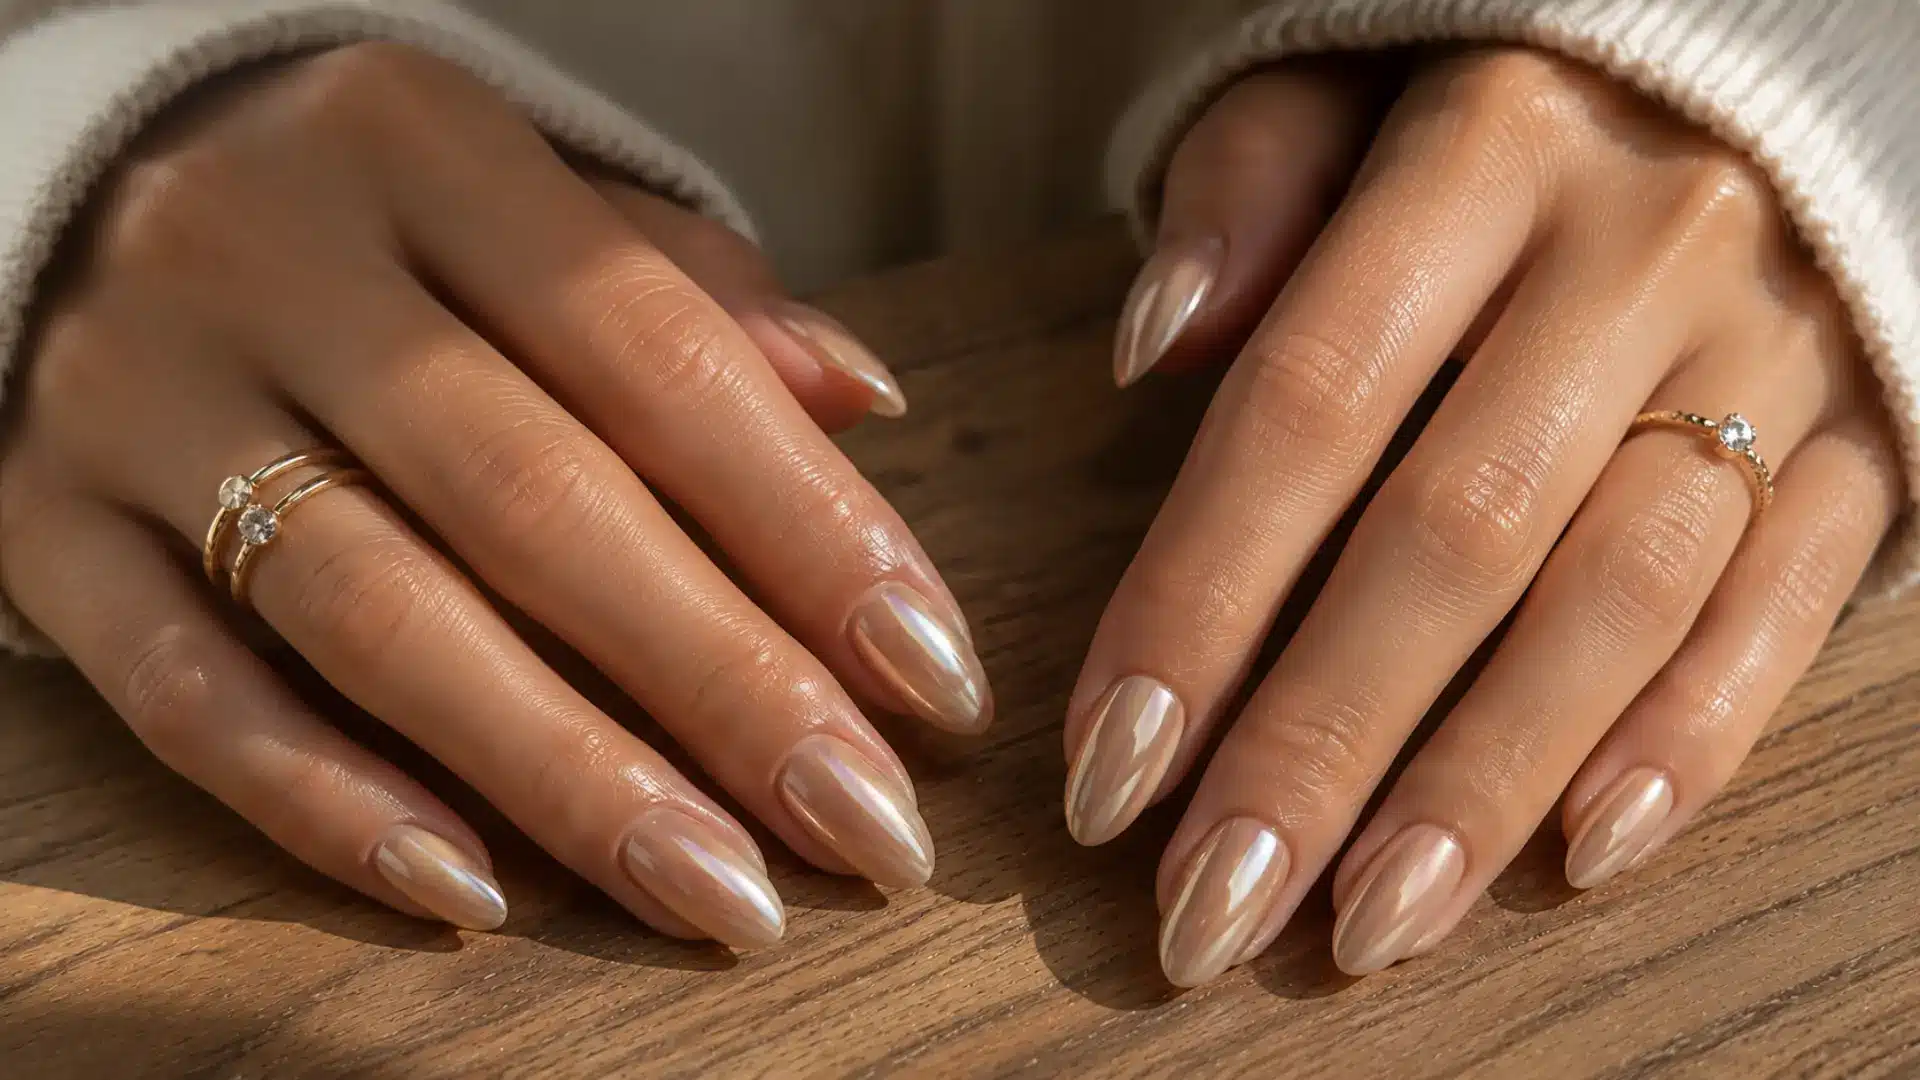
A warm, creamy base with a pearlescent chrome finish that gives a soft, iridescent glow.
The difference from the glazed donut is warmth: almond leans towards a light-brown tone, where glazed leans pink-white. It suits warm and deep skin tones particularly well.
- Best nail shape: Almond or coffin for the most flattering finish
- Tools needed: Brown gel base, pearl chrome powder
- Difficulty: Easy
- Finish: Iridescent chrome
This photographs beautifully in natural light. If you use Korean gel nail polish, many brands carry almond and cream shades that cure to a perfect semi-opaque base for chrome work.
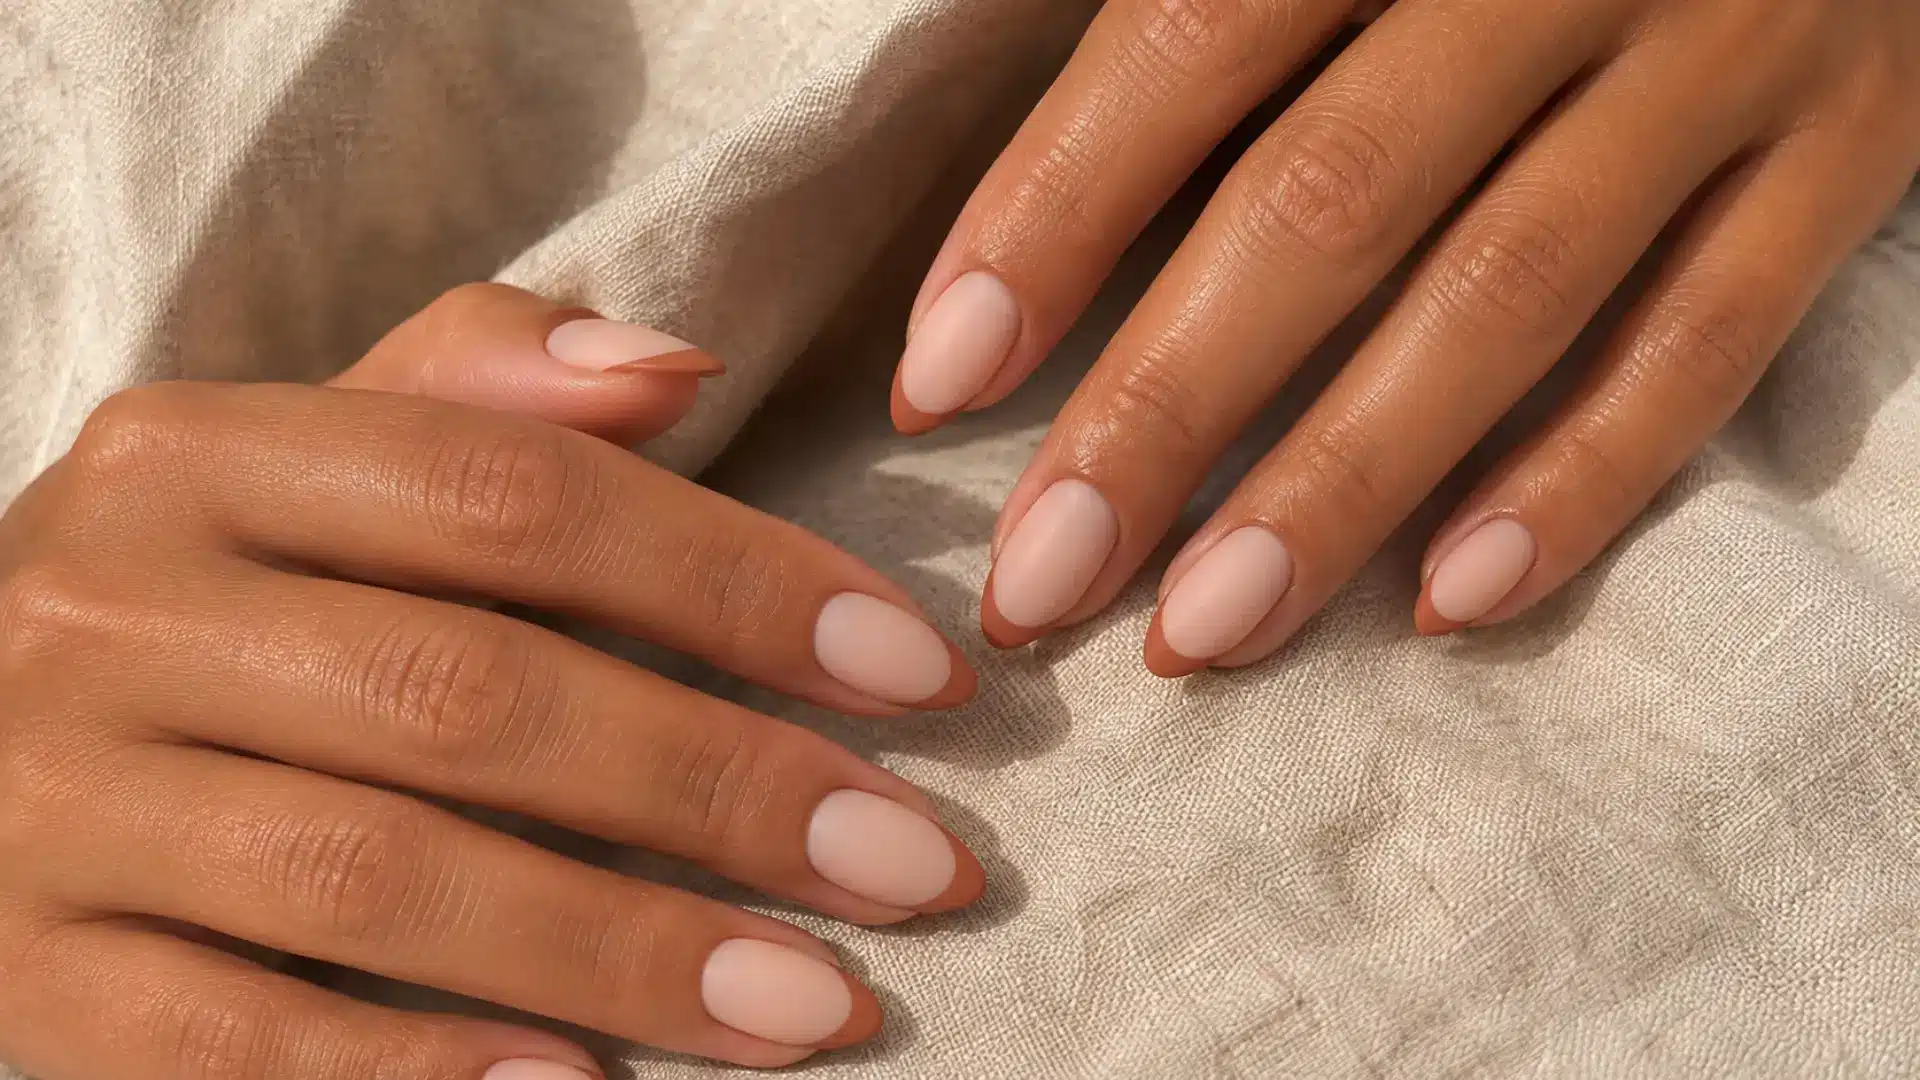
10. Skin Tint Nails
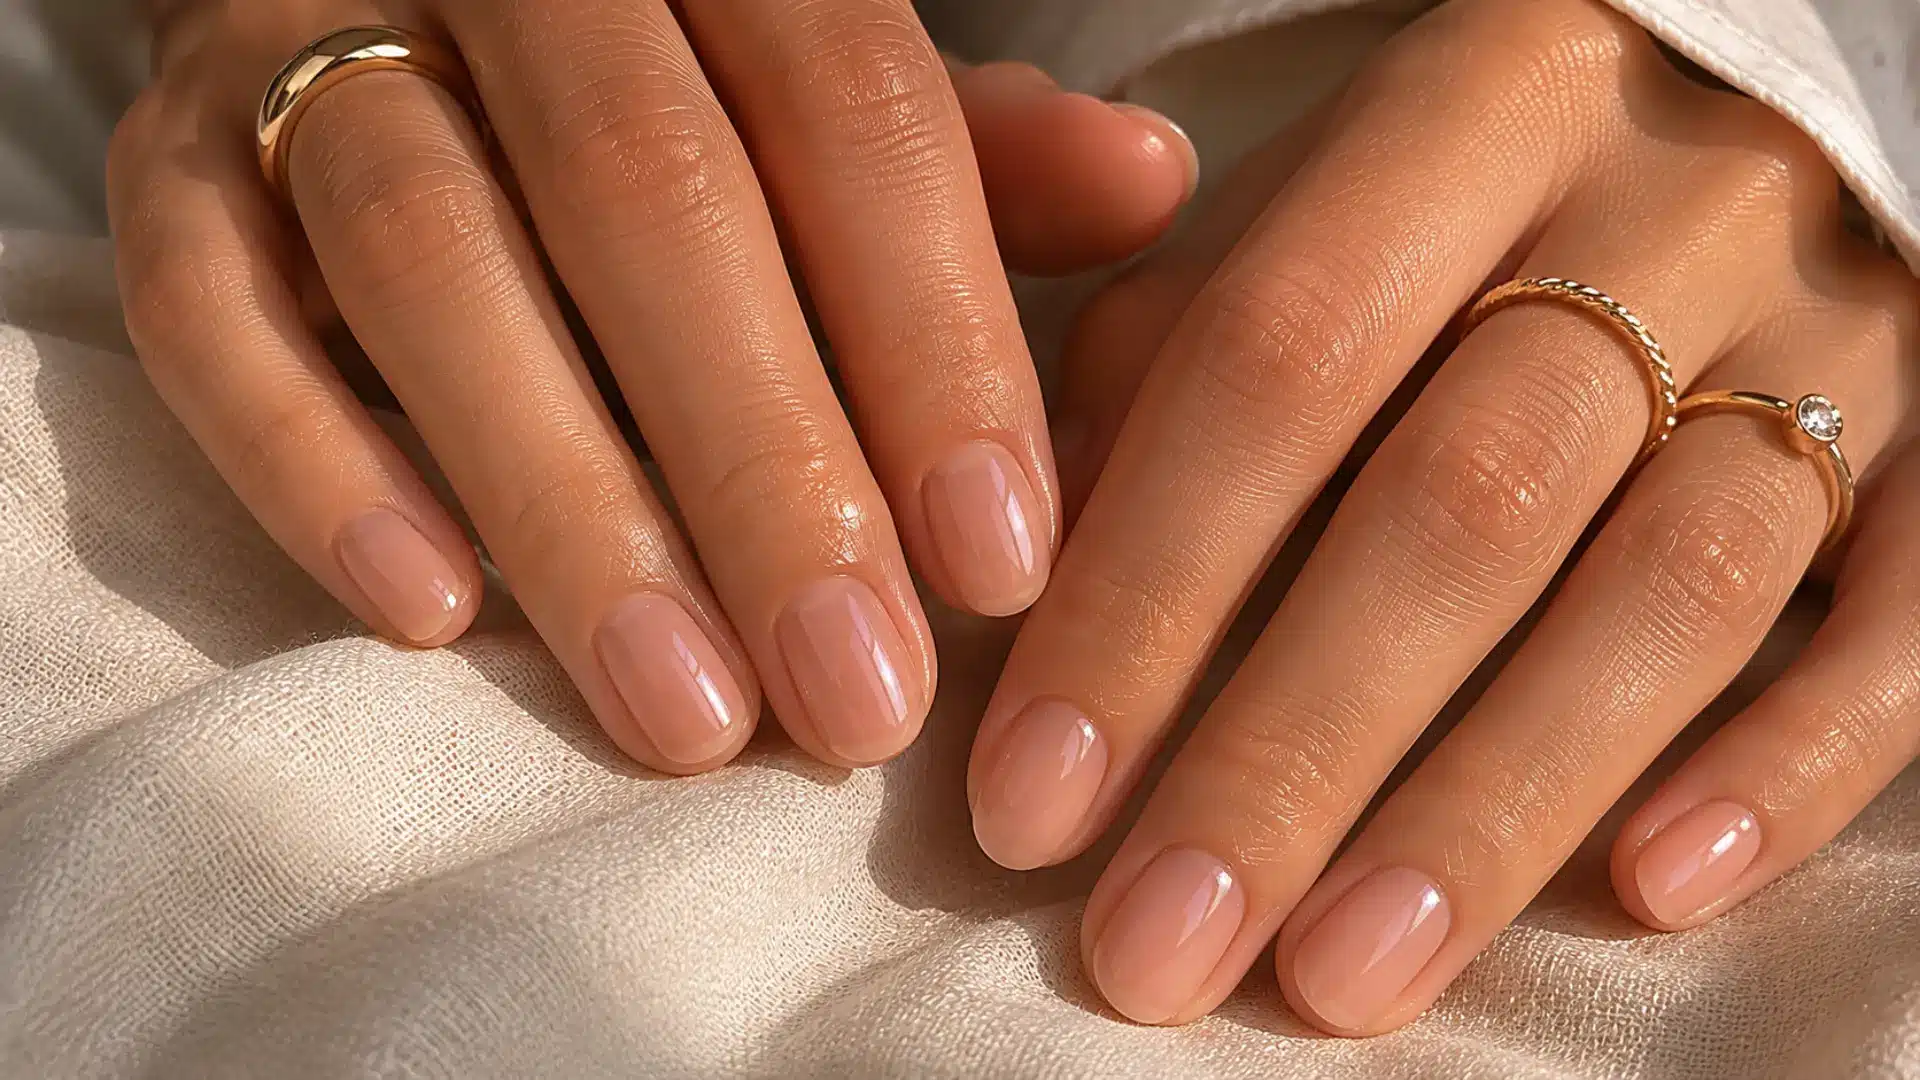
A single coat of a sheer formula matched closely to your skin tone. The goal isn’t coverage. It’s an enhancement. The nail looks bare but polished, the way tinted lip balm makes lips look without looking “done.”
- Best nail shape: Any
- Tools needed: A sheer formula in your exact skin tone, gloss top coat
- Difficulty: Very easy
- Finish: Glossy or satin
The tricky part is the shade match. Swatch on the inside of your wrist rather than your palm.
Line and Geometric Minimalist Nail Art
A thin line changes everything. These designs use the most basic tools: a liner brush, a dotting pen, and striping tape. The results look intentional and polished on any budget.
Each one works on short nails just as well as long ones. The placement and the restraint of stopping at one element instead of adding a second is what makes them land.
11. Single Thin-Line Nail
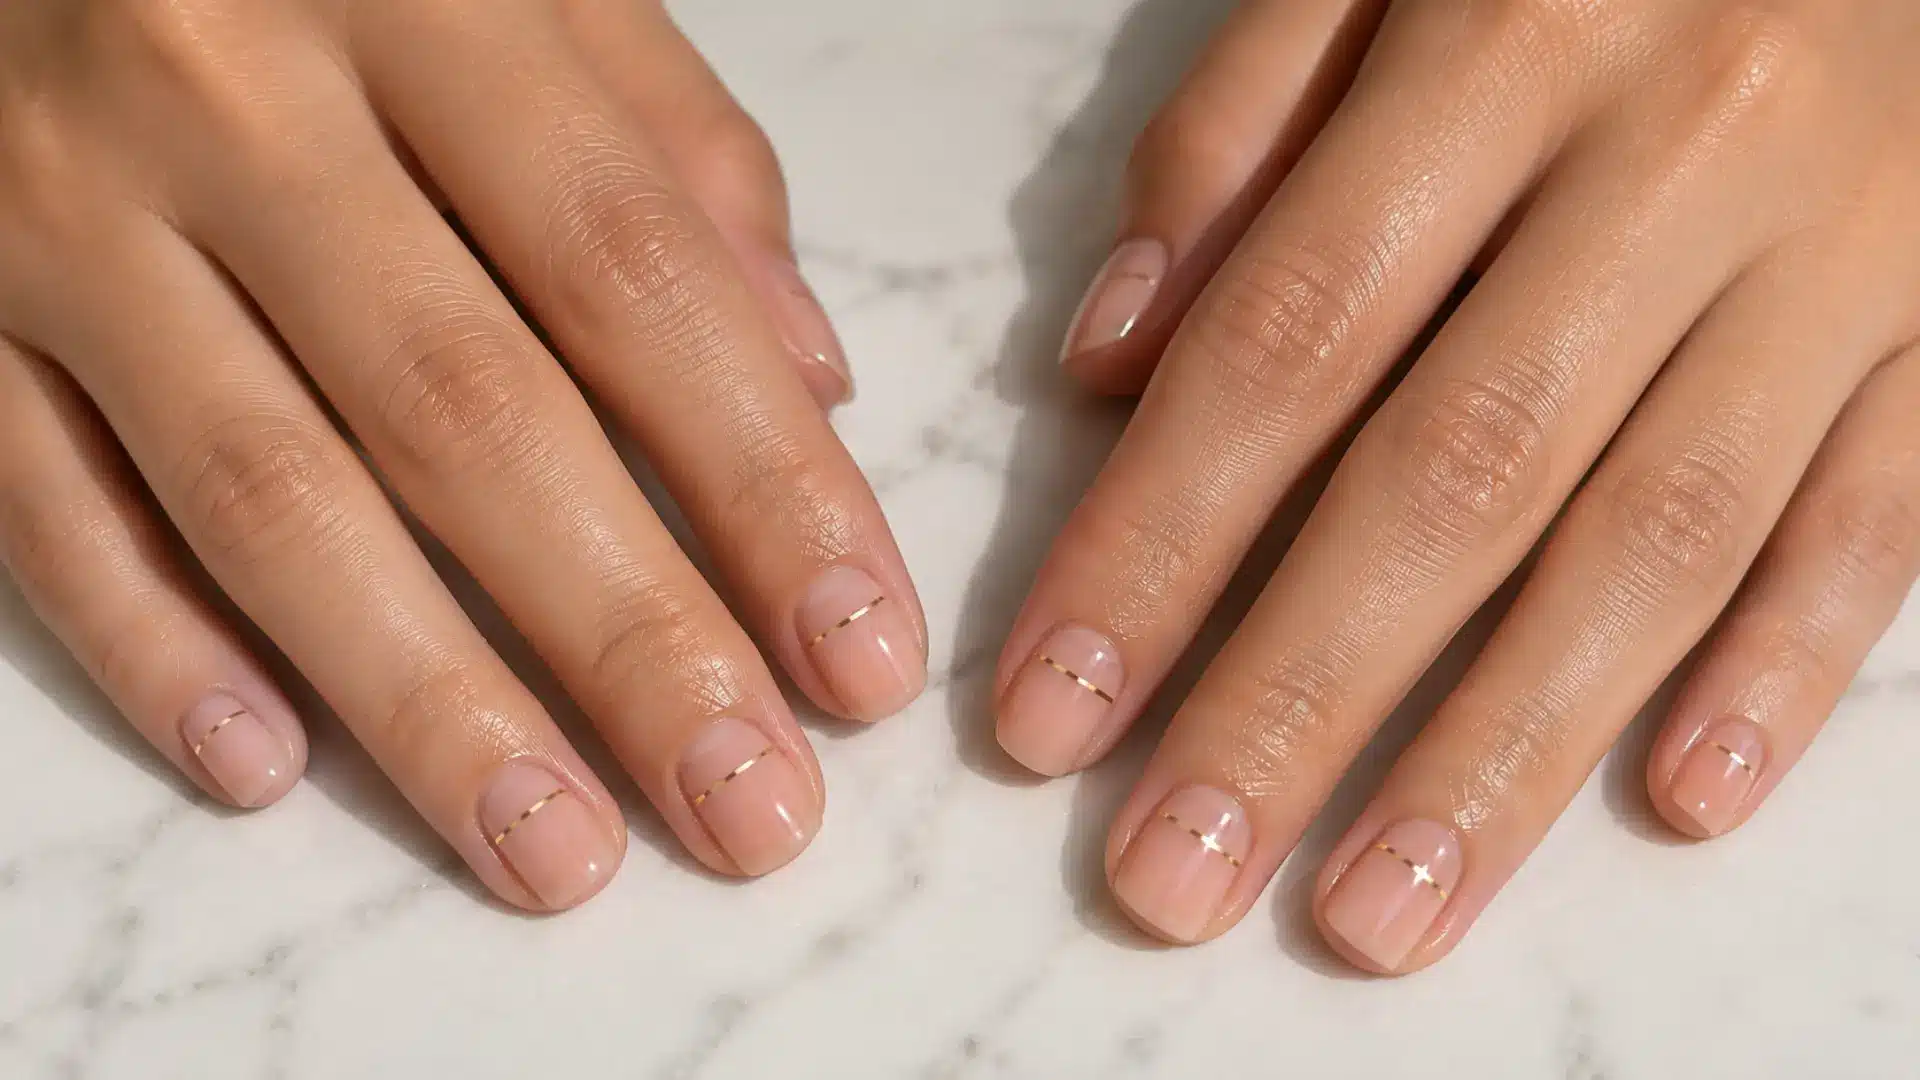
One horizontal or vertical line drawn across the center of the nail in a contrasting color. On a nude or sheer base, it reads deliberate and precise. On a soft color base, it adds an architectural quality.
- Best nail shape: Square or coffin. The straight nail edges echo the line’s clean geometry.
- Tools needed: Thin liner brush, contrasting polish or gel paint in black, gold, or white
- Difficulty: Easy
- Finish: Glossy
Draw a horizontal line two-thirds up the nail for a French-inspired effect. Draw it straight across the center for something more graphic.
12. Negative Space Geometric
A section of the nail is left unpainted (or painted with clear base only), creating a geometric shape (triangle, rectangle, or half-circle) where the natural nail shows through. The design comes from what isn’t there.
- Best nail shape: Square or coffin, so the geometry reads cleanly
- Tools needed: Stripping tape or nail vinyls, polish in one color, and top coat
- Difficulty: Easy with tape, medium freehand
- Finish: Glossy to keep the negative space crisp
Place your tape before the base coat fully dries for sharper lines.
13. Minimalist Grid/Crosshatch
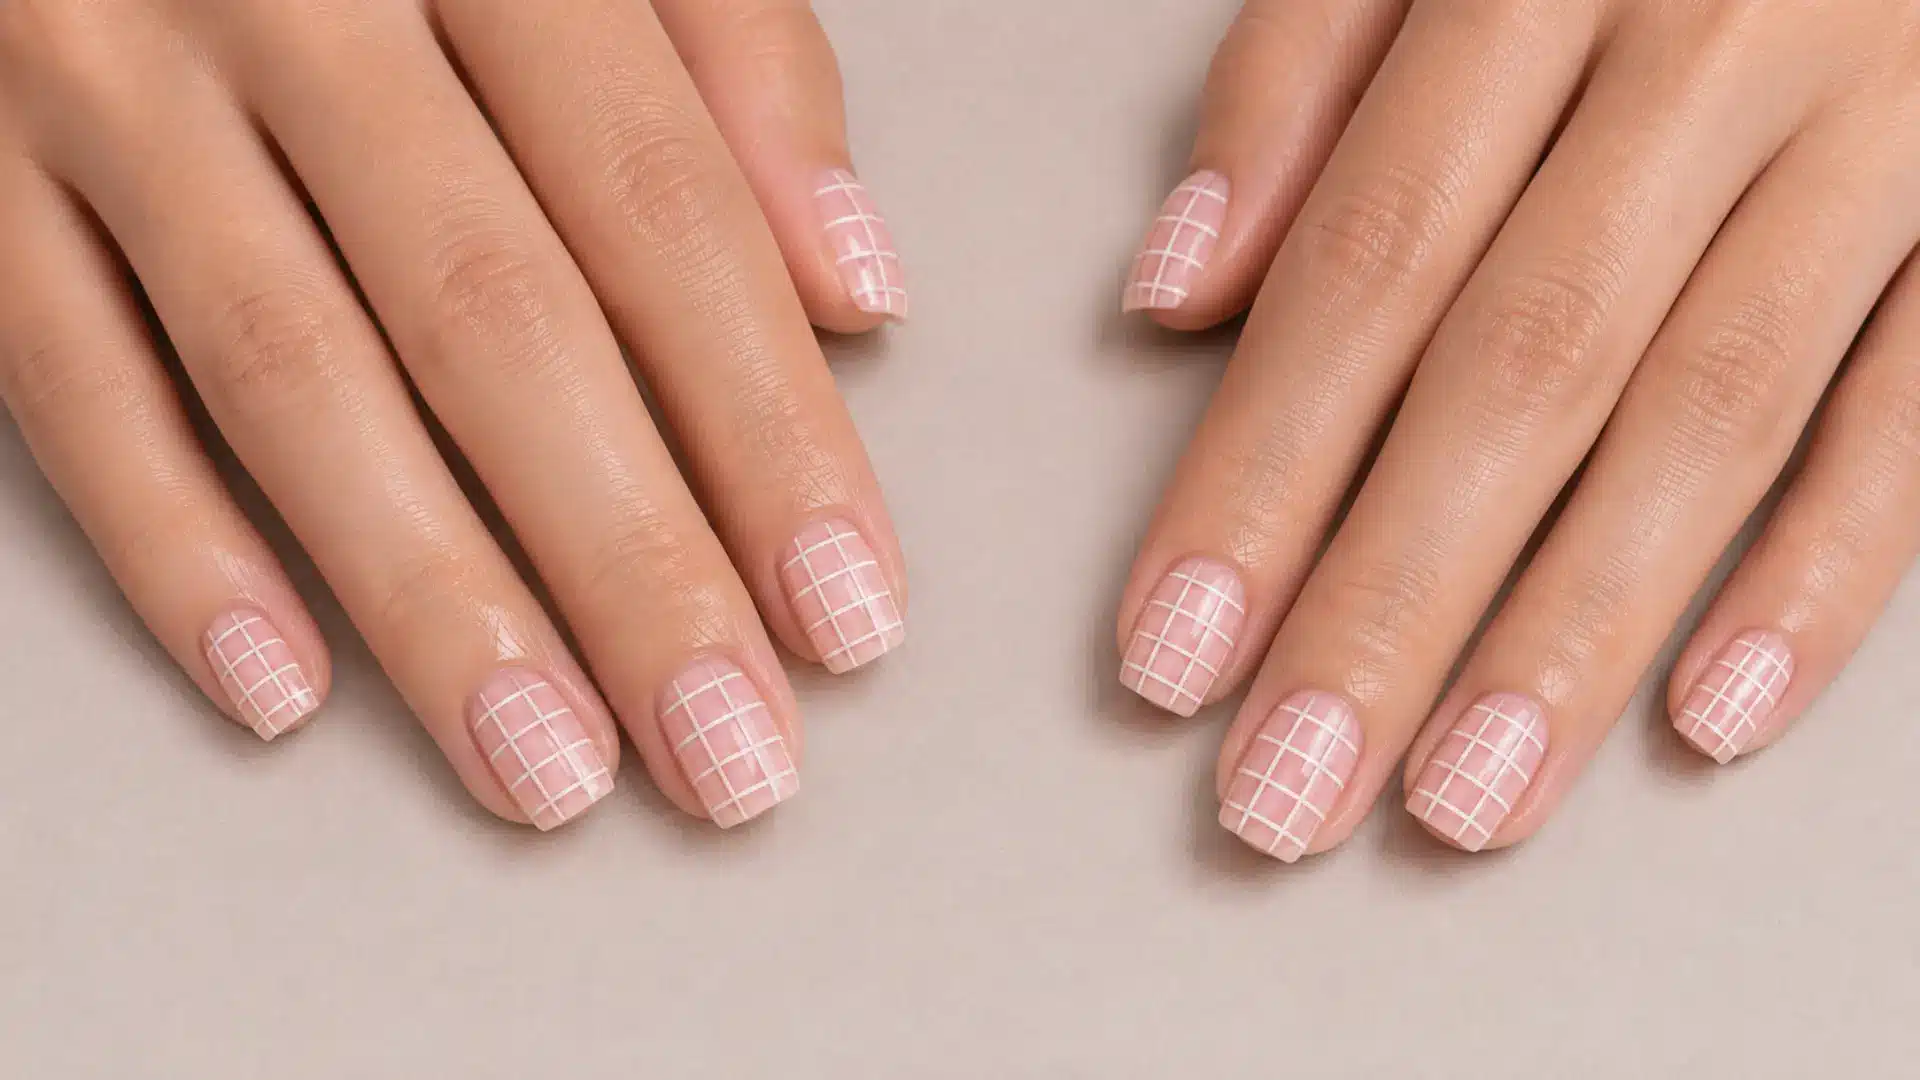
Two or three horizontal lines crossed with two or three vertical lines on a neutral base. The grid is small, confined to one section of the nail, and drawn in a thin, contrasting color. It reads like a textile print.
- Best nail shape: Square or squoval
- Tools needed: Thin liner brush, black or white gel paint
- Difficulty: Medium. Spacing the lines evenly is the challenge.
- Finish: Glossy or matte
A matte top coat over a black-on-nude grid gives a more editorial feel.
14. Diagonal Stripe Accent
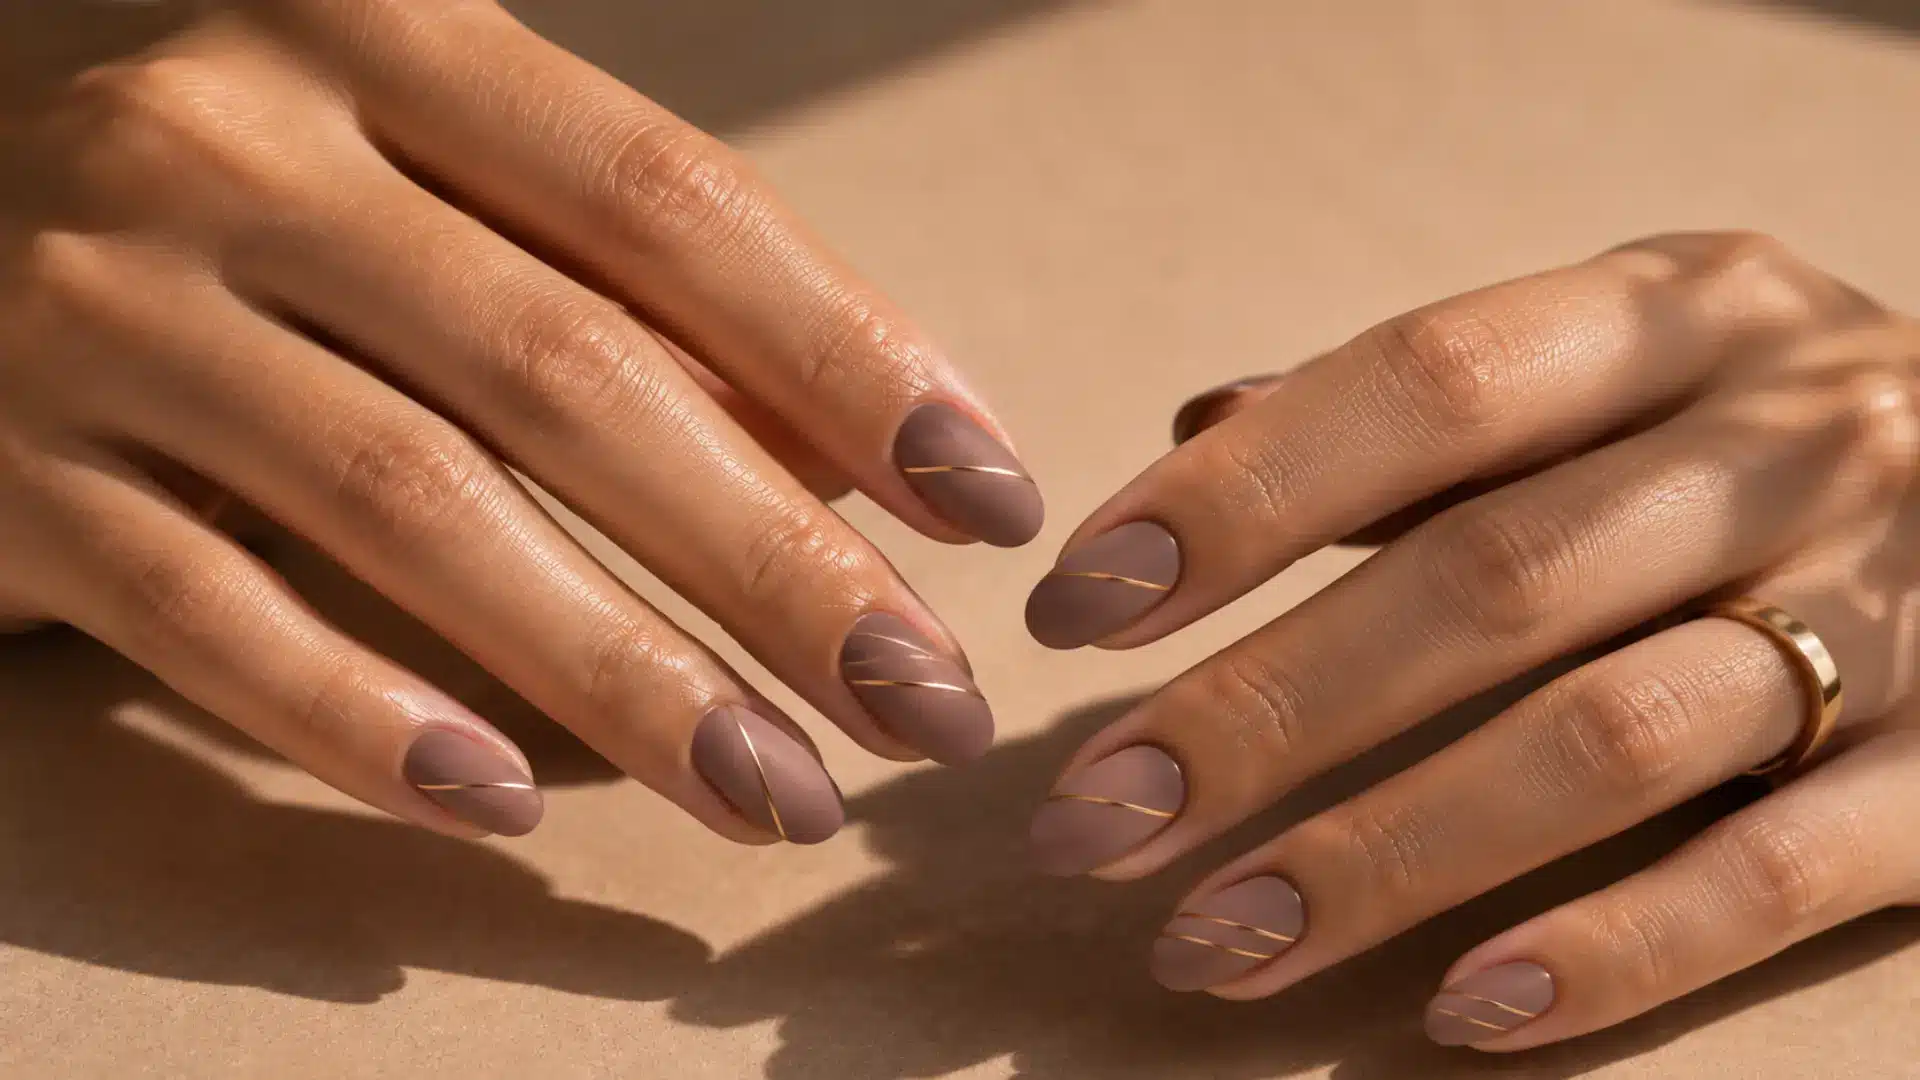
One or two diagonal stripes across the nail in a metallic or contrasting polish. The angle creates visual movement and makes nails look longer without adding any length.
- Best nail shape: Oval or almond. The diagonal follows the nail’s natural taper.
- Tools needed: Stripping tape, metallic or contrasting polish
- Difficulty: Easy with tape
- Finish: Glossy
Gold on a deep nude base is a quieter version of this. White on black reads more graphic.
15. Abstract Wavy Line
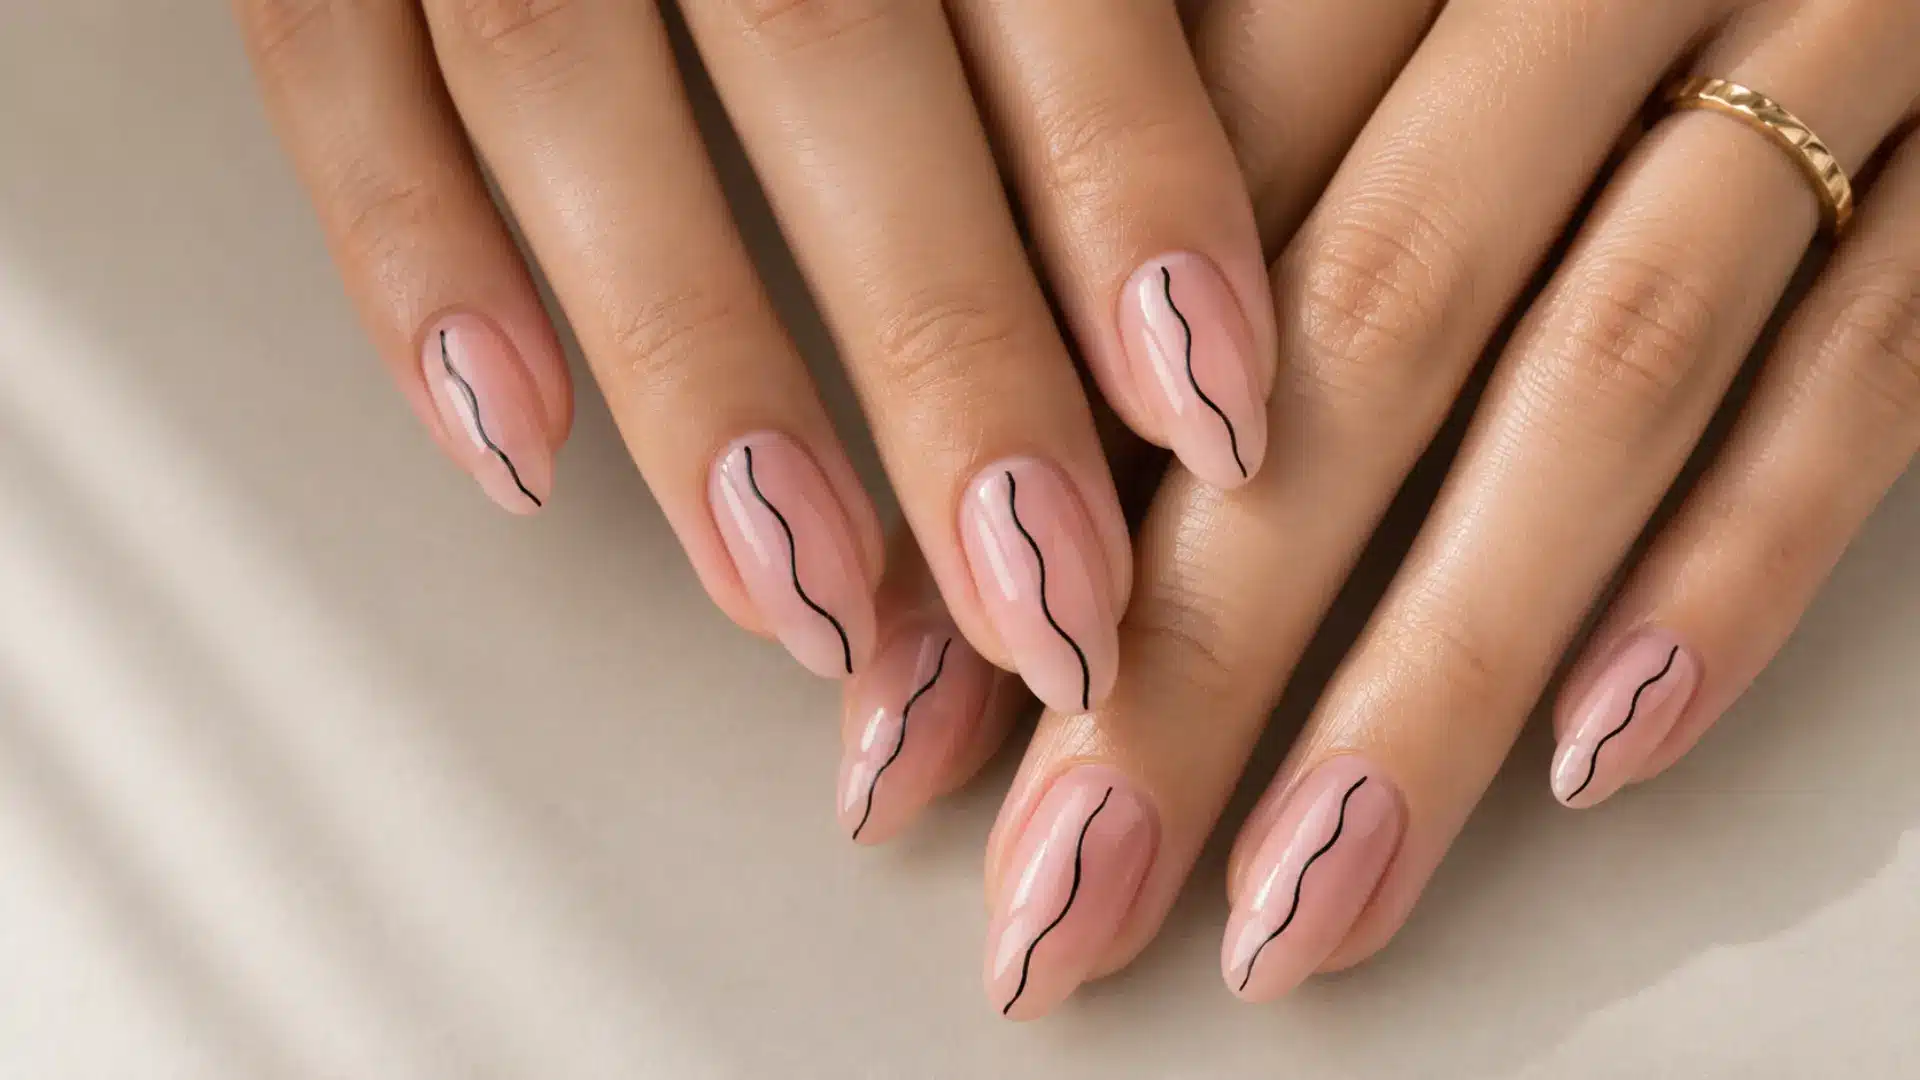
A single curved or wavy line drawn freehand across the nail. It doesn’t need to be perfect. The slight imperfection is what makes it feel hand-done rather than stamped, and that quality is the whole point.
- Best nail shape: Any. The curve softens square nails and adds character to almond.
- Tools needed: Thin liner brush, gel paint in black, white, or a soft contrast
- Difficulty: Easy. The imperfection is intentional.
- Finish: Glossy
Dilute your gel paint slightly with a nail cleanser for a thinner, more fluid line. Practice the motion in the air before touching the brush to the nail.
16. Single-Dot Accent Nail
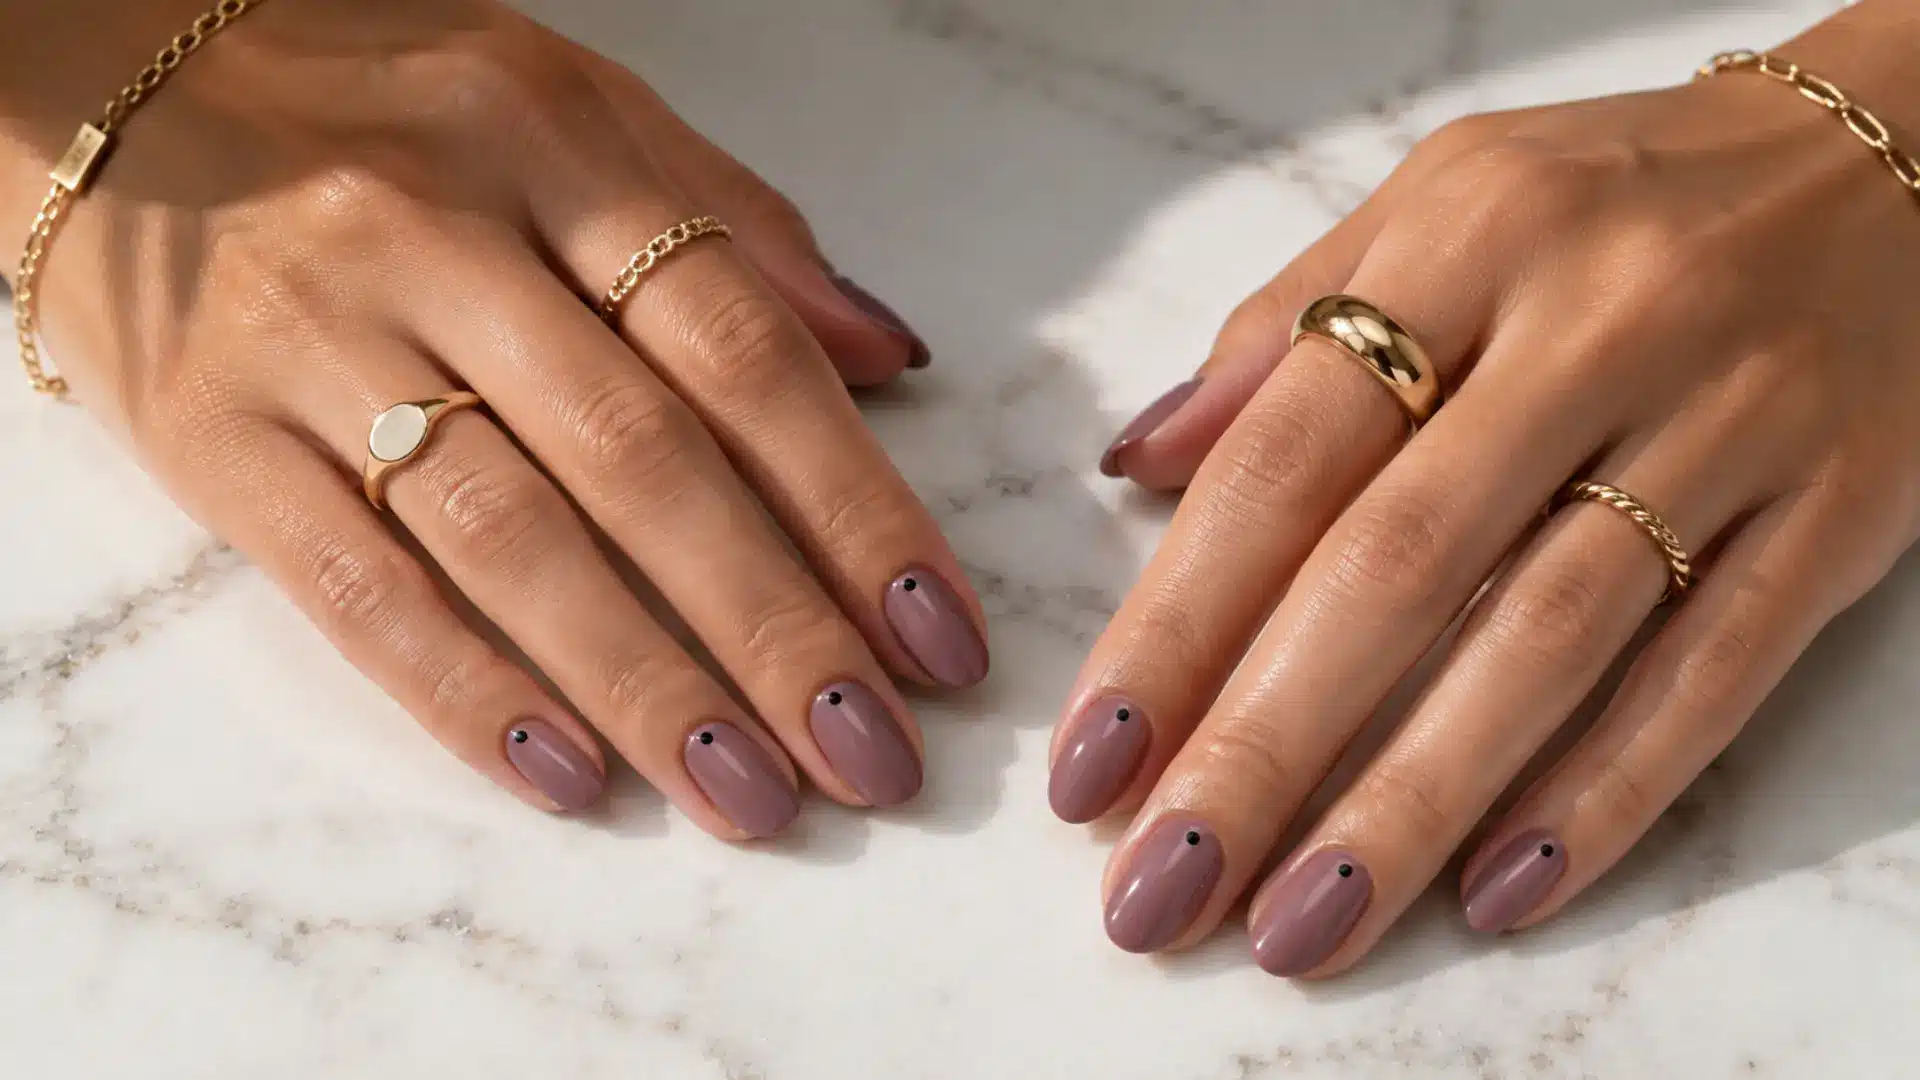
One small dot is placed near the cuticle or base of the nail. Just one. A single precise dot in black, white, or gold on a clean nude or pastel base reads deliberate and finished.
This approach works especially well on soft-toned bases. If you’re drawn to muted shades, these mauve nail designs use the same single-detail restraint on a dusty pink-purple palette.
- Best nail shape: All shapes
- Tools needed: Dotting tool or the blunt end of a bobby pin
- Difficulty: Very easy
- Finish: Glossy
Size matters here. A dot too large becomes a thumbprint. aim for 2 to 3mm for a clean result.
Soft Color Minimalist Nail Designs
Sometimes a color is the design. These shades carry everything on their own, no pattern needed.
Each reads differently depending on skin tone and finish, so the same color can look like two entirely different decisions on two different people.
If you are choosing a shade to last through multiple seasons, lean toward muted undertones over saturated ones.
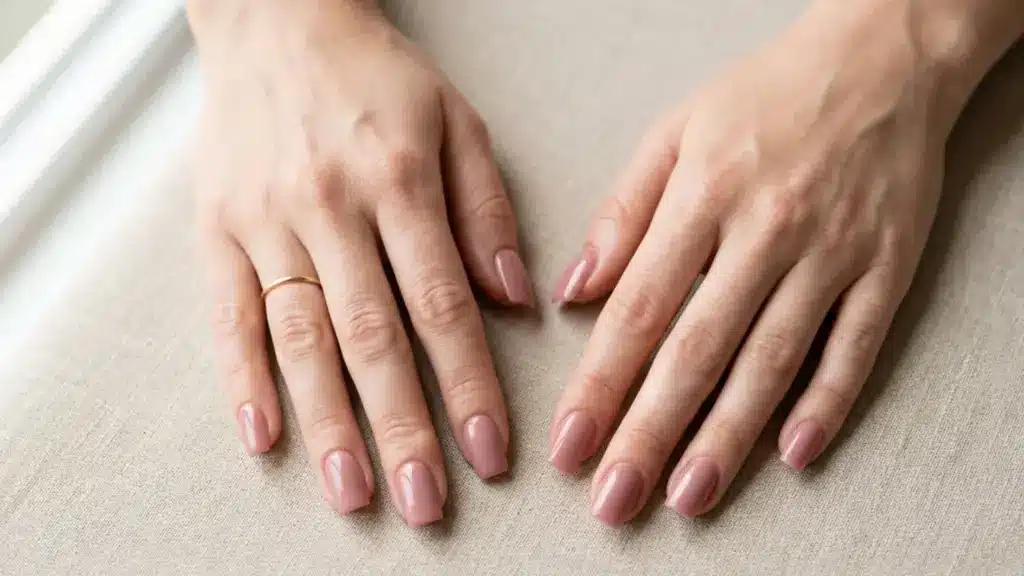
17. Minimalist Mauve Nails
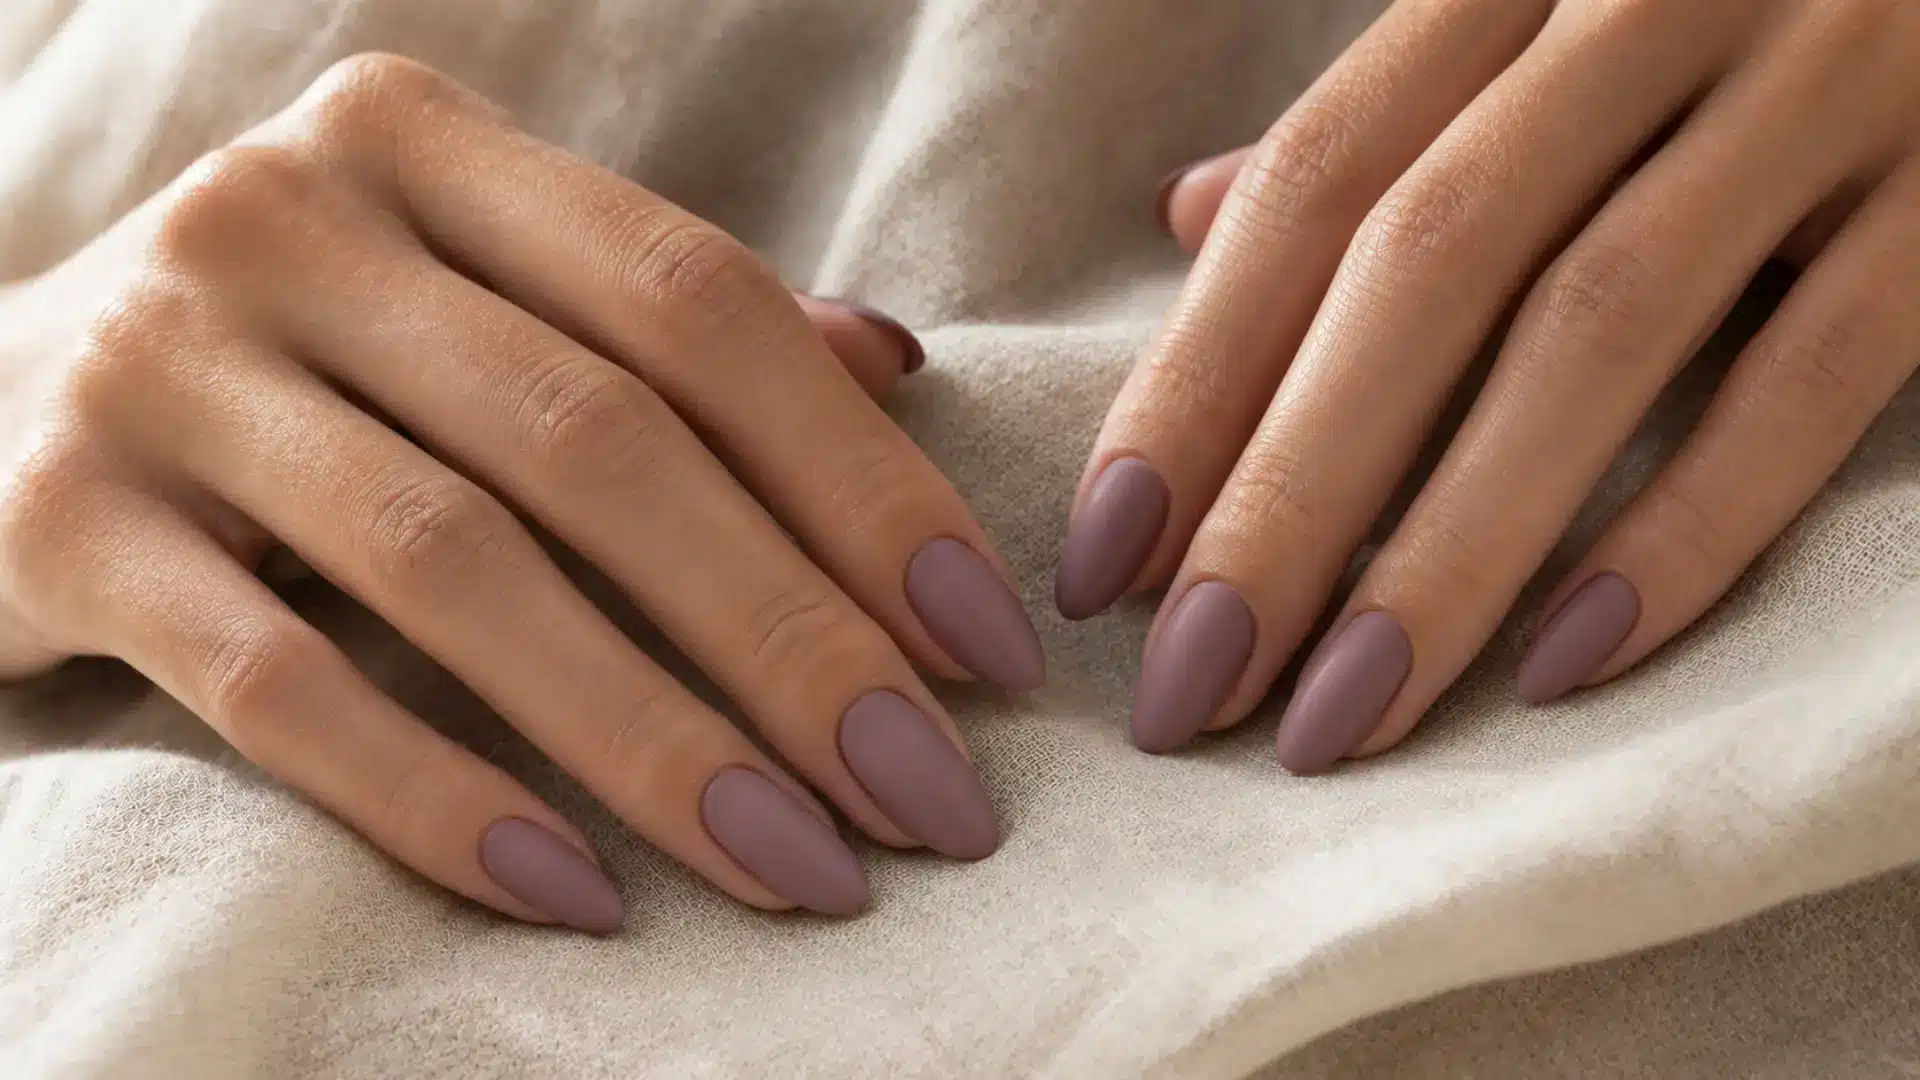
A dusty, muted pink-purple applied as a clean single color. Mauve sits between neutral and color, which is exactly why it reads as a minimalist choice despite having real presence.
It suits warm, cool, and neutral skin tones, which few shades can honestly claim.
- Best nail shape: All shapes, particularly flattering on oval and almond shapes
- Tools needed: Mauve polish or gel in a semi-opaque formula
- Difficulty: Very easy
- Finish: Matte for a modern feel, glossy for a classic one
A warm-toned mauve (more pink than purple) suits medium to deep skin tones. A cooler, grayer mauve suits fair to medium tones.
18. Butter Yellow Nails
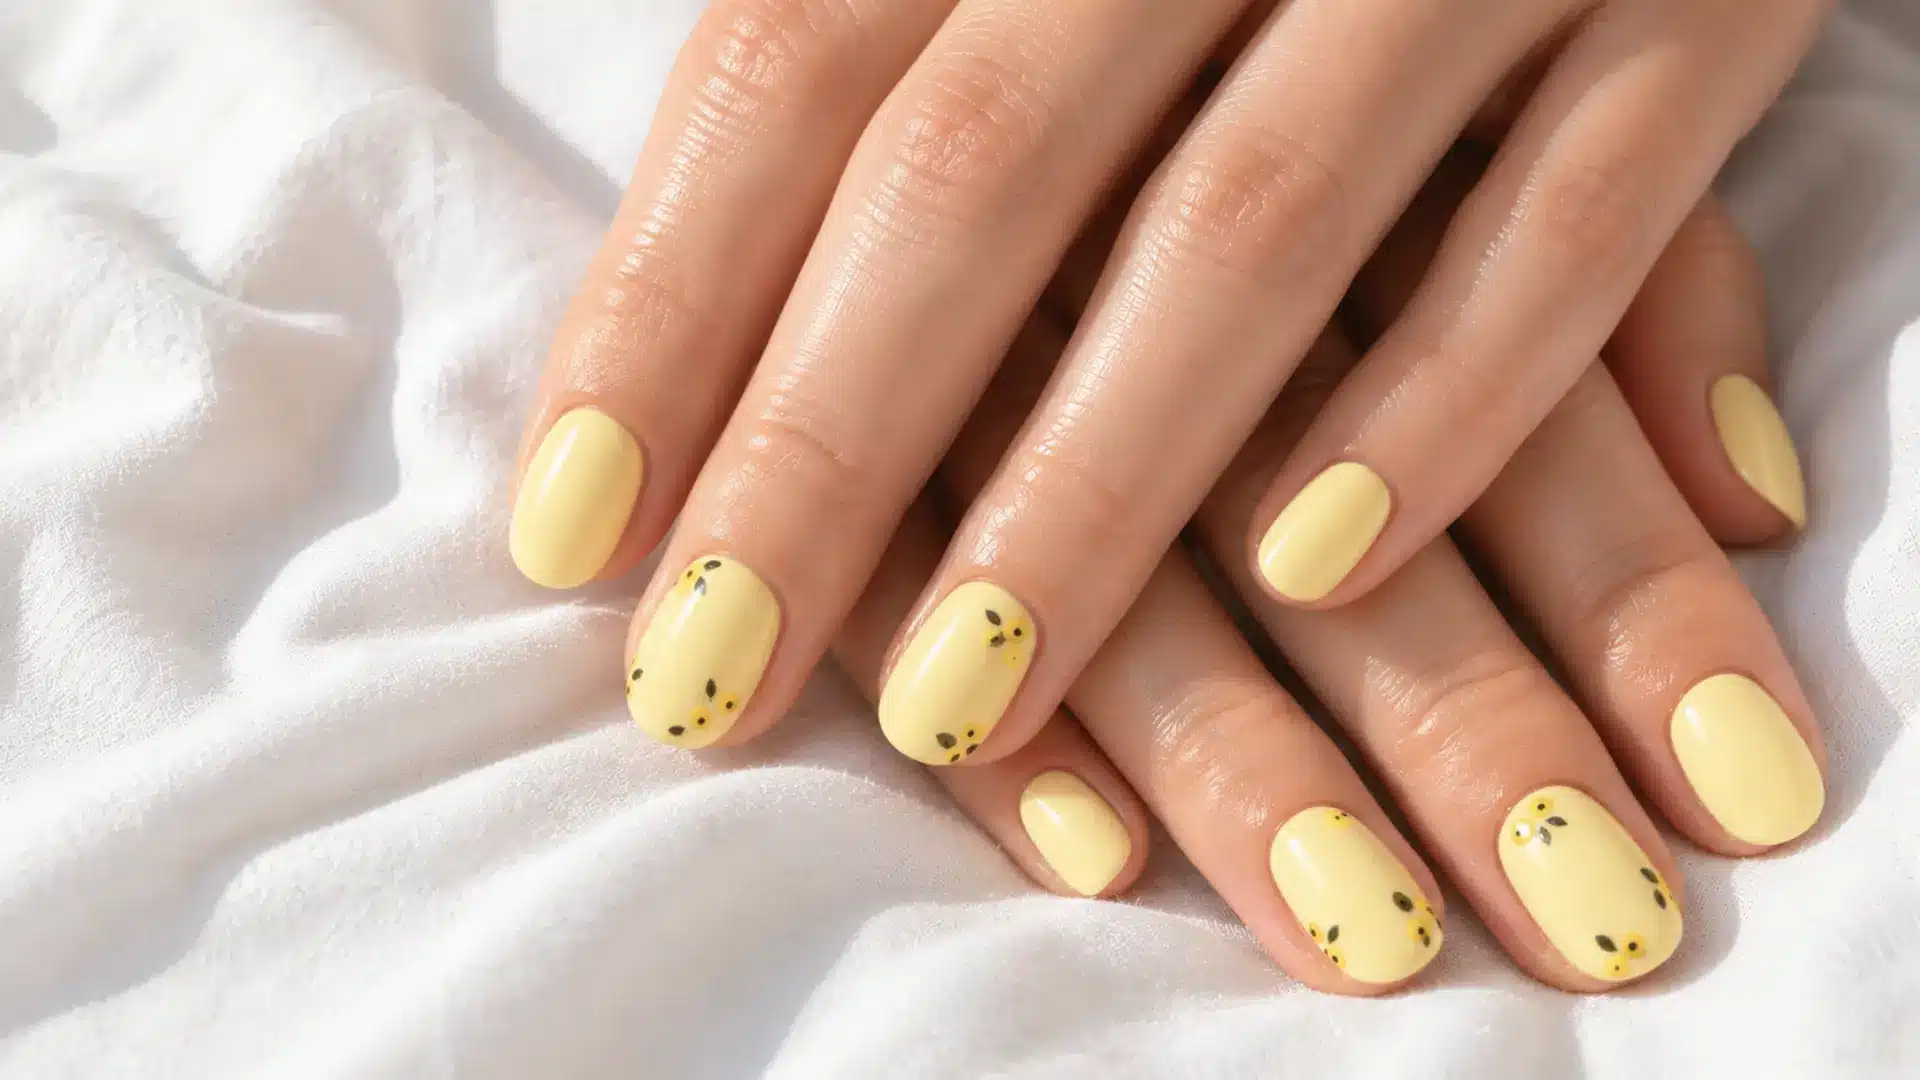
A soft, warm yellow that sits closer to cream than bright lemon. The muted quality keeps it in minimalist territory.
It became one of the defining shades of the latest nail trends and works particularly well as a spring and summer color.
- Best nail shape: Round or squoval for a softer look
- Tools needed: Butter yellow polish in a creamy formula
- Difficulty: Very easy
- Finish: Glossy
Apply over a nude base coat for a smoother, more even result. Creamy yellows can be patchy on the first coat.
19. Sage Green Matte Nails
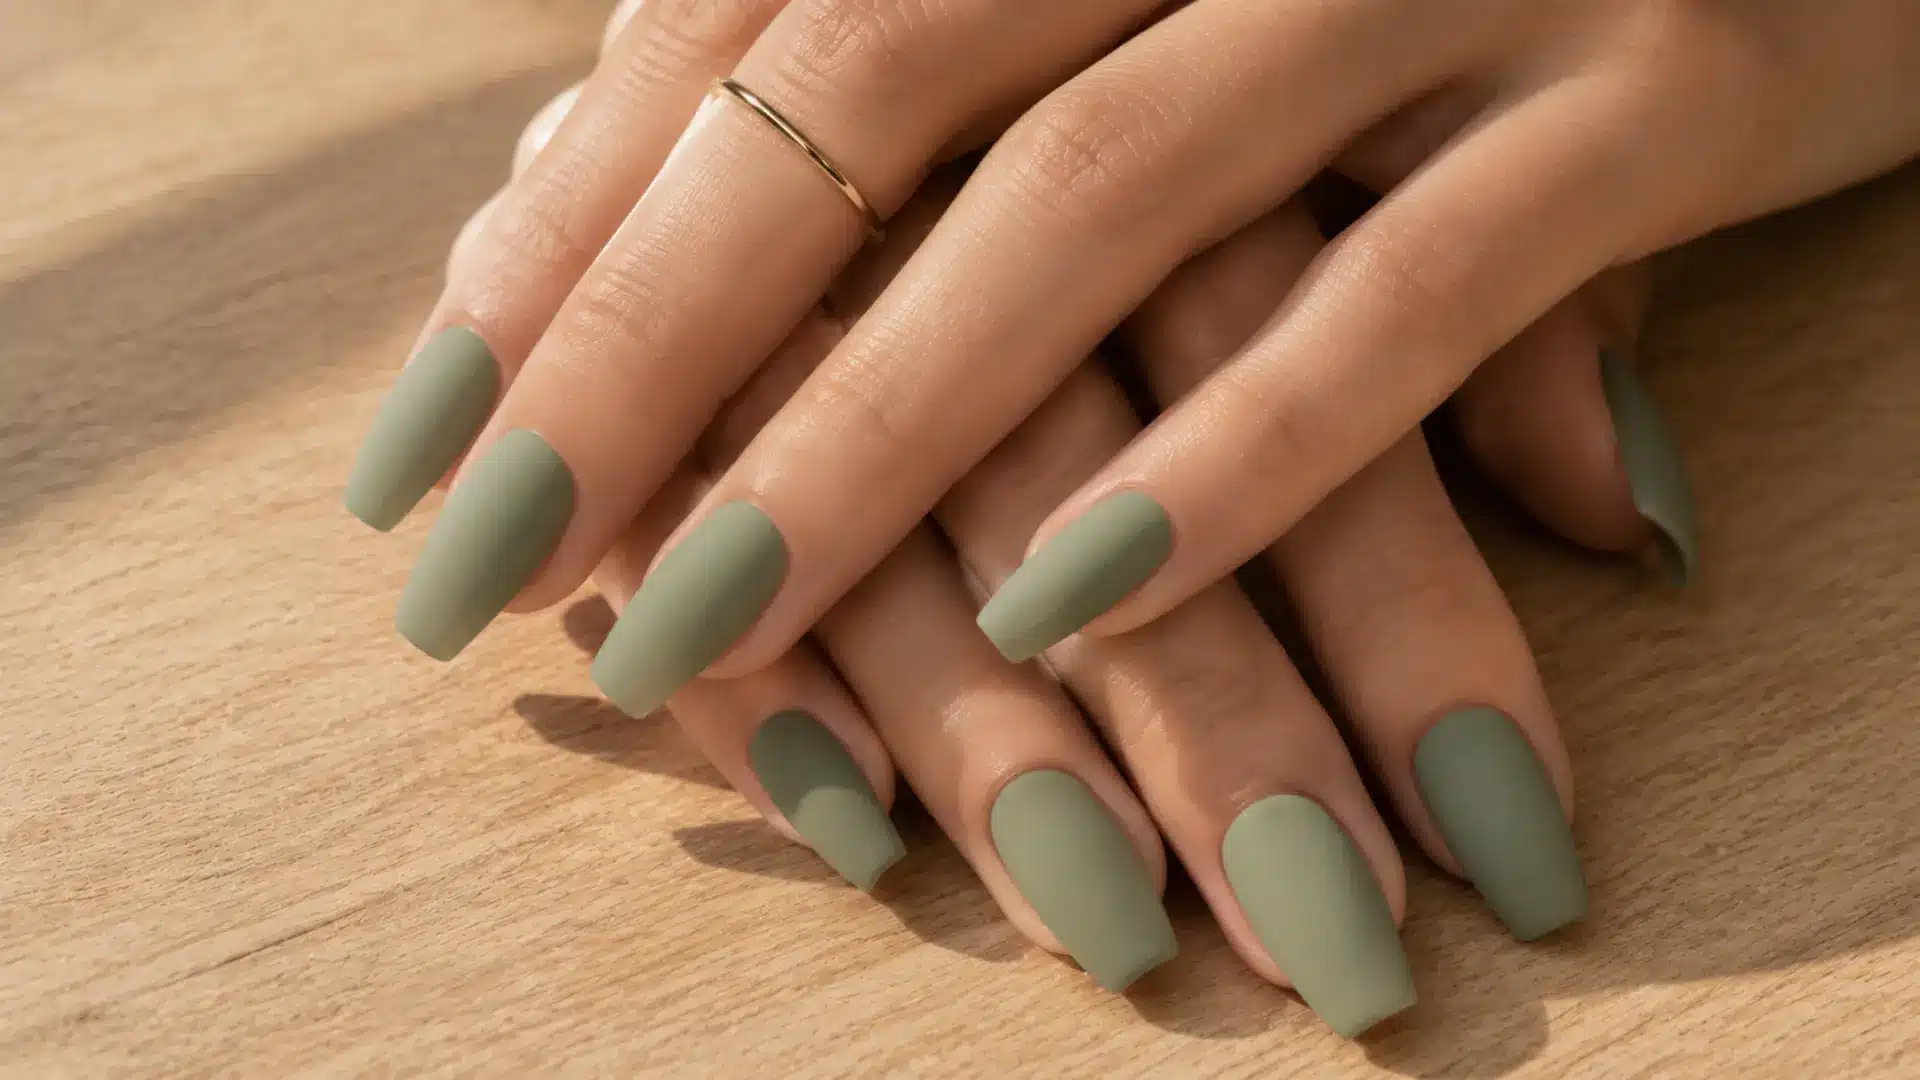
A dusty, earthy green in a matte finish. The matte is what keeps sage from looking seasonal and gives it a worn-in, considered quality instead.
This design translates across seasons, from spring through autumn.
If you want to explore the full range of what sage can do as a nail color, our sage green nail ideas list covers styles from chrome to French tip variations.
- Best nail shape: Coffin or square for an editorial feel; oval to soften it
- Tools needed: Sage green gel or polish, matte top coat
- Difficulty: Easy
- Finish: Matte. This is non-negotiable for the design to read correctly.
Pair with gold jewelry. The contrast between earthy green and warm metal is one of those combinations that’s hard to fault.
20. Blush Pink Matte Nails
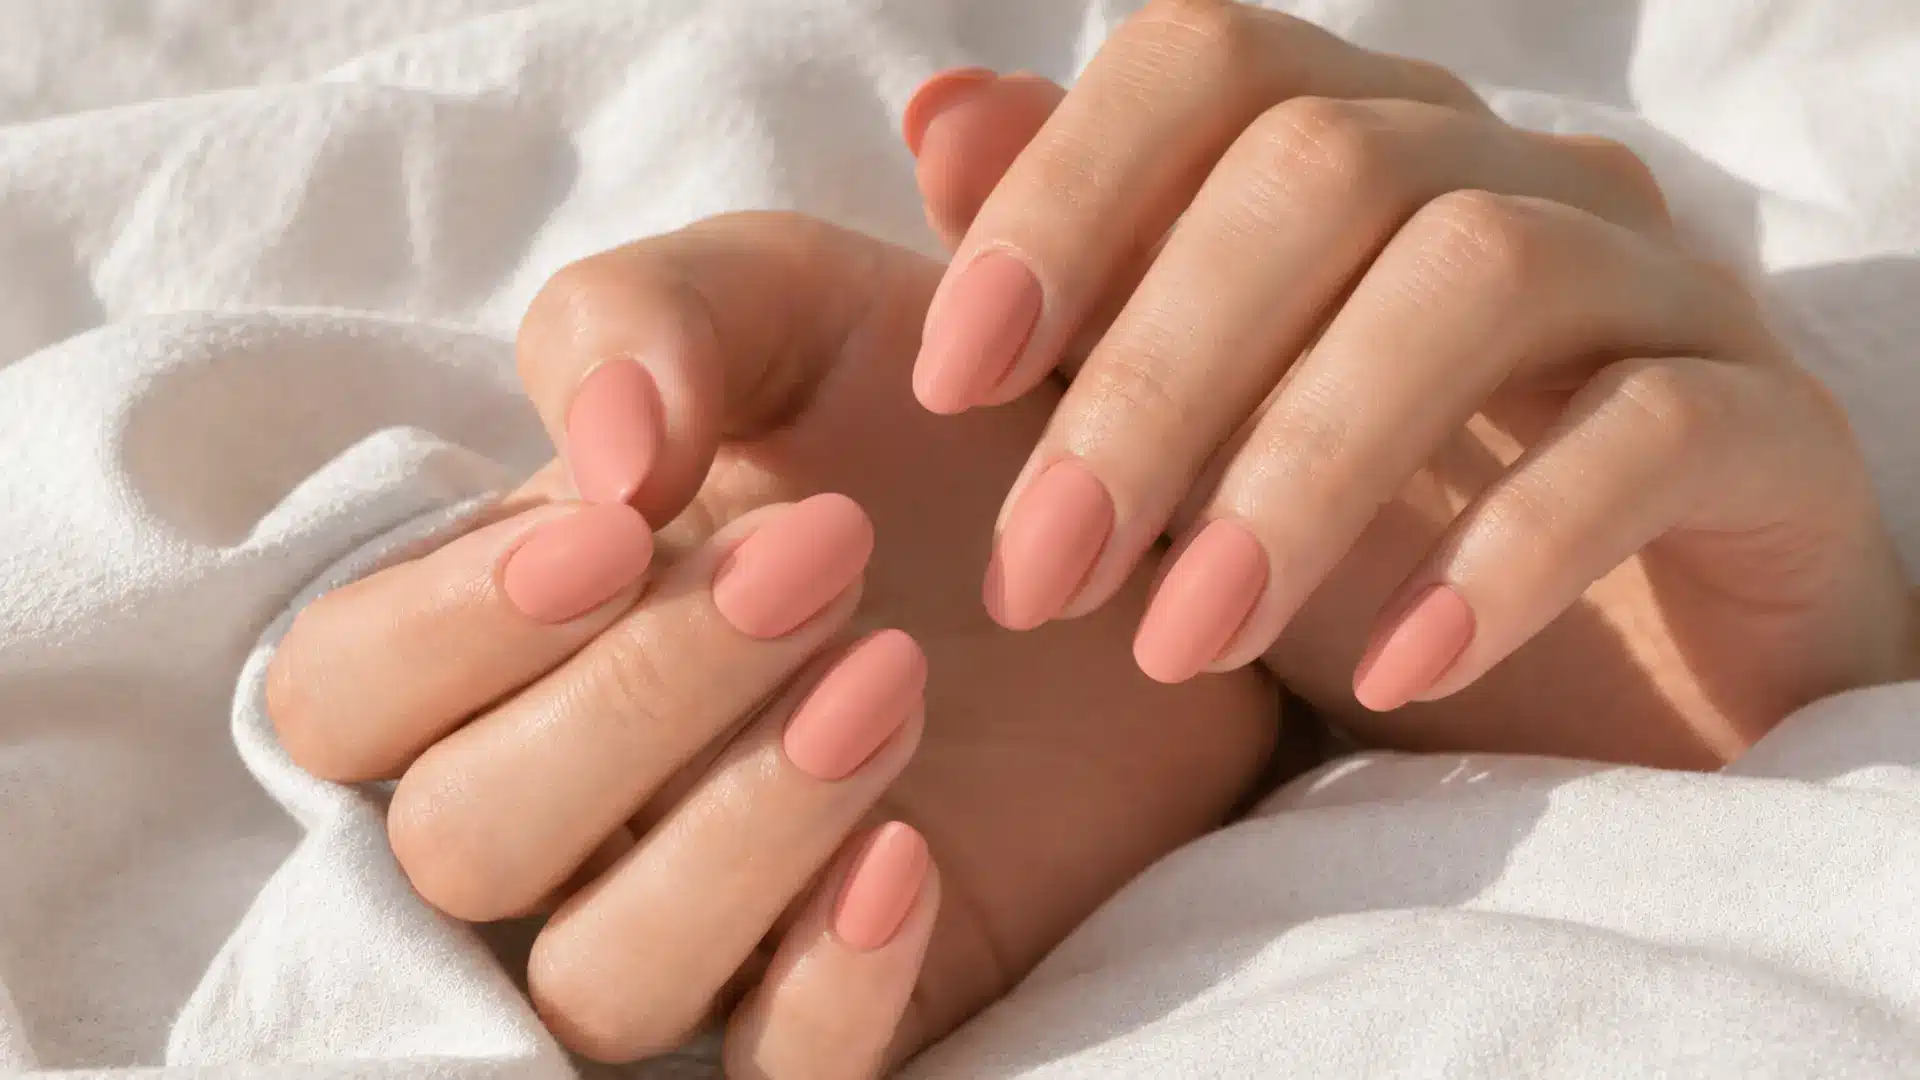
A warm, peachy-pink in a matte finish. The softness of the color and the flatness of the finish together create something that looks almost fabric-like on the nail.
It works for a work meeting and a wedding in the same week without any adjustment.
- Best nail shape: All shapes
- Tools needed: Blush or peachy-pink polish, matte top coat
- Difficulty: Very easy
- Finish: Matte
Reapply matte top coat every two or three days. It dulls faster than gloss, and the whole effect depends on keeping the surface properly flat.
21. Sheer Lavender Nails
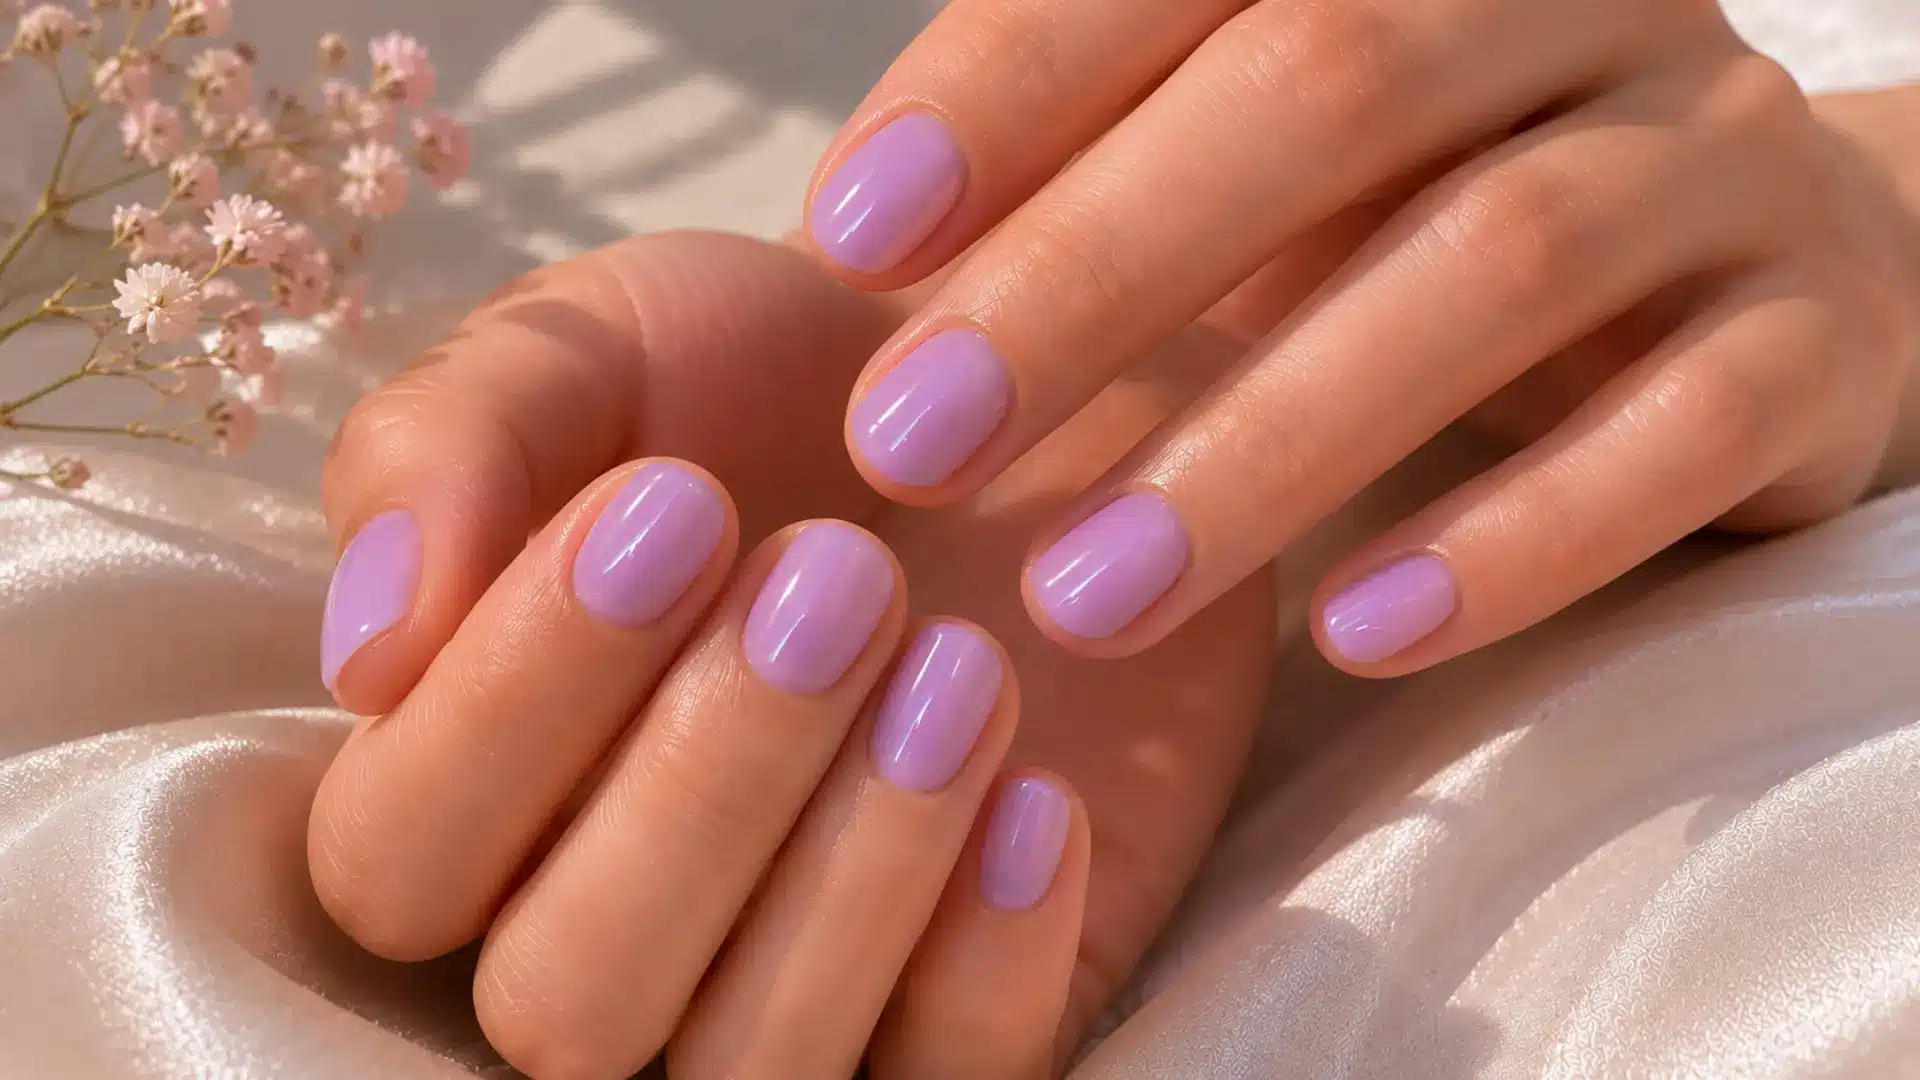
A barely-there wash of purple-pink, almost like the nail has been stained rather than painted. The sheerness is what makes this a minimalist design.
It’s translucent enough that the natural nail shows through, but with a distinctly soft, feminine tint.
- Best nail shape: Short, round, or oval
- Tools needed: Sheer or tinted lavender polish
- Difficulty: Very easy
- Finish: Glossy
Build in two thin coats for slightly more color presence, or stay at one for the bare-nail effect.
Subtle Embellishments and Texture Nail Designs
One detail, placed well, can do more than a fully decorated set. These ideas use minimal materials (a piece of foil, a single stone, a small brush) to add something specific without crowding the nail.
The restraint in stopping at one element is exactly what keeps them in minimalist territory.
22. Gold Foil Accent Nail
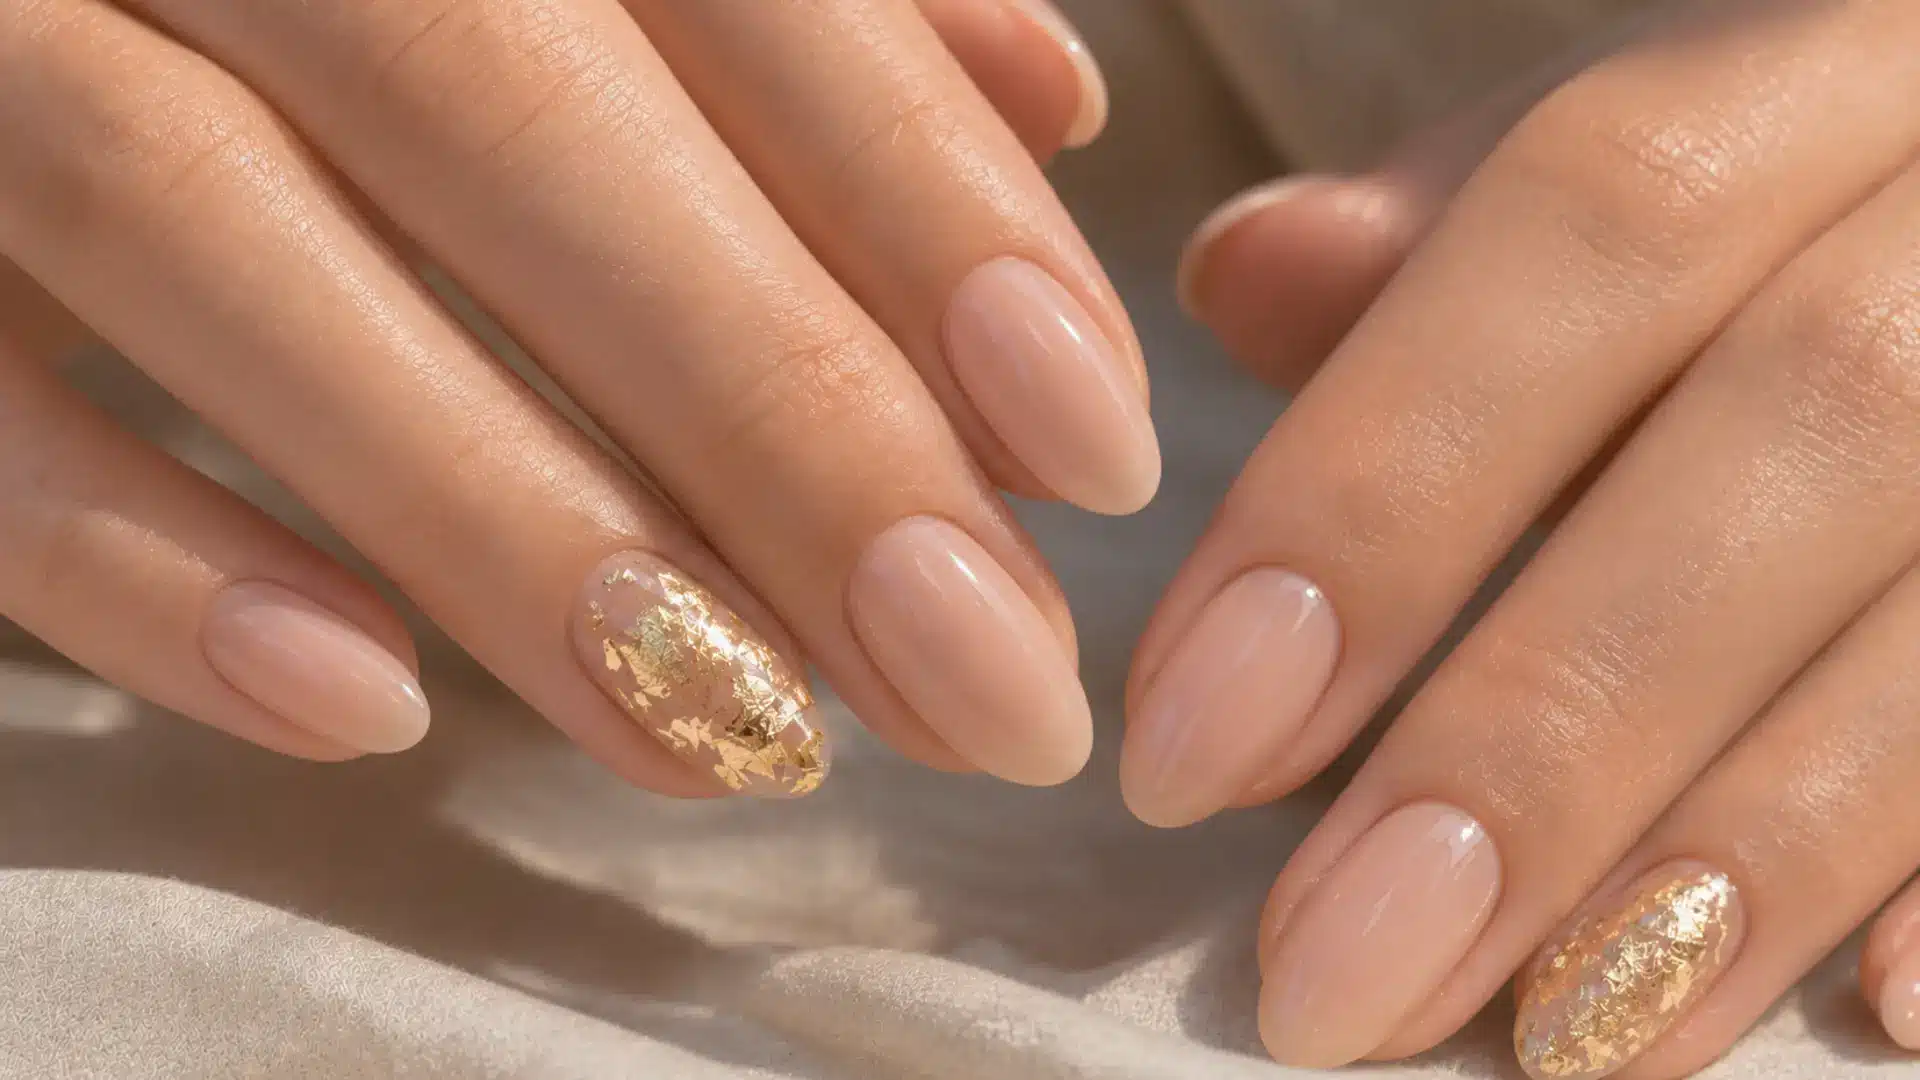
Small, irregular pieces of gold leaf or foil pressed onto a cured base, mostly on one accent nail. The foil catches light differently as the hand moves, creating a dynamic finish that no polish alone replicates.
- Best nail shape: Almond or coffin. Longer nails give the foil room to land naturally.
- Tools needed: Gold foil sheets, tweezers, gel top coat
- Difficulty: Easy. The irregularity of foil placement is intentional.
- Finish: Seal with glossy top coat to flatten and protect
Press the foil with a silicone tool rather than your finger. Finger oils dull the finish and reduce adhesion.
23. Pearl Detail Nail
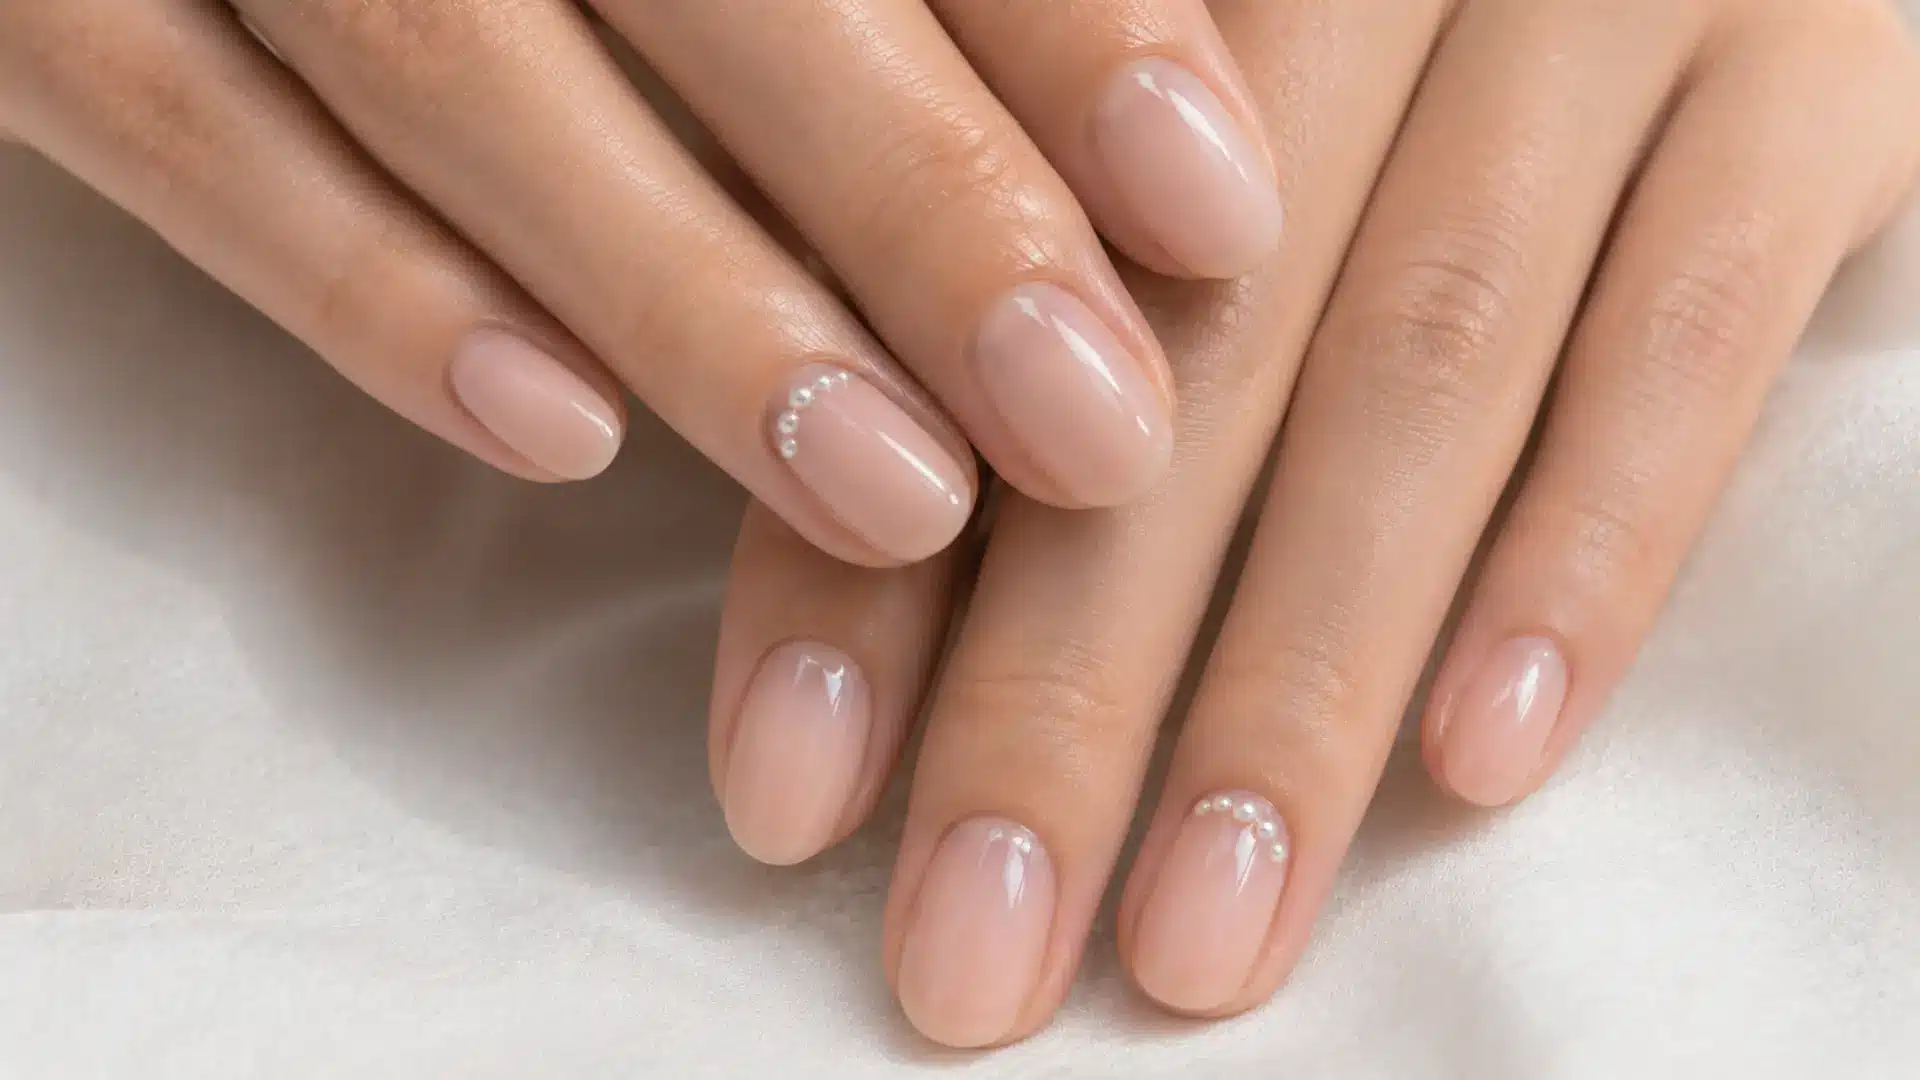
A few small pearl beads are placed near the cuticle or arranged in a loose cluster on one or two nails.
Pearls on nails have a long tradition in South Asian wedding manicures, and they’ve moved into everyday minimalist looks through the broader quiet luxury trend.
I love how much a single cluster near the base changes the feel of a plain nude nail.
- Best nail shape: Oval and almond. The softness of the pearl suits these shapes.
- Tools needed: Micro nail pearls, gel base for adhesion, top coat
- Difficulty: Easy with tweezers or a dotting tool
- Finish: Glossy top coat over the beads
Press the pearls into a tacky, uncured gel layer, then seal with a thicker top coat to prevent lifting.
24. Chrome Powder Accent
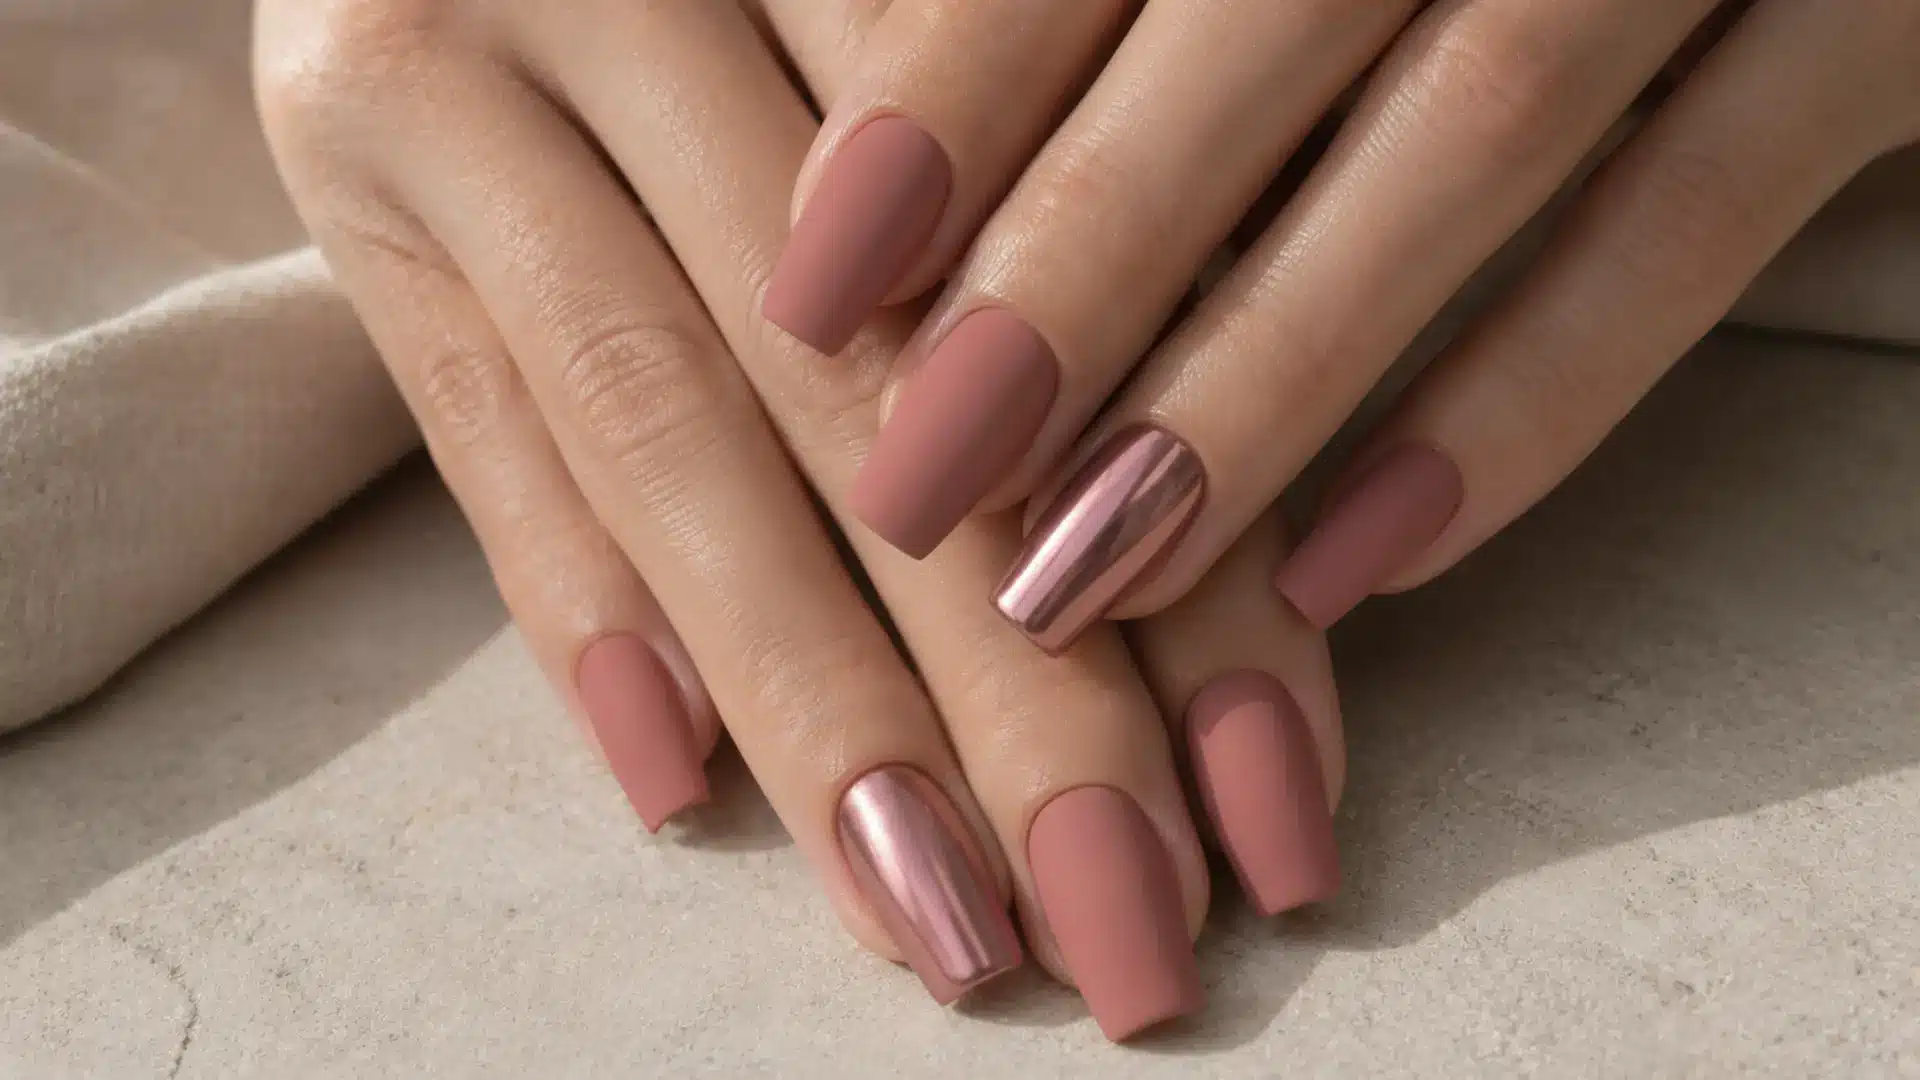
Chrome powder is applied to a single nail or just the tips, while the rest stay in a flat gloss or matte. This creates a tonal contrast (same color family, different finish) that reads more sophisticated than a mismatched accent nail.
- Best nail shape: Almond or coffin
- Tools needed: Chrome powder, silicone applicator, no-wipe gel top coat
- Difficulty: Easy with the right top coat
- Finish: Chrome over gloss base
Apply chrome to a sticky, uncured top coat layer. A fully cured, dry top coat won’t hold the powder.
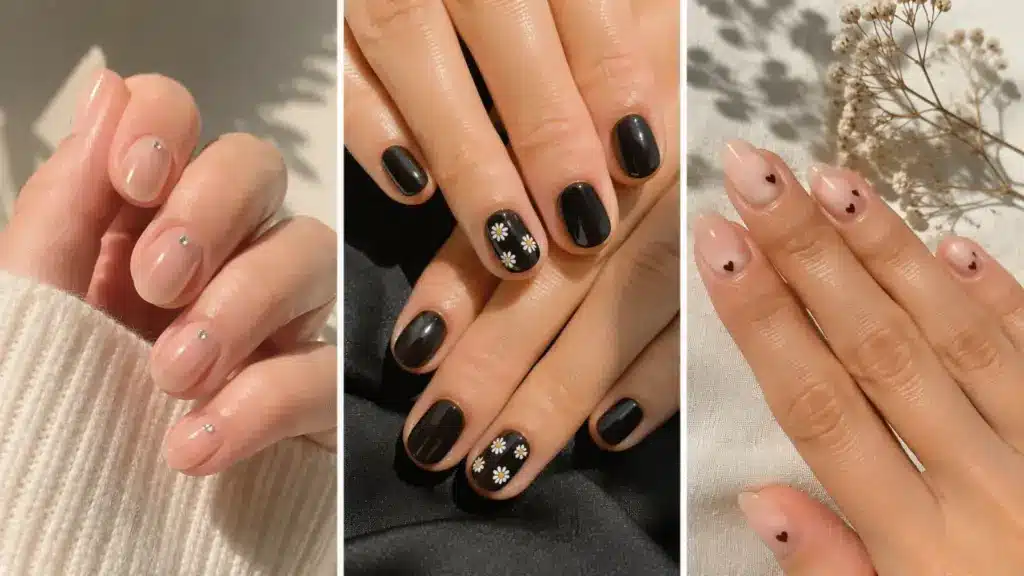
25. Micro Daisy Nail
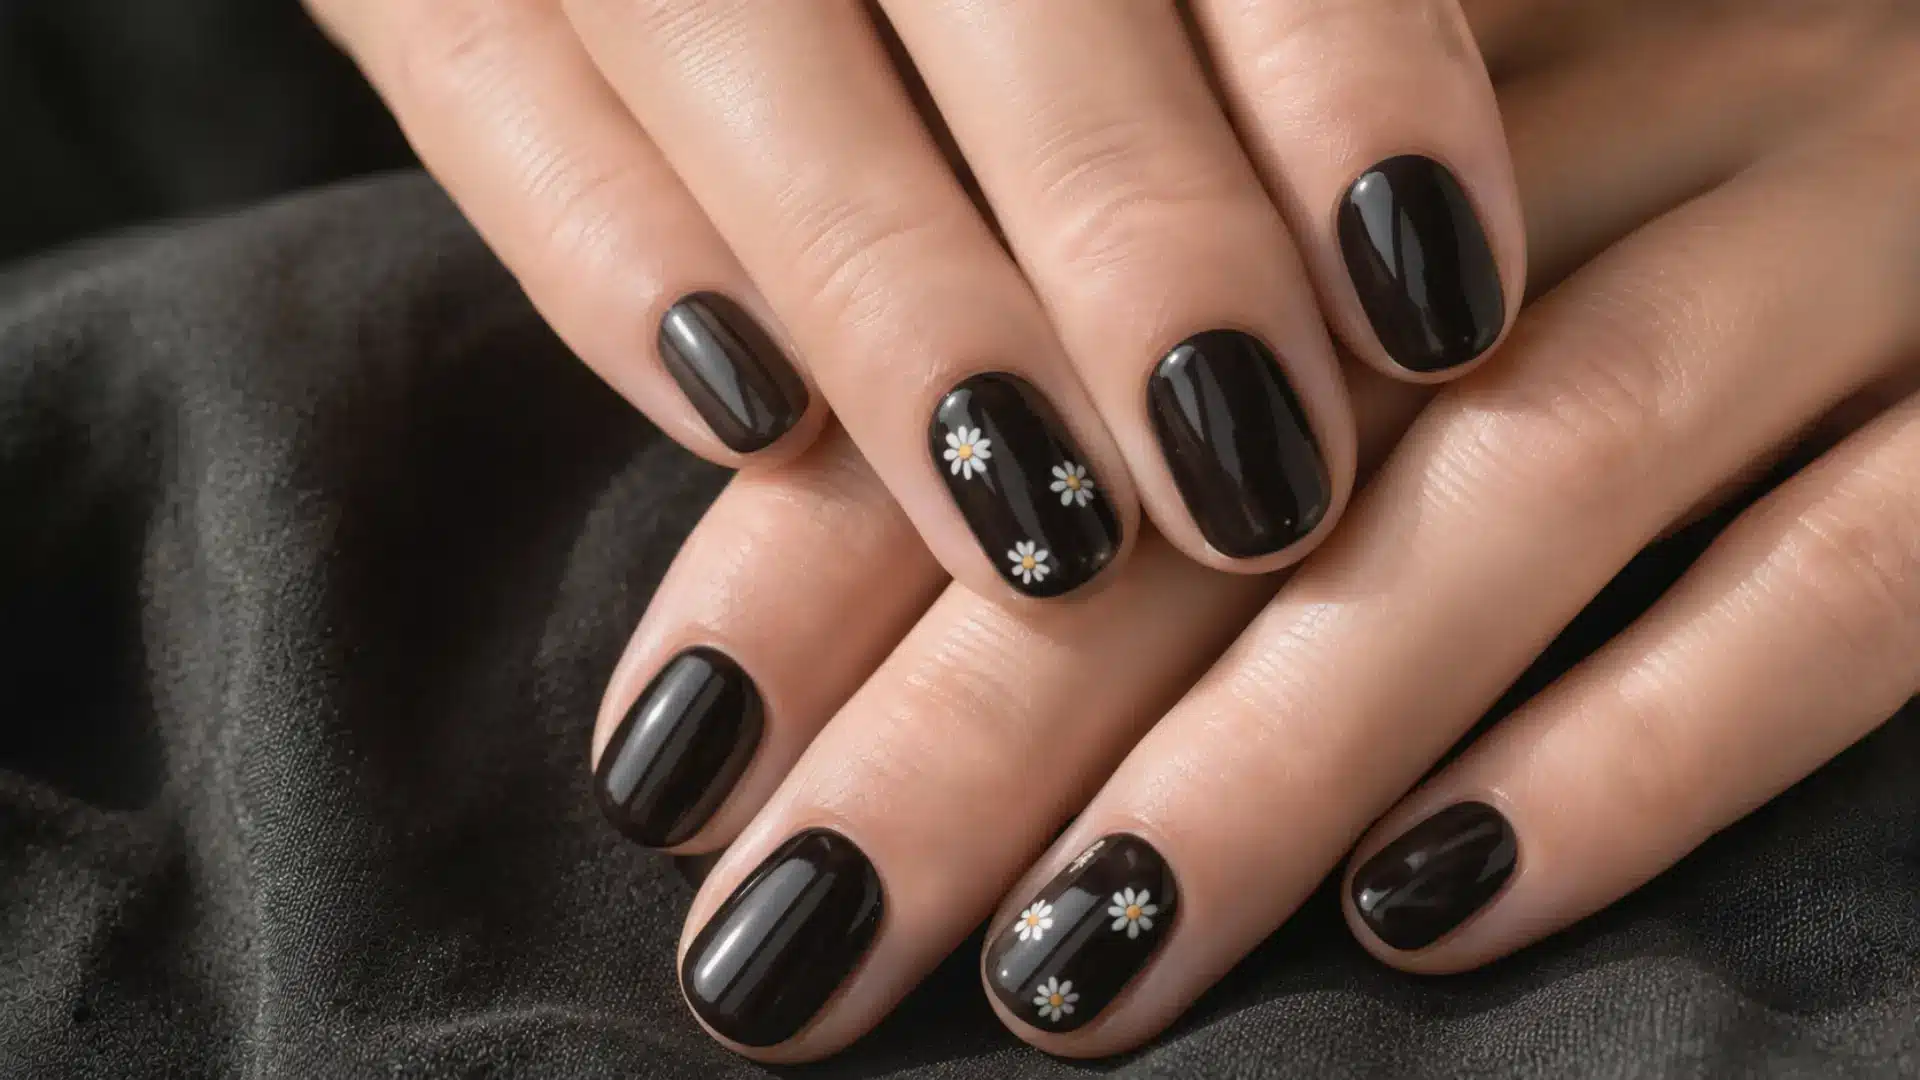
Two or three tiny daisies painted on one or two nails: a nude or white base with small five-petal flowers in white or pale yellow. The flowers are small enough that they read as a texture rather than a full illustration.
- Best nail shape: Round or oval. The softness of these shapes suits the floral detail.
- Tools needed: Dotting tool and thin brush for freehand, or a nail stamp plate with a small daisy design
- Difficulty: Easy to medium, depending on the method
- Finish: Glossy
Keep the petals thin and the center dot small. If the flowers look wallpaper-sized, they’re too big for a minimalist nail.
26. Single Rhinestone Per Nail
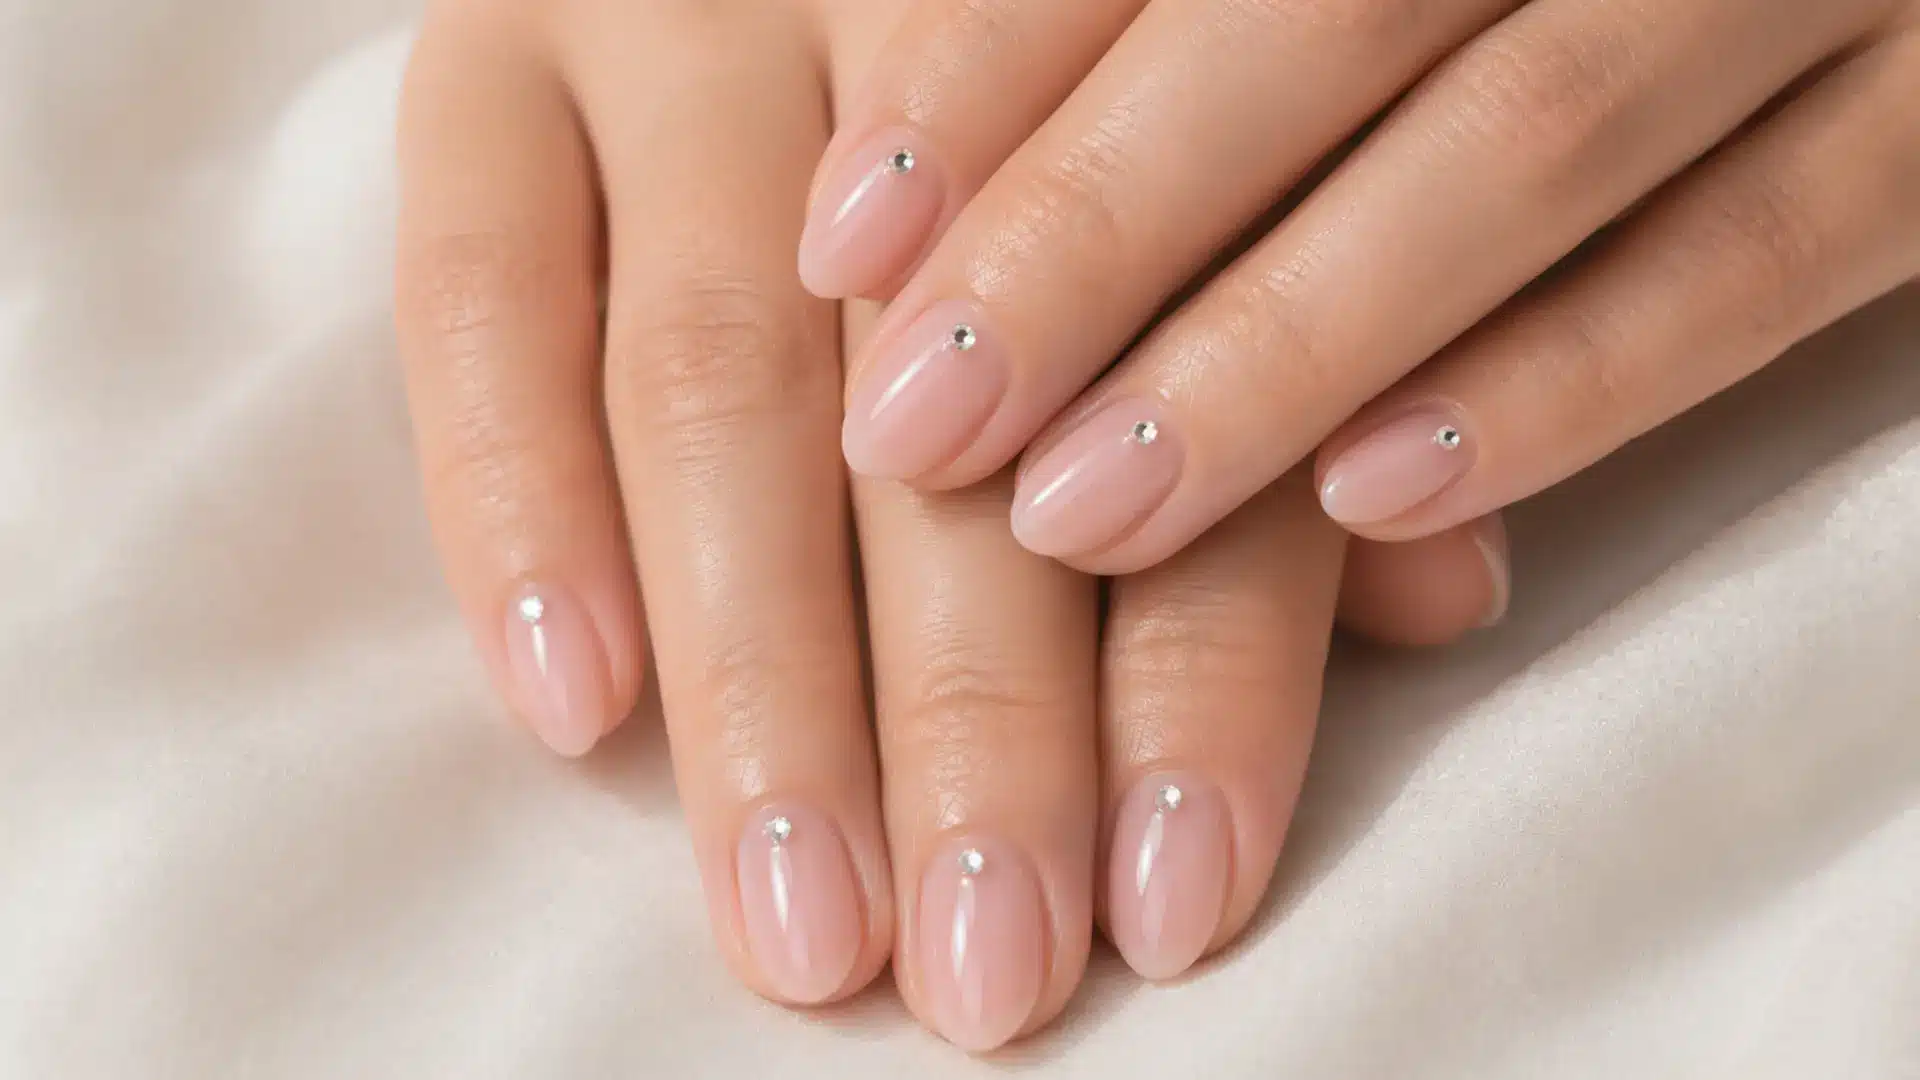
One crystal or rhinestone is placed precisely at the center base of each nail. The symmetry of one stone per nail reads minimal and deliberate. Using the same size and color across all nails keeps this restrained rather than embellished.
- Best nail shape: All shapes
- Tools needed: Micro rhinestones (size SS5 or SS6), dotting tool or orange stick, gel top coat
- Difficulty: Easy. Placement takes patience, not skill.
- Finish: Build a gel top coat around the stone rather than over it
Flat-back rhinestones sit more flush than domed ones and look less bulky under the top coat.
27. Minimalist Heart Dot Nails
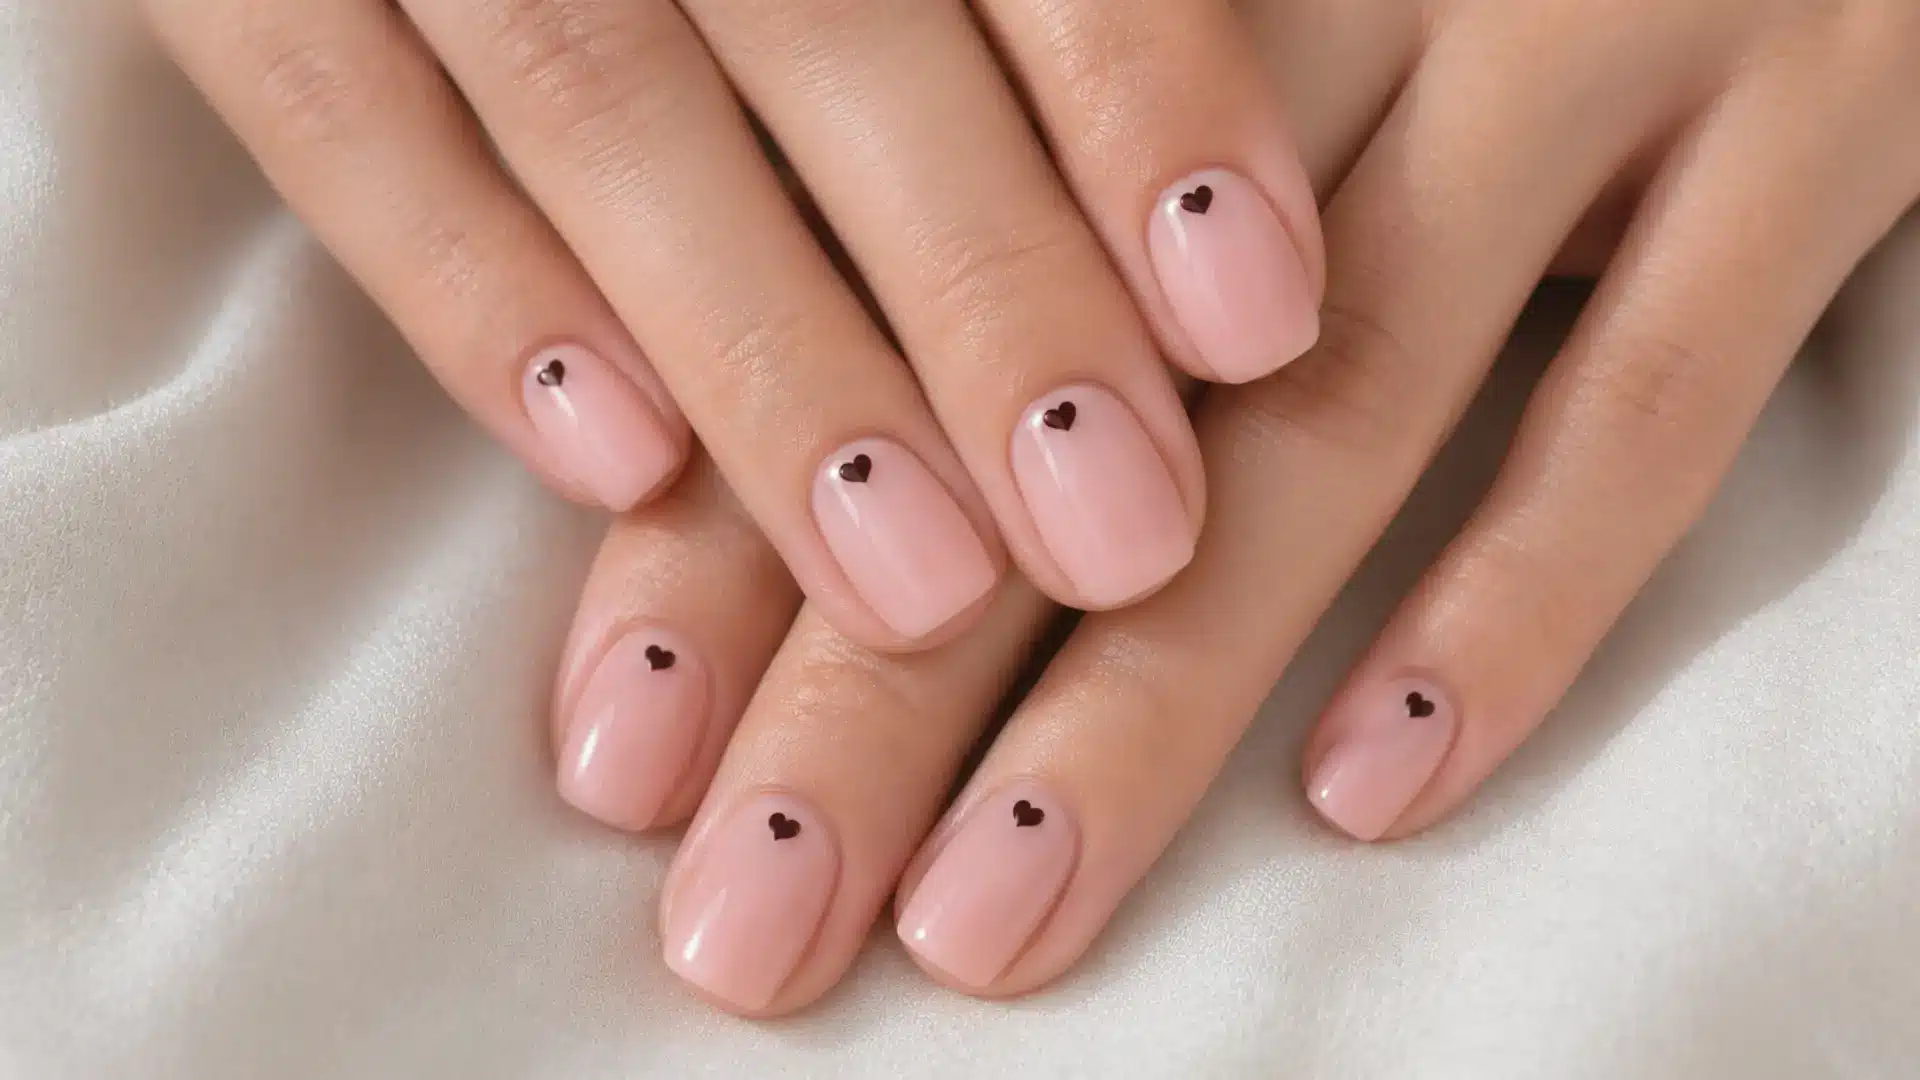
A single small heart drawn with a dotting tool near the center or cuticle of one or two nails. Two dots side by side, meeting at the bottom.
It’s a small gesture that makes a plain manicure feel personal without tipping into heavily decorated territory.
- Best nail shape: All shapes
- Tools needed: Dotting tool (medium size), contrasting polish or gel paint
- Difficulty: Easy
- Finish: Glossy
The two-dot method: place two dots close together at the top, then drag each downward and inward to form the point at the base. Practice once on paper before going to the nail.
Why Minimalist Nail Designs Last Longer than You’d Expect?
The longevity of a minimalist manicure isn’t only about polish quality or top coat. It’s about layer count. Fewer layers mean less thickness at the free edge, which means less leverage for peeling.
A sheer glazed nail with one coat of color and a good top coat can stay chip-free longer than a two-color geometric design with five layers of gel.
A few practical habits extend the life of any minimalist manicure:
- Free-edge sealing: Apply a thin layer of top coat over the nail tip with each application. This is the most vulnerable part.
- Top coat refresh: Reapply every three to four days rather than waiting for the first chip.
- Water window: Avoid prolonged water exposure in the first 24 hours after painting. The polish is still settling.
- Cuticle oil: Hydrated nail beds flex rather than crack, so the polish moves with the nail instead of against it.
None of these requires extra products. They just require the habit.
Conclusion
Minimalist nail designs reward the same quality you bring to any considered choice: a little patience and a clear idea of what you actually want on your nails.
Any of the above designs in this list can be done at home with a basic nail kit and a bit of patience.
The techniques that feel most intimidating (liner brush work, foil placement, chrome powder) usually just need one practice run on paper or a popsicle stick before you touch the actual nail.
Pick one idea, test it on two fingers first, and see how it wears through a week of ordinary use. That is how classy easy nail art habits form: one design that works, repeated until it becomes routine.
Drop your favorite design in the comments below, or save this post for your next salon visit. I’d genuinely like to know which of the twenty-seven lands is for you.
Frequently Asked Questions
What Nail Shapes Look Best with Minimalist Nail Designs?
Oval and almond shapes suit most minimalist styles because their natural curve reads polished even on a plain base.
Square and squoval shapes work well for geometric designs like grids, single lines, and negative space art. Round shapes are the most forgiving for beginners working with a liner brush for the first time.
How Long Do Minimalist Nail Designs Last at Home?
A well-applied gel minimalist manicure typically lasts two to three weeks with a regular top coat refresh. Regular polish lasts closer to five to seven days before tip wear becomes visible.
The simpler the design, the fewer layers, and the fewer layers mean less peeling at the free edge.
Can Minimalist Nail Art Work on Very Short Nails?
Most designs in this list are well-suited to short nails. Micro-French tips, single dots, sheer glazed bases, and single-line nails all work within a small nail bed.
The main adjustment is scale: on short nails, keep dots smaller, lines thinner, and rhinestones in a smaller size (SS5 rather than SS10).
What is the Difference Between Minimalist Nail Art and Plain Polish?
Plain polish is one color applied flat with no additional detail. Minimalist nail art includes a deliberate design choice: a thin line, a placed rhinestone, a negative space shape, and a chrome finish.
The design elements are subtle, but they’re there. The distinction matters most when you’re describing a look to a nail technician.