That head-turning bronze that looks like you’ve spent a week in the Caribbean, but you never even touched a ray of sunlight. Yeah, that’s a spray tan done right.
A good spray tan can look effortless in photos, yet many first-timers still hesitate before booking their appointment.
Concerns about uneven color, overly dark results, or not knowing what happens during the process are completely normal. As a licensed aesthetician, I’ve heard every version of that hesitation from clients sitting in the chair for the first time.
Looking at spray tan before-and-after examples often sparks curiosity, but understanding what actually happens to the skin makes the experience far less intimidating.
This guide covers all the essentials of spray tanning before and after in plain terms — from how DHA works on your skin and how to prep, to what to realistically expect at every stage of the process.
How Tanning Really Works on Your Skin?
Skin tanning is simply the body’s natural response to light. When ultraviolet rays from the sun reach the skin, cells begin producing melanin, the pigment that gives skin a deeper tone.
As the American Academy of Dermatology(AAD) explains, this increase in melanin occurs because the skin attempts to protect the deeper layers from UV damage.
Spray tanning works very differently. Instead of triggering melanin, professional solutions contain DHA (dihydroxyacetone), a sugar-based ingredient that reacts only with proteins in the outermost layer of skin.
The reaction forms a temporary pigment that looks like a tan but stays on the surface and fades naturally as skin renews.
The U.S. Food and Drug Administration explains that DHA has been approved as a color additive for external use in sunless tanning products for over 50 years, making it one of the most thoroughly reviewed ingredients in cosmetic skin care.
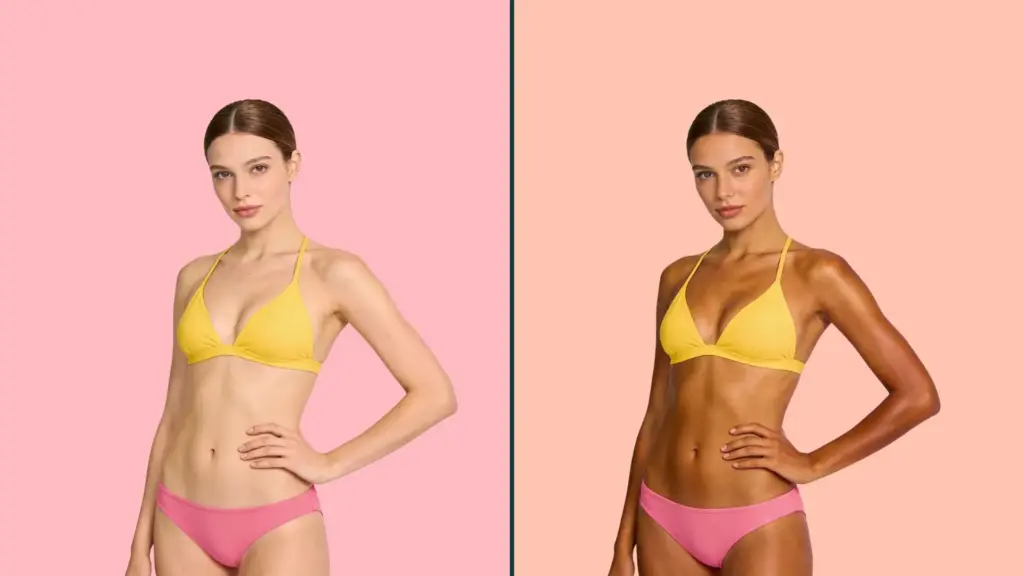
Spray Tan Before and After: The Result
Understanding spray tan before and after results helps set clear expectations before your appointment.
Before a spray tan, skin tone appears natural, and dry areas like elbows, knees, and ankles may look slightly dull or uneven.
Right after the session, the skin often appears darker due to a temporary cosmetic bronzer applied with the solution. This is not the final color.
Over the next 8 to 24 hours, dihydroxyacetone (DHA) reacts with amino acids in the outer layer of the skin to create a more natural-looking tan.
After the first rinse, the bronzer washes away, revealing a smoother, even tone.
Final results depend on proper preparation, skin type, and aftercare, all of which influence how balanced and long-lasting the spray tan appears.
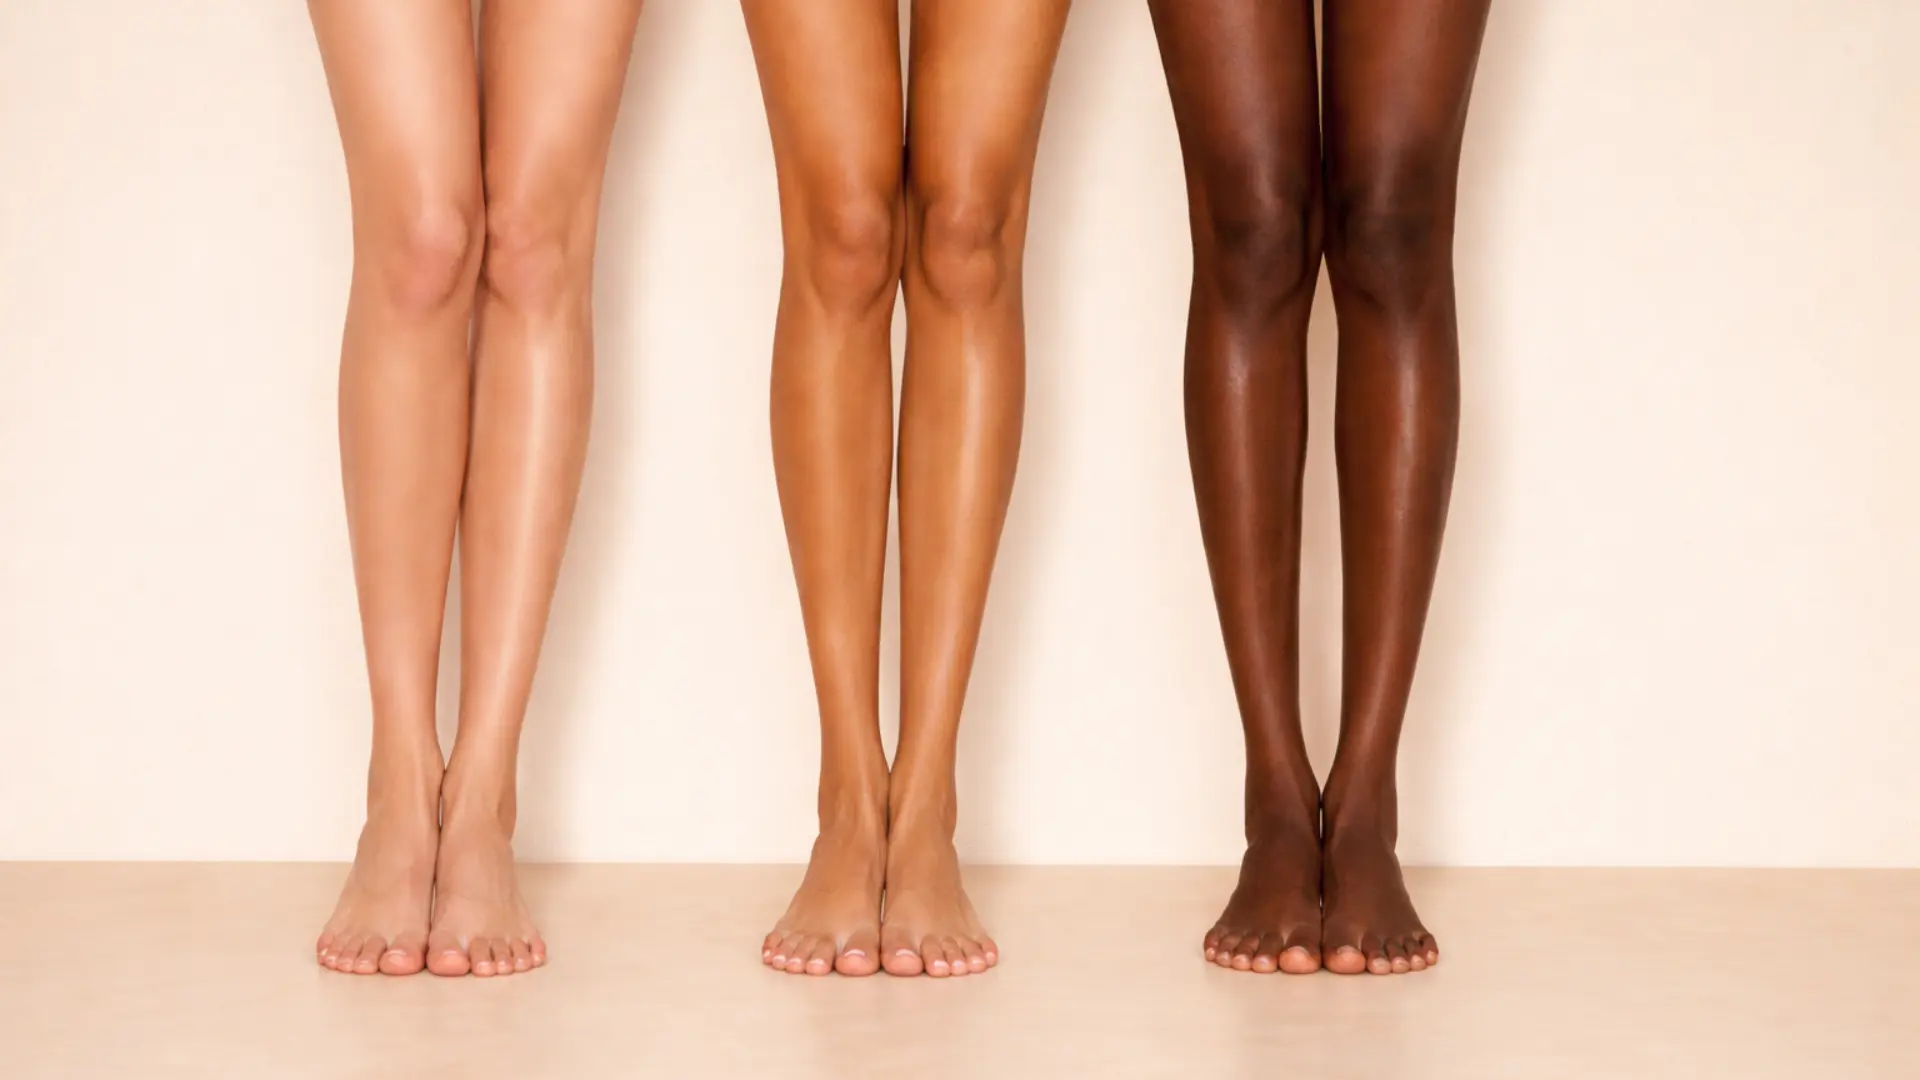
The spray tan before and after transformation also varies noticeably by skin type. Fair skin tends to shift from a pale or neutral base to a warm golden tone.
Medium skin tones develop a deeper bronze, while olive and darker skin tones gain a richer, more defined glow.
Dry skin areas like shins, elbows, and ankles are the spots most likely to absorb unevenly, which is why targeted prep on those areas makes a visible difference in the final result.
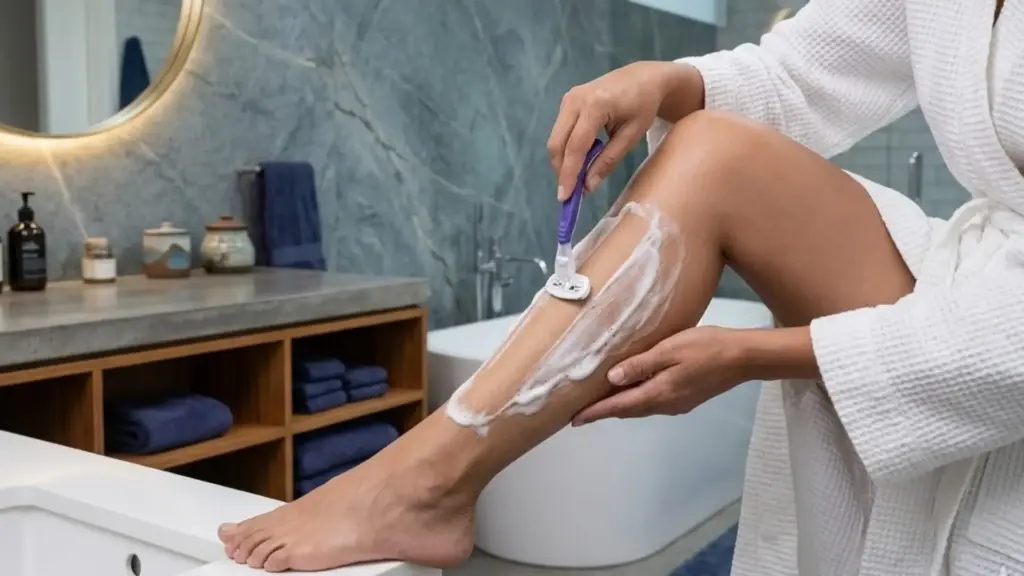
One detail that often goes unmentioned: if you shave, do it at least 12 hours before your appointment, not immediately before.
Freshly shaved skin has temporarily open follicles that can absorb too much solution, leaving a dotted or uneven texture, particularly on the legs and underarms.
Choosing Your Tan Shade: Light, Medium, or Dark
One of the most common questions people have when looking at spray tan before-and-after photos is: “Which shade is that?”
Most salons and solutions offer three tiers:
- Light: A subtle, sun-kissed warmth. Great for fair or sensitive skin types, or first-timers who want a natural-looking result.
- Medium: A classic, golden bronze, the most popular shade. Works well across a wide range of skin tones.
- Dark: A deep, rich tan with a noticeable transformation. Best for those with more tanning experience or medium-to-olive base tones.
If you’re new to spray tanning, starting with a light or medium shade is the safer bet. It’s always easier to go darker on your next visit than to walk around with a tan that feels too intense.
Skin undertone can also guide the shade decision. Cool undertones tend to look more natural with golden or honey-based formulas. Warm undertones pair well with olive or caramel shades.
Asking your technician to factor in your undertone alongside your base skin tone helps the final result look more believable.
In my experience, the most common regret I hear from first-timers is going one shade too dark. When your instinct says medium, consider starting at light-to-medium; you can always build on it at your next visit, but you cannot undo an overly deep first tan.
I also recommend mentioning any uneven base tones from sun exposure, outdoor activity, or regular time in the water, so the technician can adjust their application to balance the overall result rather than intensify existing disparity.
If you have sensitive or reactive skin, ask your technician about doing a small patch test on your inner arm 24 hours before a full session. It takes two minutes and can prevent a full-body reaction for anyone prone to DHA sensitivity, rare but worth ruling out before committing to a complete application.
If you are getting a spray tan for a specific event, plan to book your appointment two to three days ahead. This allows the bronzer to rinse away and the DHA color to fully settle before the big day.
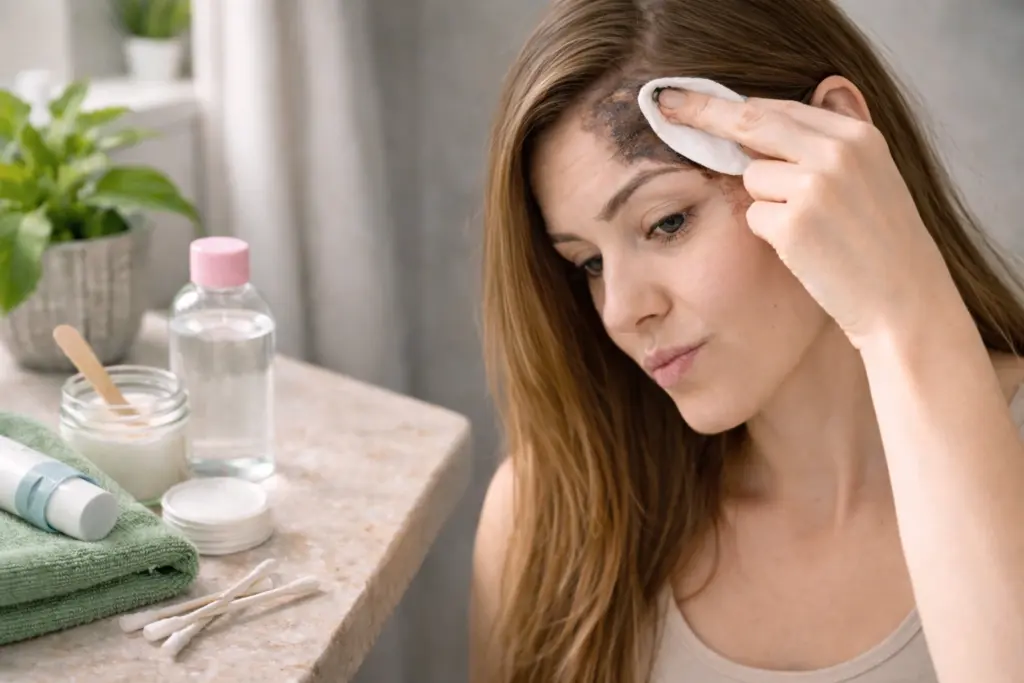
How to Prep Before Spray Tan for Flawless Results

Years of experience as a licensed aesthetician have shown me that well-prepared skin consistently develops smoother, more even results.
I’ve had clients arrive with residue from moisturizing body washes still on their skin, and no matter how good the solution, it showed in the final color.
The prep routine is not just a checklist. It’s what separates a tan that photographs beautifully from one that fades patchily by day three.
48 Hours Before Your Spray Tan Appointment
Start prepping for your spray tan 2 full days ahead to give your skin time to reset naturally. It’s like giving your skin a breather after a long swim meet.
Focus on exfoliation to slough off dead skin cells and ensure the tanning solution absorbs evenly.
- Gently scrub your whole body (elbows, knees, ankles) with a loofah or mitt using a mild sugar-based scrub.
- Let your skin soak for 5-10 minutes in the shower.
If you plan to wax, schedule that appointment at least 48 to 72 hours before your spray tan. Waxing opens the pores and can temporarily sensitize your skin, increasing the risk of uneven color uptake if the gap is too short.
If you shave, the timing is more flexible, but it still matters. Shave 12 to 24 hours before your appointment (the night before works well) using a fresh blade. Rinse with cool water afterward to help the follicles settle back down.
Shaving the morning of your session can cause the solution to pool in open follicles, resulting in a speckled appearance on your legs and underarms.
Hydration becomes key at this point. Drink plenty of water and apply a lightweight, oil-free moisturizer to maintain skin balance.
If your skincare routine includes retinol, AHAs, or salicylic acid, pause these at least 48 hours before your appointment. These ingredients speed up cell turnover, which can interfere with how evenly the DHA develops, especially on the face, neck, and décolletage.
24 Hours Before Your Spray Tan Appointment
The day before your appointment, enter maintenance mode. Your skin is prepared, so now focus on simply maintaining that smooth surface and avoiding products that could interfere with the tan.
- Skip any further exfoliation to avoid over-sensitizing.
- If dryness lingers, do a light dry brush.
- Continue hydrating with water and avoid oil-based products that could block absorption.
If you’re nervous about sensitivity, apply a hypoallergenic barrier cream to dry spots only.
Complete all other beauty services, like manicures, pedicures, facials, and eyelash appointments, at least 24 hours before your spray tan.
Your spray tan should be the last appointment on your list. If you’re keeping nail polish on, even a clear topcoat will help protect your nails from temporary discoloration from the bronzer.
The Day of Your Spray Tan Appointment
On the appointment day, keep it simple and stress-free. Treat it like showtime after poolside prep, where every detail counts for peak performance.
- Shower with just water (no soap) to cleanse without stripping your skin. Air-dry or gently pat dry.
- Skip makeup, jewelry, or anything that could transfer to your skin.
- Eat a light meal to steady your energy.
- Wear dark, loose clothing to avoid rubbing against the freshly applied solution.
Avoid applying sunscreen or oils at the last minute, as they block absorption and dull your final glow.
Once you’re in the booth or with your technician, a barrier cream will likely be applied to your palms and soles of the feet to prevent uneven absorption.
What to wear during the session? Most clients choose a bikini, underwear, or go fully bare. All three options are normal, and what matters most is your comfort level. If you wear a garment, it will leave a tan line, so choose accordingly for any upcoming events or swimwear.
Additional Notes
- Carry your flip-flops to the booth and confirm your shade preference.
- Relax into the 10-15 minute process, yes, that’s how long it typically takes to apply a spray tan!
- Bar soaps and moisturizing body washes, such as Dove and Olay, leave a residue that creates a barrier on the skin. Using these before your appointment can interfere with how evenly the solution absorbs.
- During the development window, be mindful of skin-to-skin contact. Areas where your body naturally folds, like the inner thighs or the crook of your elbow, can develop uneven patches as the bronzer shifts before the DHA has fully set.
If you tend to sleep with your arm tucked under your head, cover that contact point with loose fabric. Long cotton pants and a baggy shirt handle most of this automatically and are worth wearing for the rest of the day.
What to Expect After a Spray Tan Session?
Color development, skin feel, and the first rinse follow a predictable timeline after a spray tan, helping set expectations for how the shade settles and looks natural.
Spray Tan Right After Application Stage
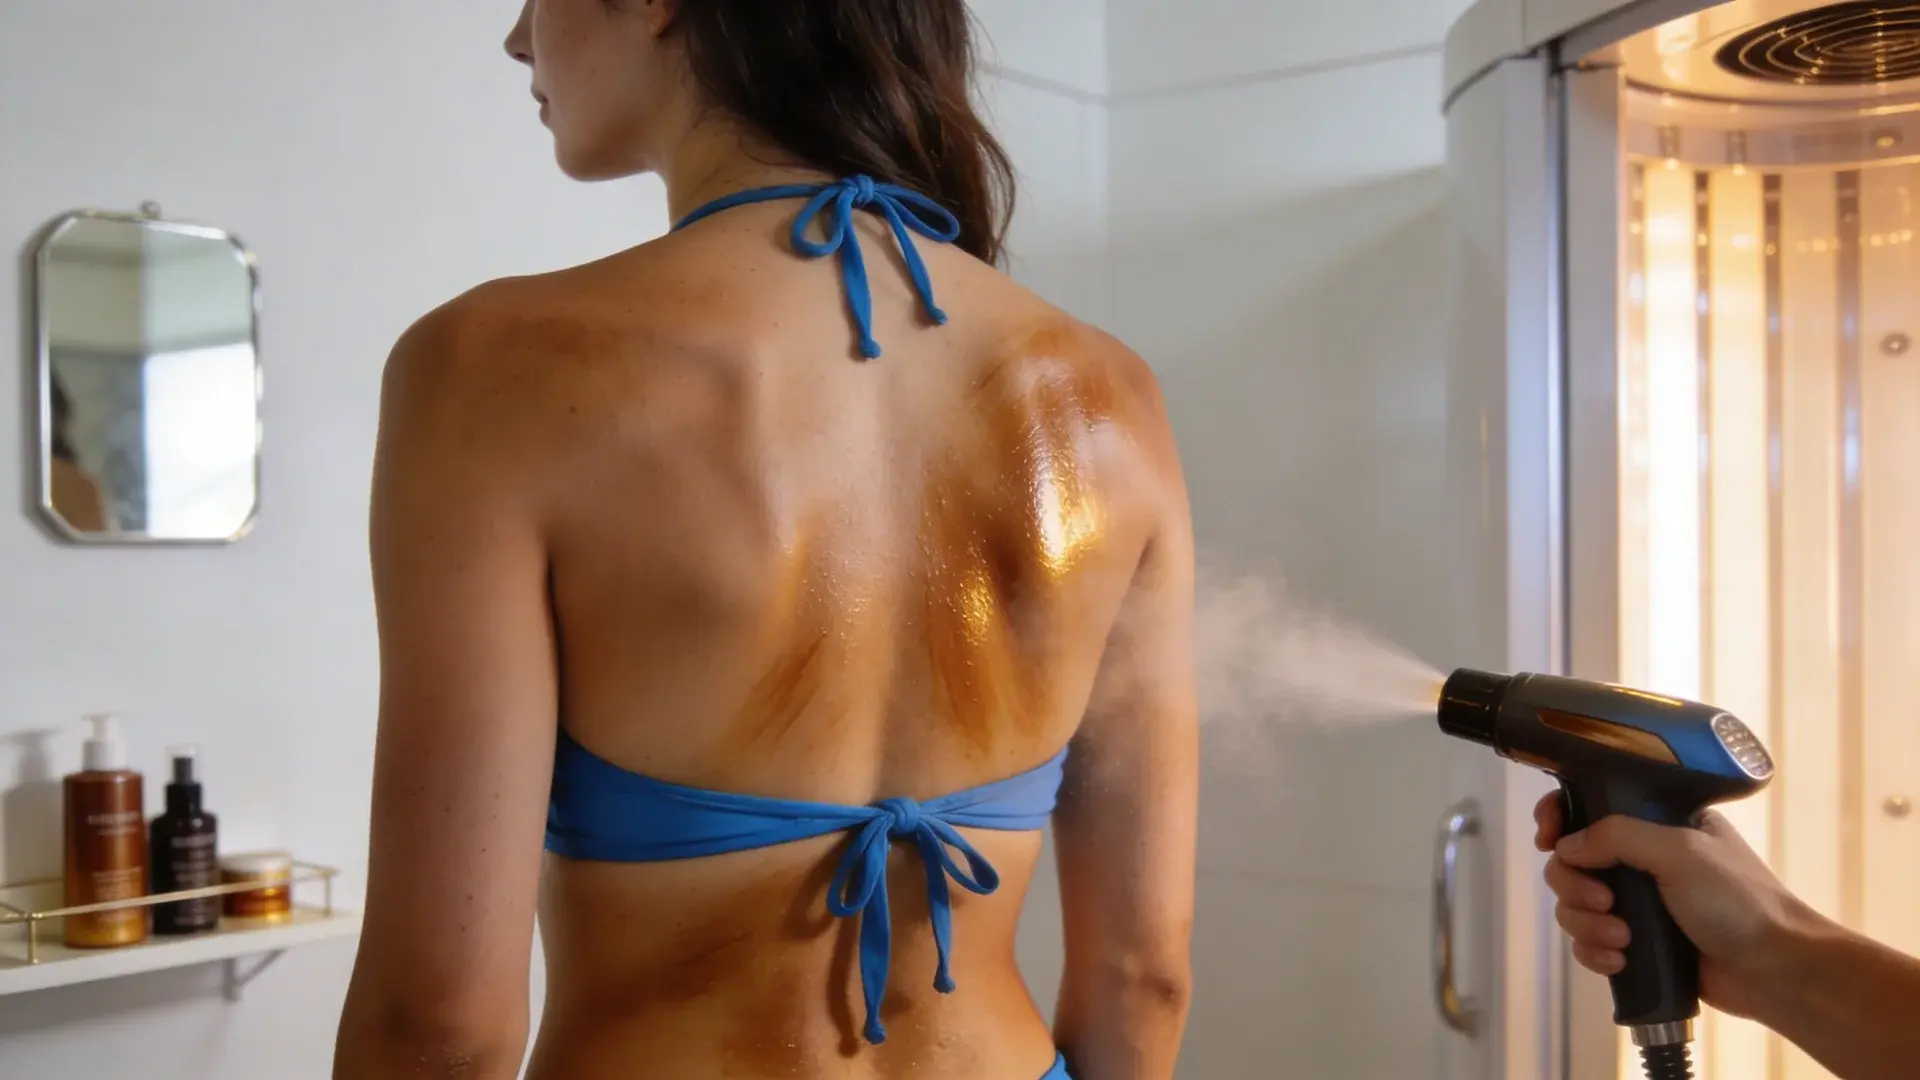
Right after a spray tan appointment, the color usually appears darker than expected.
This deeper bronze tone comes from a cosmetic bronzer, a temporary guide that helps technicians apply the solution evenly. It washes off with the first shower and is not the final developed color.
The real color develops gradually as dihydroxyacetone (DHA) reacts with amino acids in the outer layer of the skin, forming pigments that mimic a natural tan.
During the first several hours, the skin may feel slightly tacky while the solution sets. Avoid sweating, rubbing the skin, or applying lotions to help the color develop evenly.
Spray Tan After 24 Hours
About a day after the appointment, the spray tan settles into its true, more natural tone.
At this stage, the color should look even and balanced, making it a good moment to check the full spray tan before and after transformation.
During this period, DHA continues reacting with amino acids in the outer skin layer, gradually forming brown pigments called melanoidins.
This reaction usually takes several hours to complete, which is why the final color becomes clearer around the 24-hour mark.
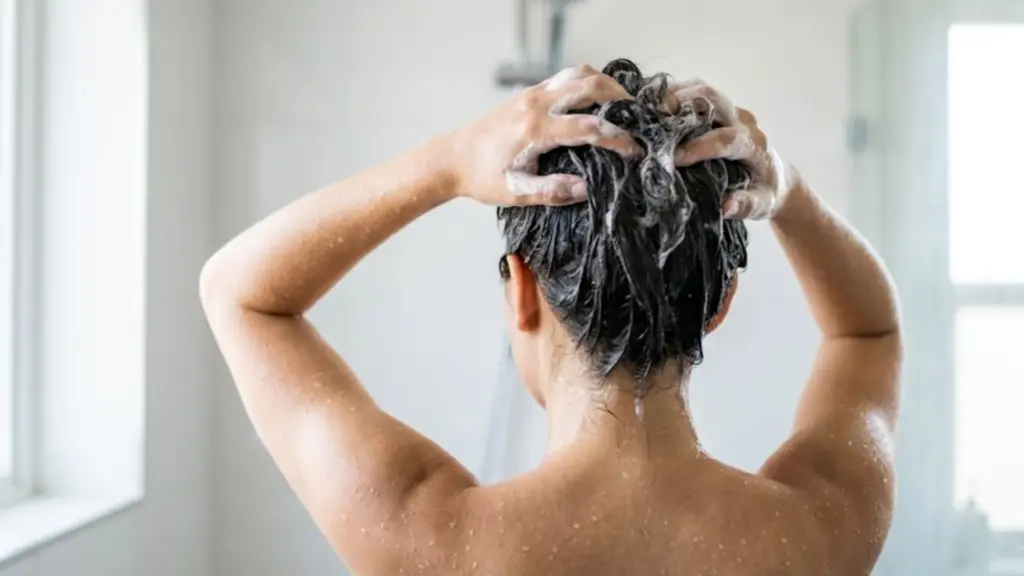
The First Shower After Spray Tan
The first shower often surprises people because the water may appear brown or orange as it runs off the skin.
This is simply the cosmetic bronzer rinsing away, not the actual developed tan. The remaining color comes from the DHA reaction that has already occurred in the outer layer of the skin.
During this rinse, I recommend using lukewarm water and your hands only, avoiding soaps, scrubs, or loofahs for the first shower.
After rinsing, pat the skin dry with a towel without rubbing to help maintain an even finish.
How Long Does a Spray Tan Take?
If you’re wondering how long a spray tan takes in the booth or with a technician, expect the hands-on application to take 5 to 20 minutes.
This is what the timeline looks like:
- 0-20 min: The application process starts. The solution is sprayed on, and you’re guided through a series of positions to ensure full coverage.
- 0-2 hours: Initial development begins. Your skin may look very dark due to the cosmetic bronzer. This is normal.
- 4–8 hours: DHA is actively reacting with your skin. This is your development window. Avoid sweating, swimming, or showering until you reach the recommended rinse time.
- 8-24 hours: Your true tan color emerges. After your first rinse, the bronzer washes away, and the DHA-developed color is what remains.
- 24 hours: The full final result can be seen after 24 hours. This is when your spray tan before and after transformation is completely visible.
A professional airbrush sessionwill take longer since the technician carefully works around your entire body in sections.
On the other hand, an automated booth is faster, usually under 5 minutes for the spray itself, though the drying time adds a few more.
Some salons also offer an express formula with a shorter development window of 1 to 3 hours before the first rinse.
Standard formulas typically require eight to twelve hours before showering. Your technician will confirm which formula is being used and give you the specific rinse window to follow.
When can you apply makeup after a spray tan? Wait at least 6 to 8 hours after the session, or ideally until after your first rinse.
Applying foundation or powder too early can mix with the cosmetic bronzer and create an uneven surface color, especially around the hairline and jaw, where the product tends to concentrate.
Common Spray Tan Mistakes to Avoid
Small missteps before or after a spray tan can lead to uneven color, faster fading, or results that don’t look as natural as expected.
- Skipping Exfoliation Before the Appointment: Dead skin buildup causes the tanning solution to cling unevenly, leading to patchy results.
- Wearing Tight Clothing Right After Tanning: Friction can rub off the bronzer and create streaks or uneven areas.
- Showering Too Early: Rinsing before the recommended time interrupts the tanning process.
- Sweating During the Development Window: Moisture can cause streaking or uneven color formation.
- Applying Lotions, Oils, or Deodorant Beforehand: Residue on the skin can block the solution from developing evenly
- Using Harsh Scrubs or Exfoliants Too Soon: This speeds up skin turnover and fades the tan unevenly.
- Not Moisturizing Regularly: Dry skin sheds faster, causing the tan to fade in patches instead of evenly.
- Waxing Too Close to the Appointment: Waxing the day of or the day right before a spray tan leaves pores open and the skin sensitized, increasing the chance of uneven absorption.
- Using Essential Oils Before the Appointment: Essential oils can prevent the tanning solution from adhering properly to the skin. Avoid using them for at least 72 hours before your session
- Shaving Immediately Before Your Appointment: Shaving temporarily opens follicles. Doing it the morning of your session, especially on the legs, can cause the solution to pool in pores, creating a speckled texture. Shave the night before instead, using a fresh blade and cool water rinse.
- Allowing Skin-to-Skin Contact During Development: Wherever skin folds or rests against itself, inner thighs, behind the knees, the crook of the elbow, bronzer can transfer and create color buildup or uneven patches. Loose, full-length clothing minimizes this during the full development window.
How Long Does a Spray Tan Last?
A spray tan typically lasts 5 to 10 days, depending on skin type, preparation, and daily habits. The color fades gradually as the outer layer of skin naturally sheds.
Since spray tanning works on the surface, anything that speeds up skin turnover will shorten how long the tan stays even.
Several factors influence how long results last. Dry skin tends to fade faster, while well-hydrated skin holds color more evenly.
Activities like swimming, sweating, shaving, and long hot showers can also cause the tan to break down sooner.
To extend the life of your spray tan, keep your skin moisturized daily, use gentle body washes, and avoid harsh exfoliation.
A tan extender lotion, which contains a low concentration of DHA, can also add two to three extra days to the life of your tan by replenishing color while moisturizing the skin at the same time.
With proper care, the color fades smoothly instead of becoming patchy, maintaining a natural appearance throughout its wear.
Natural Tanning vs Spray Tanning
Curious about safer glow options while reading about how to tan quickly in the sun?
Understanding the difference between natural tanning and spray tanning helps set realistic expectations.
| Aspect | Natural Tanning | Spray Tanning |
|---|---|---|
| Source | UV exposure from the sun or tanning beds | DHA-based tanning solution |
| Depth of effect | Penetrates deeper skin layers | Works on the surface skin layer |
| Development time | Gradual with repeated exposure | Develops within 8 to 12 hours |
| Color control | Harder to control the shade | Shade adjusted during appointment |
| Duration | Depends on sun exposure habits | Usually lasts five to ten days |
| Skin preparation | Sunscreen and protection are advised | Exfoliation and clean skin are required |
| Risk factors | Sunburn and uneven tanning are possible | Patchiness only if prep skipped |
| Maintenance | Continued sun exposure required | Moisturizing helps extend results |
Does a Spray Tan Protect You From the Sun?
A spray tan provides zero UV protection.
The DHA reaction occurs entirely on the surface of the skin and does not trigger melanin production, so your skin remains just as vulnerable to UV damage after a spray tan as before, regardless of how deep the bronze looks.
If you are heading outdoors after your appointment, apply a broad-spectrum SPF 30 or higher as you would on any other day.
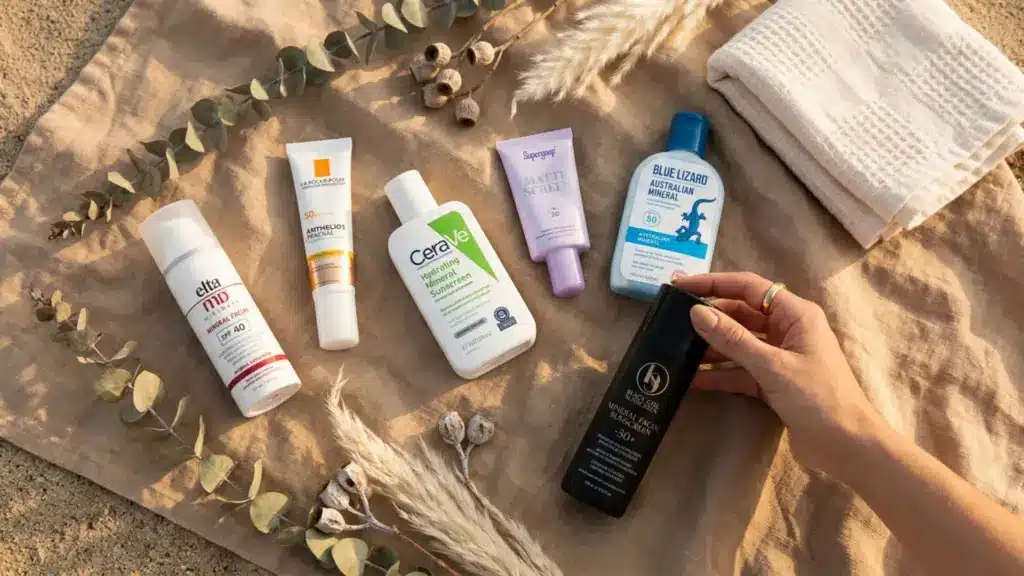
Mineral sunscreens are particularly spray-tan-friendly. They sit on the skin rather than being absorbed into it, and they are less likely to interfere with the surface color than alcohol-based chemical sunscreen formulas, which can lightly strip the top layer of developed color.
Think of the tan as purely cosmetic coverage. It changes how the skin looks. It does nothing to protect the skin.
Spray Tan Aftercare Tips for Longer Lasting Results
Proper aftercare protects your spray tan before and after results and helps the color fade evenly.
- Moisturize Morning and Evening: A lightweight, oil-free lotion helps slow natural skin shedding, so color fades gradually rather than patching on dry areas like elbows and knees.
- Take Lukewarm Showers: Very hot water can dry the skin and cause spray tan color to fade faster.
- Pat Skin Dry After Bathing: Instead of rubbing your skin with a towel, gently pat it dry. Friction from a rough towel drying can disturb the surface color and cause uneven fading.
- Avoid Exfoliating Products: Scrubs, exfoliating gloves, and strong skincare ingredients like AHAs can cause the spray tan color to fade more quickly.
- Limit Pool and Sauna Exposure: Chlorine and high heat break down the surface color faster than almost anything else. As someone who spent years coaching competitive swimmers, I watched chlorine strip both natural tans and sunless color within a single pool session. It is genuinely that fast. If a pool visit is unavoidable, apply a light layer of oil-free waterproof SPF beforehand as a partial barrier, and rinse off immediately afterward with cool water and minimal soap.
- Choose Loose, Comfortable Clothing: Soft, breathable fabrics reduce friction against the skin, helping the spray tan fade evenly rather than creating streaks or patches.
- Switch to a Gel-Based Body Wash: Bar soaps and heavily fragranced body washes containing alcohol can dry the skin and strip color faster. Clear, transparent body washes are also gentler on the skin’s natural pH balance. A stable pH helps the DHA-developed color fade more evenly rather than breaking down in patches. This is one of the easiest and most impactful product swaps you can make to extend how long your tan looks even.
- Apply Sunscreen Before Going Outdoors: A spray tan offers no UV protection whatsoever. Apply a broad-spectrum SPF 30 or higher before heading outside, regardless of how golden the tan looks. Mineral formulas are the most tan-compatible choice. They coat the skin’s surface without the alcohol content found in some chemical sunscreens that can lightly bleach the top layer of developed color.
Conclusion
Getting a great spray tan result comes down to how carefully the skin is prepared in the days before the appointment and how consistently it is cared for afterward.
Understanding how DHA works, choosing the right shade for your base tone and undertone, and following a simple prep routine are what separate a tan that fades beautifully from one that looks blotchy by day four.
The process itself takes less than 20 minutes, but the outcome is shaped by everything surrounding it, the exfoliation two days before, the products you skipped the morning of, and the moisturizer you remembered to apply each evening afterward.
A spray tan has no SPF. No matter how deep the glow looks, protect your skin before heading outdoors. The tan is cosmetic. Sun protection is not optional.
Drop your biggest spray tan win or cautionary tale in the comments. I’d genuinely love to read it.
Frequently Asked Questions
Can I Apply Self-Tanner at Home Between Spray Tan Appointments?
Yes, a gradual self-tanning lotion can help maintain color between professional sessions without creating uneven buildup.
Will a Spray Tan Hide Stretch Marks or Skin Imperfections?
A spray tan can minimize the appearance of stretch marks and minor imperfections by creating a more uniform skin tone.
Why Does My Skin Smell Weird After Spray Tanning?
DHA reacting with skin proteins creates a temporary biscuit-like odor that peaks at 8–24 hours and completely disappears after your first shower.