You pick up a Gua Sha tool, follow a quick video, and still feel unsure about the results. Something seems slightly off, whether it is the angle, the pressure, or the direction of each stroke.
These small details often go unnoticed, yet they play a major role in how effective the technique feels over time.
This is a common experience, but the method itself is simple; missing a few key basics can make it seem like nothing is changing.
When used correctly, Gua Sha can help reduce puffiness, support circulation, and give the face a more relaxed appearance.
This guide explains how to Gua Sha your face and neck, how to create a consistent routine, and the common mistakes that quietly limit visible results.
What is Gua Sha?
Gua sha is a traditional Chinese facial massage technique that uses a flat, smooth stone to improve circulation, release muscle tension, and support lymphatic drainage in the face and neck.
Gua sha works on three levels: microcirculation, lymphatic drainage, and myofascial release.
A study published in the Journal of Science and Healing found that gua sha can increase microcirculation in the skin, which contributes to a healthier, more even complexion over time.
Microcirculation occurs when the stone glides across the skin with steady pressure, increasing blood flow to the surface. This brings more oxygen and nutrients to skin cells, which can support a healthier, more even appearance over time.
The lymphatic drainage system relies on movement, so gentle, directional strokes help move fluid toward lymph nodes. This is what creates the visible depuffing effect, especially after a morning session.
Lastly, myofascial release, areas like the jaw, temples, and neck hold tension.
Consistent pressure helps relax this tightness, which can make the face look softer and more defined without changing bone structure.
How to Prep Your Face Before a Gua Sha Routine
Proper skin prep makes a major difference in how effective and comfortable a gua sha routine feels. The tool should glide smoothly across the skin without pulling or creating friction.
- Do not skip prep: Skipping this step is the most common reason gua sha underdelivers, as the prep is not optional.
- Start with clean skin: Wash your face and pat it dry before beginning.
- Use a facial oil: Apply a facial oil generously, not a serum, not a moisturizer, an oil.
- Create enough slip: The tool needs a slip to glide without dragging. When there is not enough lubricant between the stone and your skin, you are pulling at the skin rather than massaging through it.
- Avoid irritation: That friction can cause irritation, broken capillaries in sensitive skin, and sometimes temporary redness that has nothing to do with the beneficial kind.
- Choose oils for dry or aging skin: Rosehip and sea buckthorn are good options.
- Use lightweight options when needed: Squalane is lightweight and slowly absorbed, helping maintain slip throughout the routine.
- Pick versatile oils carefully: Jojoba works across most skin types.
- Choose acne-friendly oils when necessary: If your skin is acne-prone, look for oils rated low on the comedogenic scale. Hemp seed and squalane are both reasonable choices.
- Fit gua sha into your routine: Pairing gua sha with a thoughtful morning skincare routine helps you figure out the right timing around other products.
How to Gua Sha Your Face and Neck: Step-by-Step Process
Getting the technique right makes all the difference when it comes to gua sha results. It is not just about moving the tool across the skin, but about using the correct angle, direction, and pressure to support natural drainage and circulation.
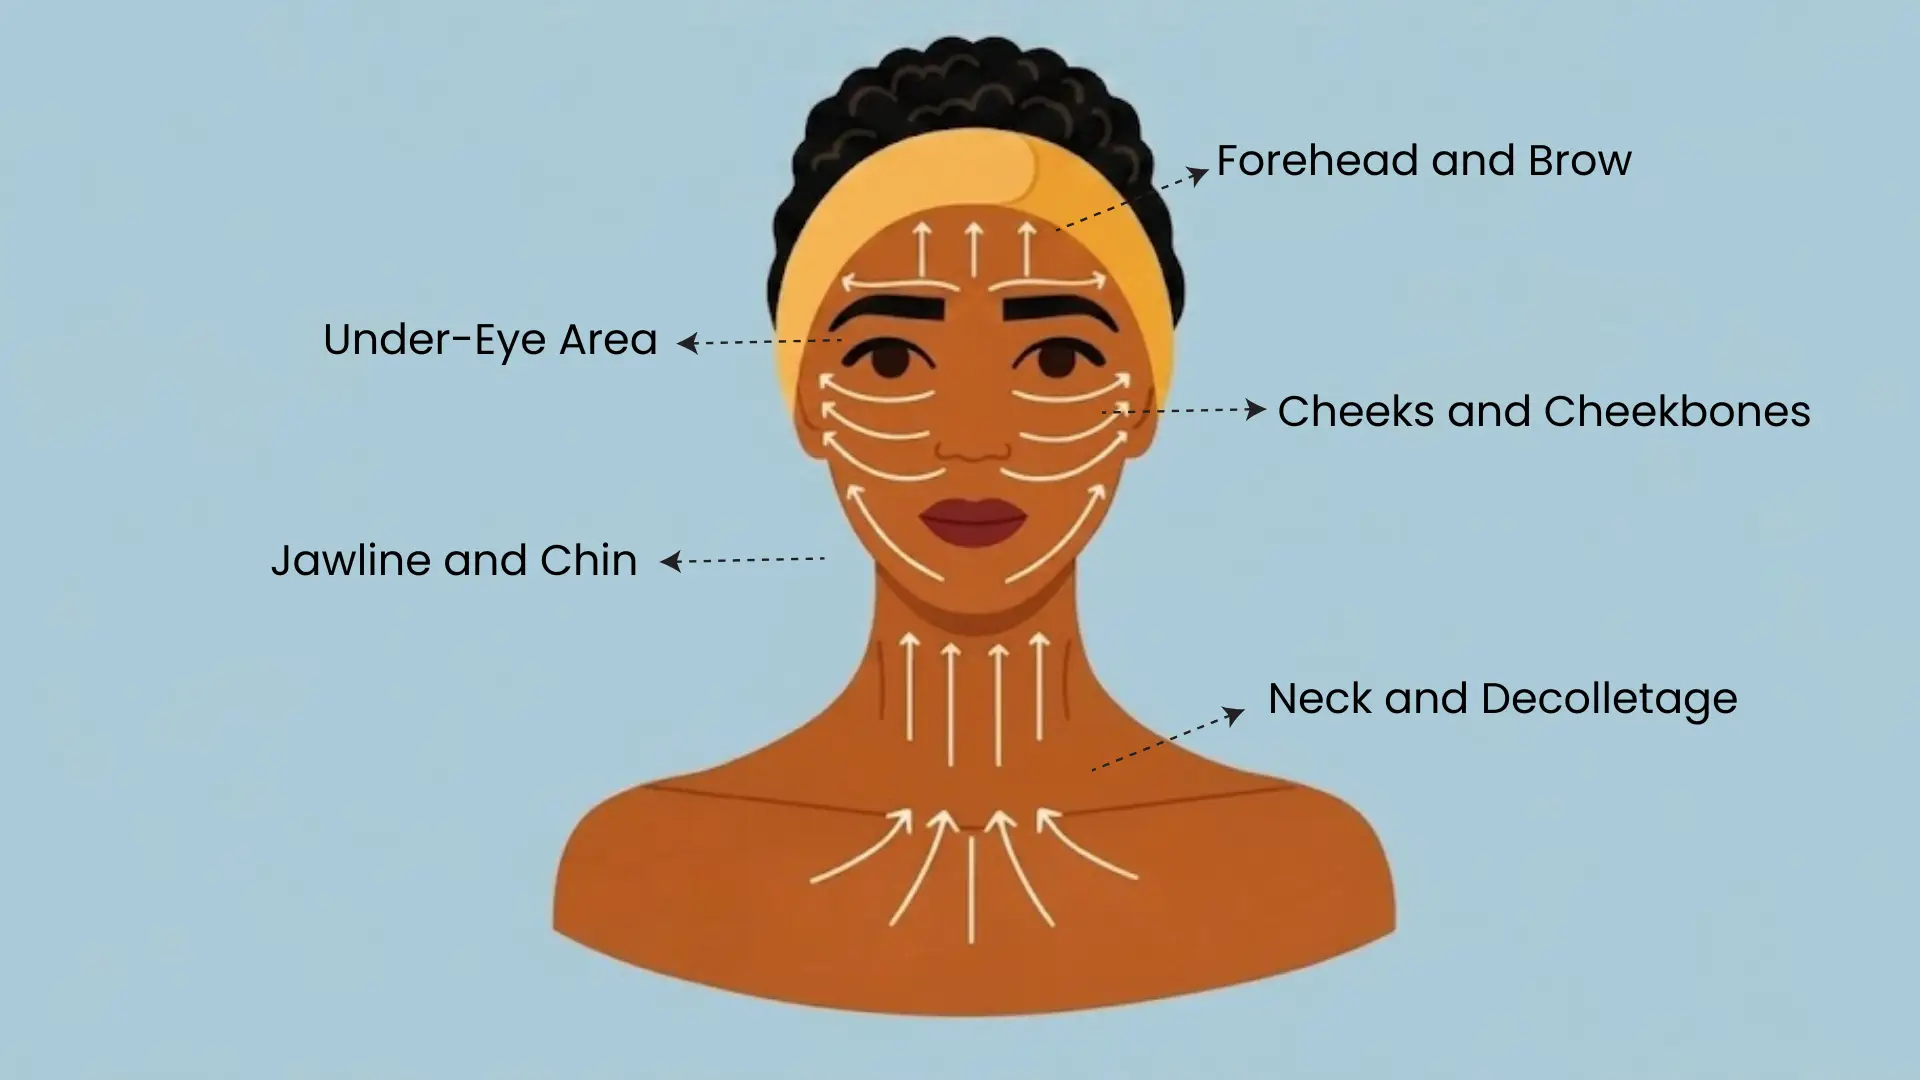
1. Neck and Decolletage
Hold the tool horizontally and use the flat broad edge. Starting at the base of the neck, stroke upward toward the jaw with light to medium pressure.
Do 5 to 8 strokes on each side. Then, working from the collarbone up to just below the jaw, use gentle downward strokes along the sides of the neck to encourage fluid toward the lymph nodes just above the collarbone.
This direction is intentional: it pushes fluid toward the drainage point rather than away from it.
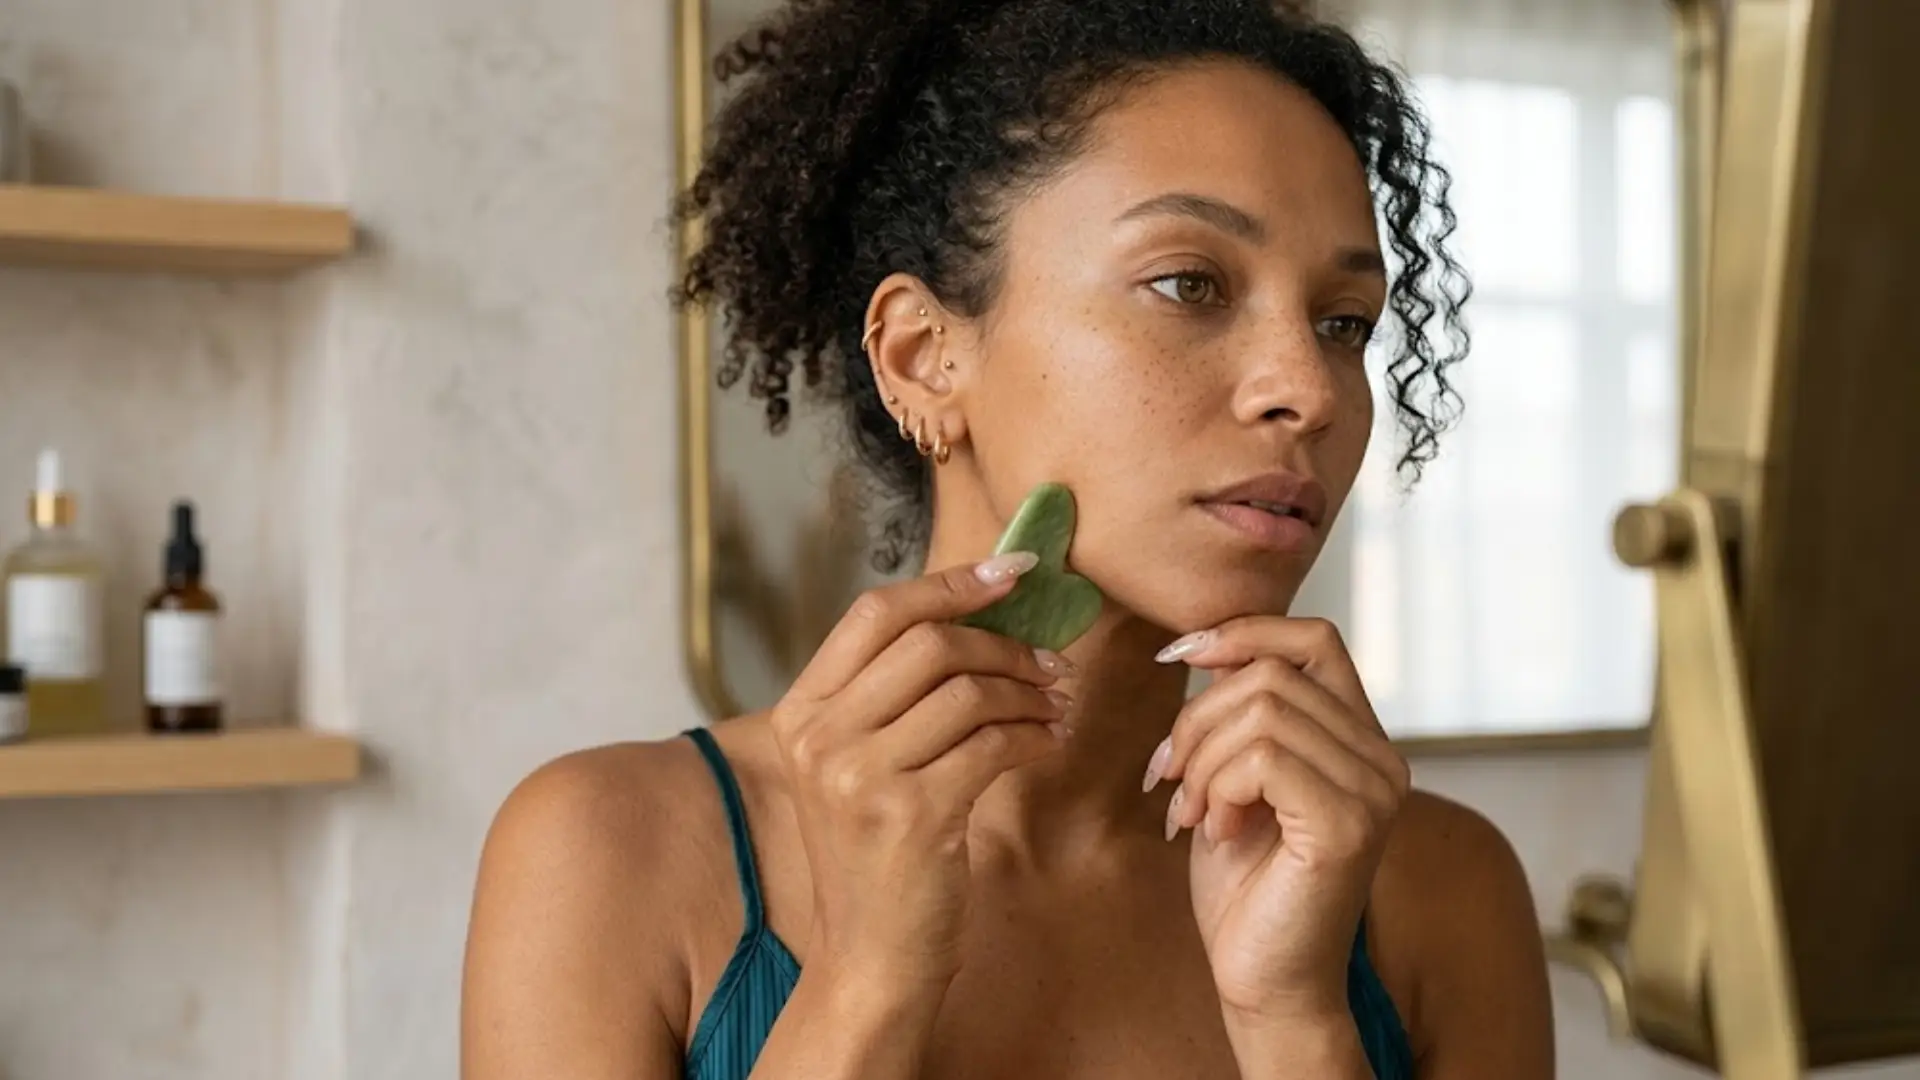
2. Jawline and Chin
Use the curved concave edge along the jaw. Start at the center of the chin and stroke outward toward the ear.
Keep the tool angled at roughly 15 degrees to the skin; flatter is better than steep, 5 to 8 strokes per side.
For a defined jawline effect, you can apply slightly more pressure here than elsewhere, but “more pressure” means firm, not hard. If you are pressing hard enough to feel discomfort, ease off.
3. Cheeks and Cheekbones
Use the flat, broad edge, start near the nose, and stroke outward and upward toward the ear. Follow the natural line of the cheekbone and do 5 to 8 strokes per side.
The cheeks are where I consistently see the fastest visible results in clients with puffy morning skin.
This area accumulates a lot of lymphatic fluid when you are tired, stressed, or after a salt-heavy meal the night before.
4. Under-Eye Area
Switch to the curved small edge or the pointed end, depending on your tool.
Use very light pressure on the under-eye area, which has thin skin with little underlying fat padding. Stroke gently from the inner corner of the eye outward toward the temple. 3 to 5 strokes per side.
Do not drag back inward. If your tool has no narrow edge, skip this area rather than risk over-stimulating it with a large flat surface.
5. Forehead and Brow
Use the flat, broad edge and starting at the brow, stroke upward toward the hairline with slow, even pressure. Work across the forehead in horizontal sections, 5 to 8 strokes per zone.
For the brow bone specifically, the notched edge (if your tool has one) can be used to grip the brow bone and stroke outward toward the temple.
This targets the tension that builds up from squinting, screen time, and furrowing.
Finish by doing another gentle pass down the sides of the neck, directing any moved fluid toward the drainage nodes above the collarbone.
Benefits of Using Gua Sha for Face and Skin
When done with the right technique and consistency, gua sha can support both the appearance and feel of the skin. It works by encouraging gentle movement under the skin, which helps reduce puffiness, ease tension, and promote a more refreshed look over time.
- Reduces Puffiness: Helps move excess fluid away from the face, especially around the cheeks and under the eyes, giving a more defined look.
- Improves Blood Circulation: Increases blood flow to the skin, which can give a natural, healthy glow.
- Relieves Facial Tension: Helps relax tight areas like the jaw and forehead, making the face appear softer and less stressed.
- Enhances Product Absorption: Using gua sha with a serum or oil allows products to spread evenly and absorb better into the skin.
- Promotes Smoother Texture: Regular use can help the skin feel smoother and more even over time.
- Defines Facial Contours: Helps create a more sculpted appearance, especially along the jawline and cheekbones.
- Supports Relaxation: The repetitive, gentle motion can have a calming effect, making it a soothing part of a daily routine.
Choosing the Right Gua Sha Tool for Your Face
Shape matters more than material when it comes to facial gua sha. Different edges serve different areas.
A curved concave edge fits the jawline and neck. A flat, broad edge works on the forehead and cheeks where you need even coverage.
A pointed or notched end can reach into tighter areas like the under-eye and the brow bone. Most well-designed gua sha tools include at least two or three of these edges in one piece.
As for material, rose quartz stays cool, which some people prefer for morning depuffing. Jade is the most traditional.
Stainless steel is durable, easy to sanitize, and stays cold well when refrigerated.
Bian stone (the original material used in traditional Chinese medicine) is denser and holds pressure differently from softer stones. Any of these works. The edge shape and your technique are what drive the result.
One practical note: avoid tools with rough edges or poorly finished curves. They create friction and can irritate the skin surface, especially on the neck, where the skin is thinner.
How Often Should You Use Gua Sha?
Daily use is fine if your skin tolerates it, but it is not necessary for results. 3 to 5 times per week is a sustainable starting point.
Morning gua sha focuses on depuffing as the face swells slightly overnight from fluid accumulation, and a quick 5-minute session helps clear that.
Evening gua sha is more about tension release after a day of facial muscle use. Both have their place. If you can only commit to one, morning tends to yield the most immediate results.
I typically recommend clients start with morning sessions only, get consistent at that, and layer in evening sessions later if they want more tension release.
Trying to do both right away can feel like a chore, and consistency matters more than frequency here.
The first couple of weeks may not show big changes. Focus on staying consistent rather than doing it too hard.
Visible results usually take a few weeks, so give it some time before deciding if it is working for you.
If you wake up with a cold, active breakouts, or facial sunburn, skip that day. Your skin is already under stress. Gua sha adds stimulation, and irritated skin does not benefit from more of it.
Common Gua Sha Mistakes You Should Avoid
Even with a simple tool like gua sha, small mistakes can quietly limit results or even irritate the skin. Many people focus on the motions but overlook details like pressure, technique, or skin prep, which can make a noticeable difference over time.
- Using too much pressure: Light-to-medium pressure is all that is needed to stimulate circulation and move lymph. Hard pressure risks bruising, broken capillaries, and skin trauma that takes longer to heal than any benefit you would gain.
- Skipping the oil: Even a small pump of facial oil applied and then forgotten mid-routine can leave you with dry patches mid-stroke.
- Working downward on the face: Downward strokes on the face and cheeks work against the natural lift direction of the muscle and fascia. There is also no lymph node collecting drainage at the bottom of the face, the way there is at the collarbone. Upward strokes on the face, downward toward the collarbone on the neck.
- Using gua sha over active acne or broken skin: A gua sha tool passed over a pustule or a healing wound spreads bacteria and slows healing. Work around active breakouts, not through them.
- The wrong tool angle: Holding the stone nearly perpendicular to your skin (90 degrees) is uncomfortable and creates drag. Flat (around 15 degrees) is the working angle. Think of how you would use a credit card to scrape something off a surface rather than a knife.
Conclusion
Learning how to gua sha face and neck correctly comes down to a few non-negotiable habits: enough oil, the right angle, the right direction, and the right pressure.
The technique feels simple once it clicks, but consistency within your gua sha routine is what actually brings visible change.
Start with three sessions per week, spend 5 to 10 minutes each time, and always begin at the neck. Pay attention to how your skin responds and adjust pressure and frequency as needed.
If something feels uncomfortable, ease off instead of pushing through. Well-cared-for skin responds better to patience than force.
Try this gua sha routine for a week and notice where the biggest difference shows up. Share your experience in the comments.
Frequently Asked Questions
Can I Use Gua Sha if I Have Rosacea?
Gua sha applies mechanical pressure and increases surface circulation, both of which can trigger flushing in rosacea-prone skin. If you have rosacea, consult your dermatologist before starting.
Does the Temperature of The Stone Matter?
A cold stone (refrigerated for 10 to 15 minutes beforehand) enhances the depuffing effect by temporarily constricting surface vessels, which the massage then increases circulation. A room-temperature stone is fine for general use.
How Do I Clean My Gua Sha Tool?
Wash with mild soap and warm water after each use. Dry thoroughly before storing. For stone tools, avoid prolonged soaking in water, as this can weaken some stones over time. Stainless steel is the easiest material to sanitize fully.