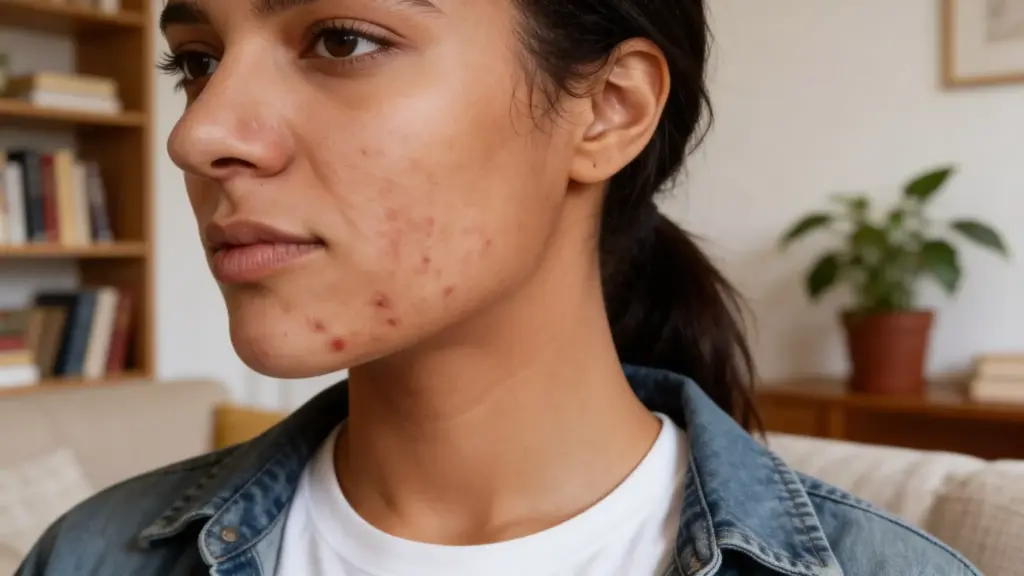
You wear lipstick every single day, reapply it after every coffee, and still catch yourself in the bathroom mirror at 2 PM with bare, washed-out lips. Sound familiar?
That frustrating cycle is exactly why lip blushing has become one of the most talked-about cosmetic procedures in recent years.
It’s a semi-permanent tattoo technique that deposits soft, natural-looking pigment into your lips, giving you a subtle, always-there tint without the daily maintenance.
But what is lip blushing, really? How does it actually work? Does it hurt? And is it worth the investment?
After years of working hands-on with clients navigating cosmetic decisions, I can say that the biggest barrier to trying lip blushing is almost never the needle or the price. It is the lack of honest, practical information about what actually happens before, during, and after.
This blog breaks down the full process, from preparation and procedure to healing, costs, and long-term results, so you can decide whether it’s the right move for your lips.
What is Lip Blushing and How Does It Work?
Lip blushing is a popular semi-permanent cosmetic tattoo procedure that gently enhances your natural lip color and shape for that soft, flushed, just-kissed glow we all crave.
Think of it as a delicate wash of tint, like your favorite rosy lip balm, but one that stays put for months without constant reapplication.
Instead of creating a bold or heavy look, this technique focuses on gentle definition.
A fine needle deposits pigment into the upper layers of the lips, helping improve tone, correct uneven color, and create the appearance of fuller lips without adding volume.
The lip blushing enhances natural lip color and creates the illusion of fuller lips without adding physical volume, which is precisely what sets it apart from injectables.
Often referred to as watercolor lips or aquarelle lips, this method builds color gradually. The final result is light, fresh, and slightly glossy, rather than dense or overly defined.
A typical session takes around 1.5 to 2 hours. The color may appear brighter at first, but it softens as the lips heal, settling into a more natural tone over the following weeks.
Most people choose soft pinks, warm nudes, or light berry tones to keep the finish natural.
How Long Does Lip Blushing Last Over Time?
Most people can expect lip blushing to last between 1 and 3 years, depending on several key factors.
Some clients with ideal skin conditions and disciplined aftercare have reported color holding well past the three-year mark. Long-term lip blush results show a realistic picture of what lip blushing looks like over time in detail.
Several variables influence fading speed:
- Skin Type: Oily skin tends to break down pigment faster. Mature skin, which is often drier, may actually retain color longer in some cases, though results vary.
- Sun Exposure: UV rays are one of the fastest ways to fade lip pigment. Applying SPF lip balm daily after healing is one of the single most effective things you can do to protect your investment.
- Shade Depth: Lighter pigments fade more noticeably than deeper ones. A soft nude will need a refresh sooner than a dusty rose.
- Lifestyle Habits: Smoking, frequent lip-licking, and regular exfoliation all accelerate fading.
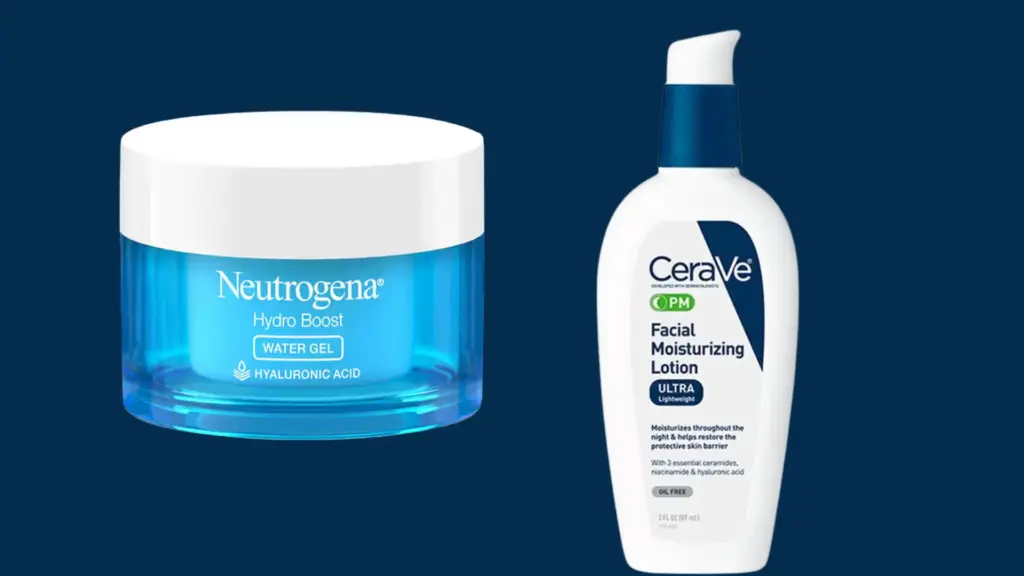
- Skincare Products: Retinoids, acids, and anti-aging serums used near the lip area will shorten longevity over time.
Touch-ups are typically recommended every 12 to 18 months to keep color vibrant. The good news is that touch-up sessions are shorter and less involved than the original appointment.
Does Lip Blushing Hurt?
Honestly, it all depends on your pain tolerance. But for most people, lip blushing is far less intense than they expect.
With a proper numbing cream applied beforehand, the sensation is usually described as light vibration or mild pressure rather than sharp pain.
The lips are sensitive tissue, so you may feel a slight sting along the outer border where the skin is thinner. A secondary numbing gel is typically applied during the session to manage this.
Most clients find the first 10 minutes the most uncomfortable, after which the area settles into near-complete numbness.
One factor most guides skip: being on your menstrual cycle can heighten your pain sensitivity during the session. If possible, scheduling around your cycle can make the experience noticeably more comfortable
If you have a low pain threshold, let your artist know ahead of time. They can take shorter passes, give you breaks, and reapply numbing product as needed.
Arriving well-rested and having eaten something beforehand also makes a difference, so don’t go in on an empty stomach.
How to Prepare for Your Lip Blushing Appointment
Prep is one of the most overlooked parts of the process, and it has a real impact on how evenly the pigment settles.
- Hydrate Well: Drink plenty of water in the days leading up to your appointment. Dehydrated lips are harder to work on and may not retain pigment as evenly.
- Skip Caffeine on The Day: Caffeine can increase sensitivity and minor swelling. It is not a dealbreaker, but avoiding it makes for a more comfortable session.
- Avoid Blood-Thinning Medications: Do not take medications such as aspirin, ibuprofen, niacin, or vitamin E for 24 hours beforehand. These medications thin the blood and increase circulation, which can lead to excessive bleeding during the procedure, affecting pigment retention and resulting in uneven or less effective color.
- Pause Retinoids and Exfoliating Acids: Pause Retin-A, glycolic acid, and AHAs on the lip area at least two weeks prior, as these thin the skin and affect pigment retention.
- Wait After Lip Fillers: If you have had filler injections, most technicians require a minimum wait of four to eight weeks before lip blushing. Filler can shift with needle pressure and alter the final look.
Clients who take prep seriously consistently heal faster and hold pigment more evenly.
In practice, the 2 things that make the biggest difference are consistent hydration in the days leading up to your appointment and avoiding sun exposure on the lip area beforehand. Small steps, but they add up.
Note: If you have a history of cold sores, tell your artist before booking. Lip blushing involves needles penetrating lip tissue, and it can trigger a herpes simplex (HSV-1) outbreak even if you have not had one in years. Your doctor can prescribe an antiviral, such as valacyclovir, to take for a few days before and after the procedure as a precaution.
Step-by-Step Lip Blushing Procedure
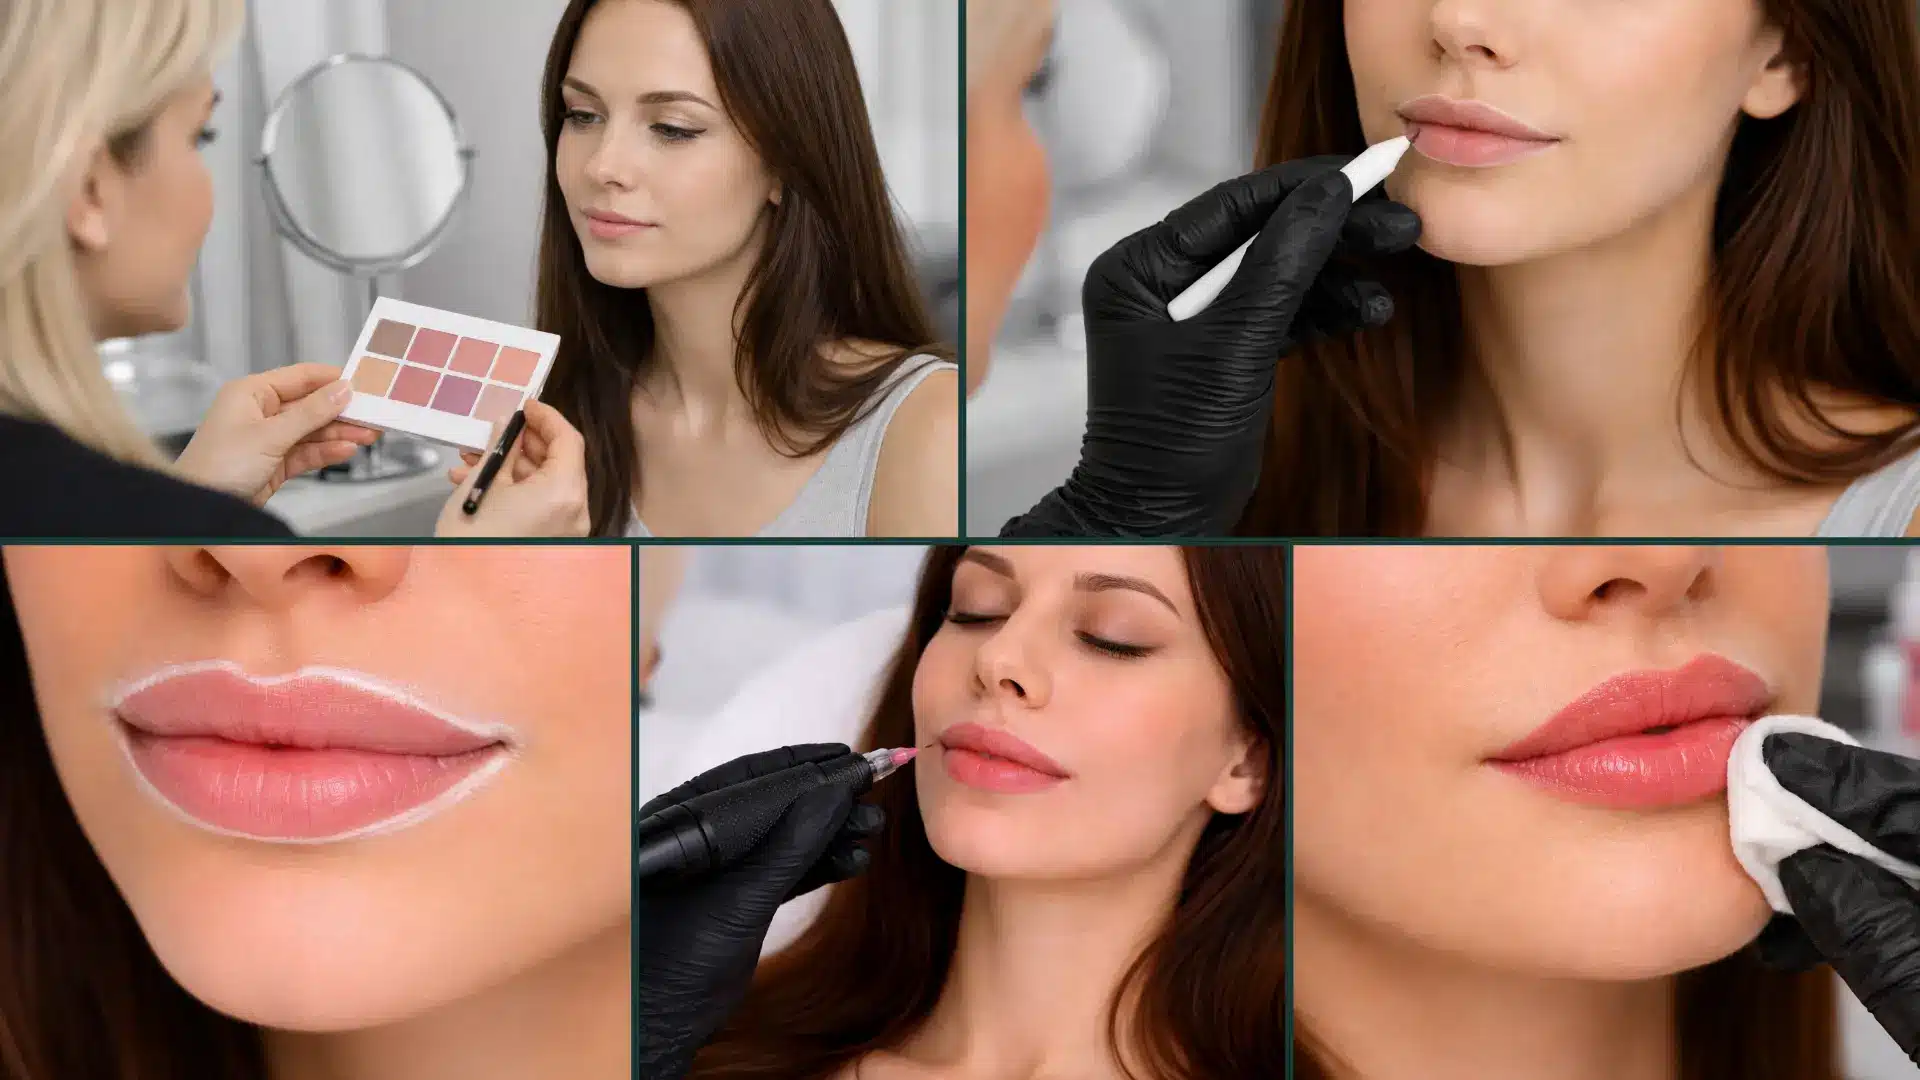
A step-by-step look at how lip blushing shapes, colors, and enhances lips through careful planning, numbing, and layered pigment application for natural results.
1. Consultation and Shade Selection
The process begins with a thorough consultation where you discuss your goals, lip concerns, and desired outcome with the technician.
They review your medical history to ensure suitability and take clear before photos for reference.
During your consultation, a skilled artist will blend custom pigments rather than using stock colors. Cooler undertones tend to suit pink or berry shades, while warmer undertones often look best in peachy nudes.
Together, you select a pigment shade that complements your natural lip tone, skin undertone, and lifestyle preferences.
This step ensures personalized results and builds trust before any work starts. The consultation usually lasts 20 to 30 minutes and sets the foundation for a satisfying experience.
2. Lip Mapping and Outlining
Once numbing cream has been applied, the technician carefully maps your lips to create symmetry and definition.
They draw a precise outline using a sterile wax pencil to enhance shape, correct unevenness, or subtly adjust borders without over-dramatizing.
This mapping acts as a guide for even pigment distribution and helps achieve balanced, harmonious results. You get to approve the outline before proceeding, allowing any final tweaks.
This careful planning step is key to avoiding asymmetry and ensuring the final blush feels like an enhanced version of your own lips rather than something artificial.
3. Numbing Process
Comfort remains a priority, so a topical numbing cream containing lidocaine will be applied generously to your lips.
The cream sits for 15 to 20 minutes, allowing it to fully take effect and minimize any sensation during the procedure.
You might feel a slight cooling or tingling as it works. Most clients report the area becomes pleasantly numb, and the technician may reapply secondary numbing gel during the session if needed.
This step makes the experience much more relaxing and tolerable, turning what could feel intimidating into a calm, manageable appointment.
4. Pigment Application Using Micro-Needles
With your lips fully numbed, the technician uses a handheld rotary machine equipped with fine micro-needles to deposit specialized cosmetic pigments.
They start with light outlining passes along the mapped border, then move into feathery shading layers across the lip surface.
Multiple gentle passes gradually build translucent color. Saturation levels can vary from the softest nude effect to a slightly deeper aquarelle effect.
Your technician will check in with you throughout to ensure the depth matches what you discussed during your consultation. You may feel a light vibration or pressure, but discomfort remains minimal thanks to numbing.
5. Cleaning and Aftercare Briefing
After pigment application is complete, the technician gently cleans the area and provides detailed aftercare instructions to support smooth healing.
You will receive guidance on managing initial swelling, keeping the area dry, avoiding certain foods and activities, and using recommended healing balms.
Most professionals schedule a touch-up appointment 6 to 8 weeks later, once the color has fully settled and any minor adjustments can be made.
This follow-up session is where the true final result takes shape. The pigment retention varies from person to person, and the touch-up corrects any areas that healed too lightly.
How to Choose a Lip Blushing Artist
The artist you choose has more impact on your results than almost any other factor. Here is what to look for before booking.
- Check their portfolio specifically for lip-blushing work: not just brow or lash work. Look for healed results, not just freshly done photos, which look more vibrant than the final outcome.
- Confirm their licensing and hygiene practices: Ask about their sterilization process, the pigment brands they use, and whether they work with single-use needles. A reputable artist will answer these questions without hesitation.
- Ask how many lip-blushing treatments they have completed. Request to see before-and-after photos from clients with a similar skin tone to yours.
- Read reviews specifically about their lip work: Look for mentions of natural results, even healing, and responsiveness to client concerns.
- Be cautious of very low prices: Pricing significantly below the market range (under $300) often signals limited experience, lower-quality pigments, or hygiene shortcuts. Your lips are not the place to bargain-hunt.
I tell clients the same thing I tell myself before referring anyone: look at healed photos, not fresh ones. Fresh lip blush always looks more intense. The real test of an artist’s skill is what the lips look like four to six weeks later.
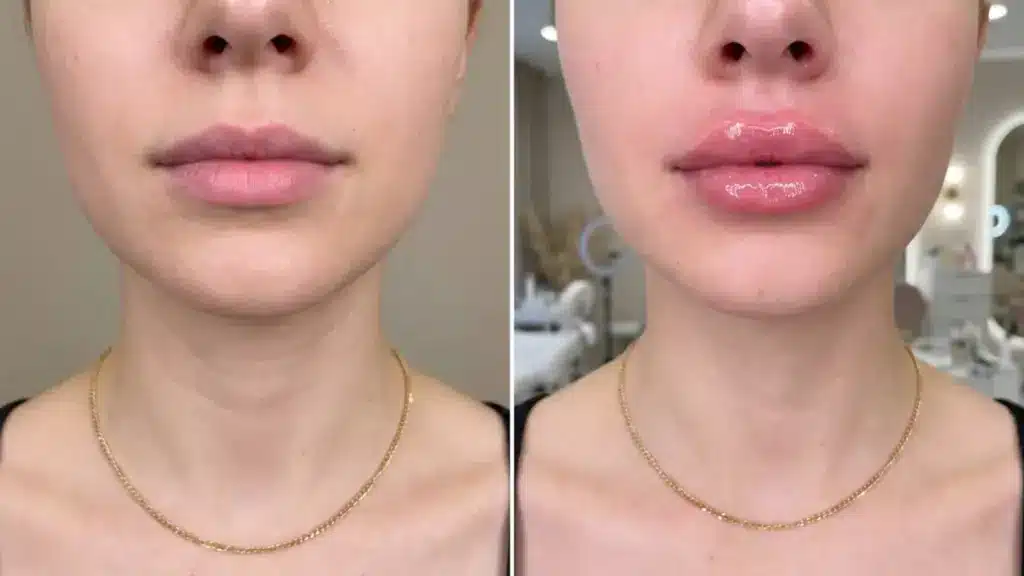
Lip Blushing Results Before and After: What You’ll See

Right after your lip blushing session, your lips often appear bolder and more vibrant than the final look, with some swelling giving a temporarily plumper effect that settles beautifully.
Over the next few weeks, as healing progresses, the color softens into a natural, flushed tint that enhances your own lip shade without looking overly made-up.
Realistic transformations show improved symmetry, a gentle color boost that makes pale or uneven lips pop with life, and a subtle fuller illusion created through clever shading without the use of any fillers.
The shift from initial intensity to that soft, everyday glow is what makes the results so addictive and low-key gorgeous.
Many women share how it restores lost vibrancy, as one in her 50s who noticed her once-rosy lips had faded with age.
After healing, she woke up to a youthful, even blush that boosted her confidence without daily effort.
Expect a subtle, breathable tint rather than dramatic drama, which is perfect for that effortless, just-kissed vibe.
Pros and Cons of Lip Blushing to Consider
A clear look at the real benefits and limitations of lip blushing to help set expectations before deciding on the procedure.
| Pros | Cons |
|---|---|
| Enhances natural lip color and shape | High upfront cost |
| Saves time on daily makeup | Needs a touch-up session |
| Improves symmetry and evens tone | Healing takes several days |
| Creates fuller-looking lips naturally | Color fades over time |
| Long-lasting, low-maintenance tint | Results depend on artist’s skill |
| Custom shades for a natural finish | Not ideal for very dark lips |
| Boosts confidence in appearance | Risk of uneven results |
| Can correct scars, hypopigmentation, and asymmetry | Difficult to reverse without laser treatment |
Lip Blushing vs Other Semi-Permanent Makeup Options
Understanding how lip blushing compares to similar procedures helps you choose the right one for your goals.
1. Lip Blushing vs Lip Fillers: Fillers (typically hyaluronic acid) add physical volume to the lips but do not change their color.
Lip blushing does the opposite. It enhances pigment and creates the visual illusion of fullness through shading, without injecting anything.
The two can be combined, but if you plan to get both, most technicians recommend completing the filler first and waiting four to eight weeks before tattooing over it.
2. Lip Blushing vs Lip Liner Tattoo: A traditional lip liner tattoo creates a defined, sometimes stark border.
Lip blushing uses a softer, gradient technique that blends the color throughout the entire lip, resulting in a far more natural look. The aquarelle method specifically avoids any harsh outline.
3. Lip Blushing vs Tinted Lip Balms: Tinted balms and daily lipstick give you complete control over color intensity every day, but they require constant reapplication and offer zero correction for uneven pigmentation.
Lip blushing provides a consistent, always-there base that actually improves the underlying color.
If you are weighing different approaches to lasting lip color, it is worth understanding what separates semi-permanent techniques from fully permanent ones before committing. Permanent lip color options cover a broader range of techniques and longevity expectations worth reviewing alongside this one.
Each of these methods falls under a wider category of cosmetic lip treatments, where differences in technique, longevity, and finish become clearer when looking at permanent lip color options in a broader context.
Should You Get Lip Blushing Done?
Lip blushing works best when expectations are realistic. It is not a replacement for lip filler.It adds color and soft definition, not volume.
If your main concern is thin or flat lips, fillers address that directly. If your concern is faded color, uneven tone, or asymmetry, lip blushing is genuinely well-suited to the job.
You are a good candidate to get lip blushing done if you:
- Have naturally pale, uneven, or faded lip color
- Is someone who wants to simplify their daily makeup routine
- Want a subtle definition without a harsh liner
- Have lips that have lost pigment with age
You may want to wait or consult a doctor if you:
- Have an active cold sore, skin infection, or irritation on or near the lips
- Are pregnant or breastfeeding
- Have had lip filler injections within the past four to eight weeks
- Have a known allergy to tattoo pigments. Red and pink pigments, in particular, carry a slightly higher risk of allergic reaction
- Have very dark natural lip pigmentation. Your artist may recommend a neutralization session before adding color
- Are concerned about reversibility. Because lip blushing is semi-permanent, results are difficult to undo without laser treatment. This is a real factor worth weighing before committing.
How Much Does Lip Blushing Cost?
Let’s talk money because it’s one of the first questions everyone asks when considering lip blushing.
You can expect to pay anywhere from about $400 to $1,500 for a full initial session, with most people landing in the $500 to $900 range for quality work.
Prices swing based on where you live. Big cities like New York or Los Angeles often push toward the higher end due to higher overhead and demand for top artists, while smaller towns or less competitive areas might sit lower.
The artist’s experience also plays a huge role. Seasoned pros with stunning portfolios and specialized training charge more because they deliver those natural, flawless results you dream about.
Other factors sneak in as well. High-end pigments, sterile setups, and whether the price includes the mandatory touch-up (usually 6-8 weeks later) can bump up the price.
Some artists bundle the touch-up for free or at a discount, while others charge separately. You can expect $250 to $600 for that follow-up refresh.
Always ask upfront about what’s included so there are no surprises.
Beyond the session itself, think about little extras. You might spend $20–50 on recommended healing balms, gentle cleansers, or SPF lip products to protect your investment during recovery.
If you’re traveling for a trusted artist, add any travel costs as well. And remember, super-low prices (like under $300–400) can sometimes signal shortcuts in quality, training, or hygiene. Your lips deserve better than a risky bargain.
Lip Blushing Aftercare Tips for Better Results
Aftercare is where a lot of results are won or lost. The first 10 days after the appointment are very critical. What you do (and don’t do) during healing directly affects how evenly the pigment sets and how long it lasts.
The first 24 hours:
The first day after lip blushing sets the tone for how well the pigment heals. Gentle care is key during this stage.
- Gently wipe the lips with a clean, damp cloth every one to two hours to remove lymph fluid. This helps prevent heavy scabbing and supports even color retention.
- Apply a thin layer of the recommended healing balm before bed to keep the lips hydrated.
- Drink using a straw and avoid direct contact with food. Activities like kissing or rubbing the lips should be avoided completely.
Days 2 to 10:
As healing progresses, the focus shifts to protecting the lips and allowing natural shedding.
- Keep lips away from water exposure, such as swimming, soaking, or steam.
- Let any dryness or flaking fall off naturally. Picking or peeling can affect how the pigment settles.
- Avoid applying makeup on the lips for at least a week to prevent irritation.
- Stay away from strong skincare ingredients like exfoliants, retinoids, or acids near the lips for about four weeks.
- Limit sun exposure during healing. Once healed, using an SPF lip balm helps maintain color.
- Avoid smoking, as it can dry the lips, slow healing, and cause faster fading of pigment.
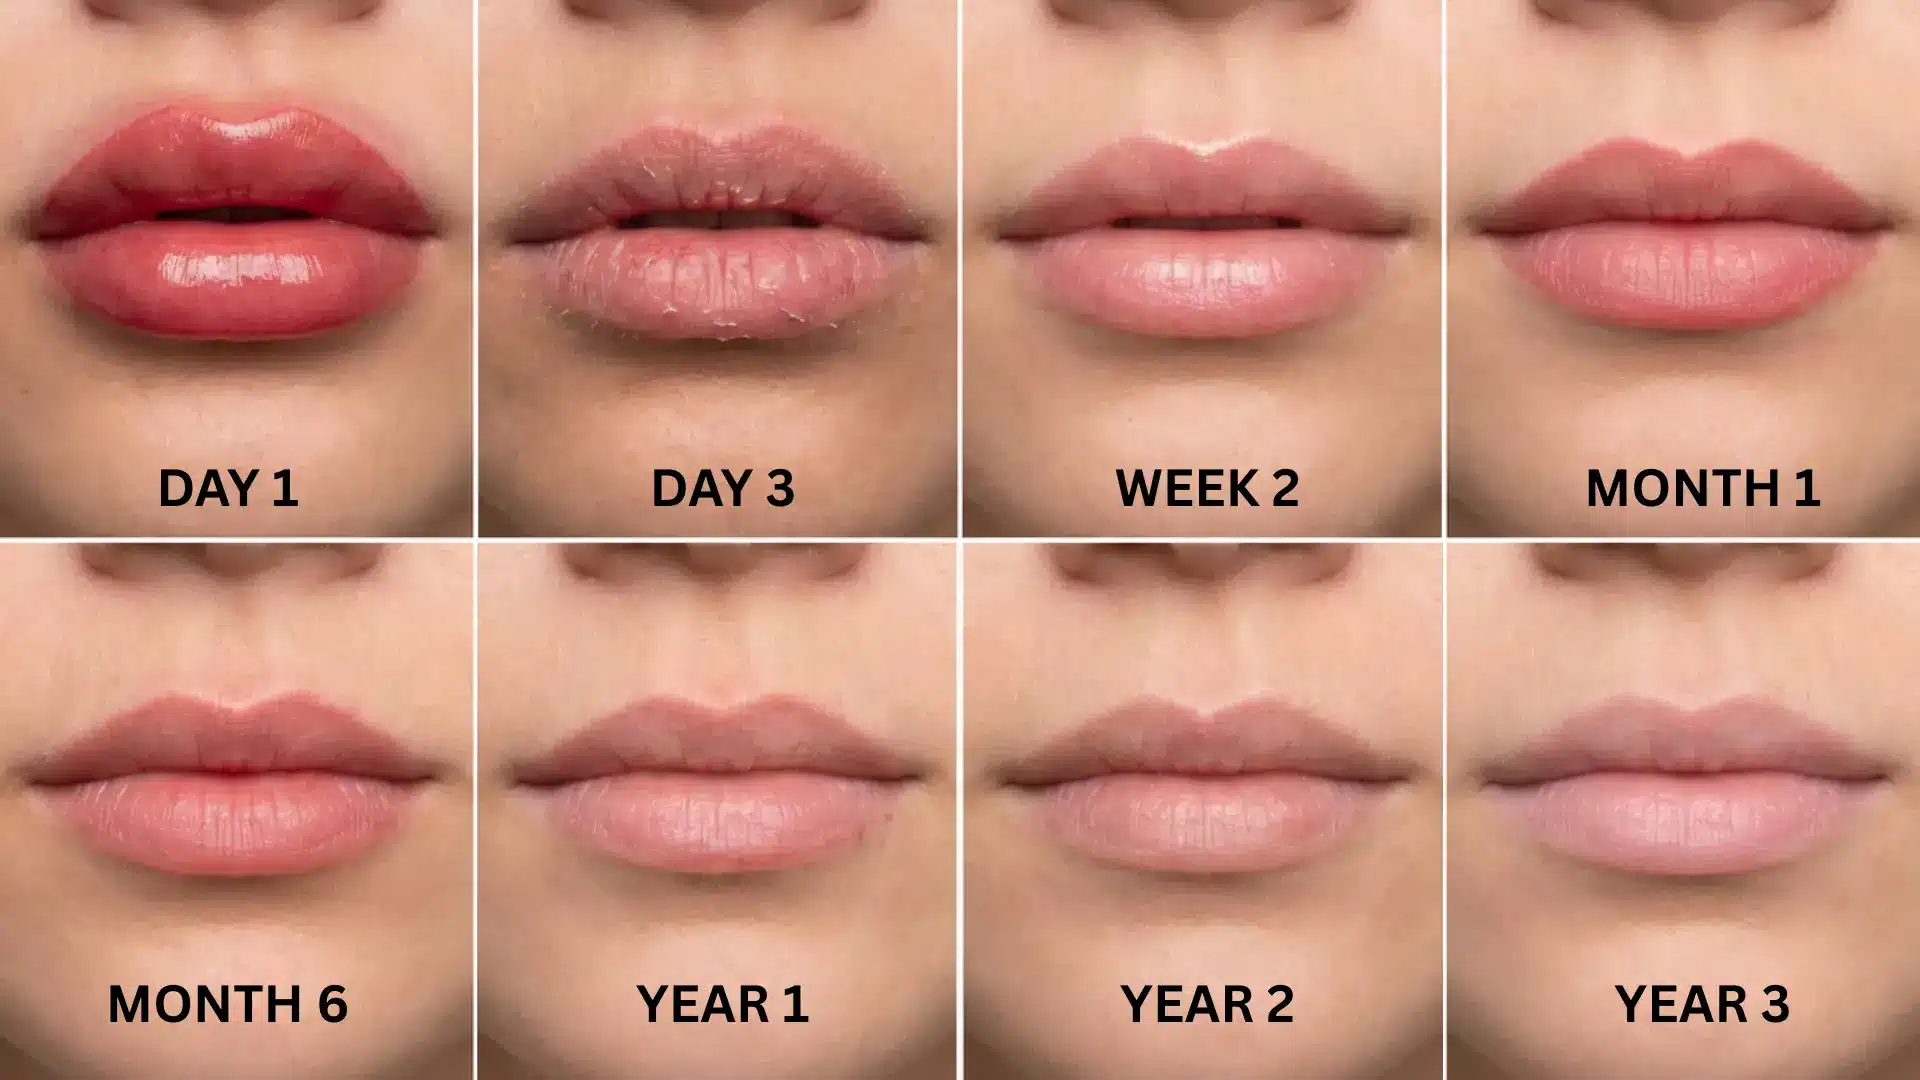
What to Expect Week by Week:
- Day 1: Lips appear bold and swollen. Color is at its most intense.
- Days 3 to 4: Peeling and light scabbing begin as the outer skin layer sheds.
- Day 7: Pigment vibrancy drops noticeably, often by 30 to 50 percent. This is expected and not a sign of poor retention.
- Days 10 to 14: Surface healed. The color may appear very light or nearly gone at this stage. This is the “ghost phase,” and it is temporary.
- Week 4: The true healed color begins to emerge. This is what your lips will look like at their baseline until the touch-up.
During this phase, the lips may look lighter or uneven, especially between days five and ten. This is a normal part of the healing process as the top layer of skin sheds.
The final color gradually settles and becomes more visible around the fourth week.
Conclusion
Lip blushing sits in a sweet spot that few cosmetic procedures occupy. It’s subtle enough to look completely natural, yet impactful enough that you’ll notice the difference every morning.
The key takeaway here isn’t just about color. It’s about choosing the right artist, committing to proper aftercare, and going in with honest expectations about what semi-permanent pigment can and can’t do.
Your skin type, lifestyle, and willingness to protect the results with SPF and touch-ups will shape your experience far more than the procedure itself.
The clients who love their results months later are almost always the ones who treated aftercare as seriously as the appointment.
If subtle enhancement sounds like the goal, lip blushing can feel like a smart, low-maintenance upgrade. Take time to review real results, understand the healing journey, and weigh the long-term value before deciding.
Thinking about trying it or still unsure? Share your thoughts or questions below and keep the conversation going.
Frequently Asked Questions
Can You Change Lip Blushing Color Later?
Yes, color can be shifted during touch-ups. Artists can layer warmer, cooler, darker, or lighter pigments over the existing blush, though dramatic changes may need laser fading first.
Can Lip Blushing Hide Small Lip Scars or White Spots?
Yes, very effectively. Skilled artists use targeted neutralizing pigments first, then blend the desired shade over scars or hypopigmentation for smooth, even coverage.
Can I Still Wear Bold Lipstick over Lip Blushing?
Definitely! Lip blushing acts as a tinted base, so bold lipstick applies smoothly over it. Once you remove the lipstick, your blushed tint remains underneath as a natural fallback.
Can Lip Blushing Be Reversed if I Dislike the Result?
Fully reversing lip blushing is difficult. Because it is a semi-permanent tattoo, the pigment does not simply wash out over time, the way makeup does. Laser treatments can lighten or remove pigment over multiple sessions, but the process is gradual, expensive, and not always complete