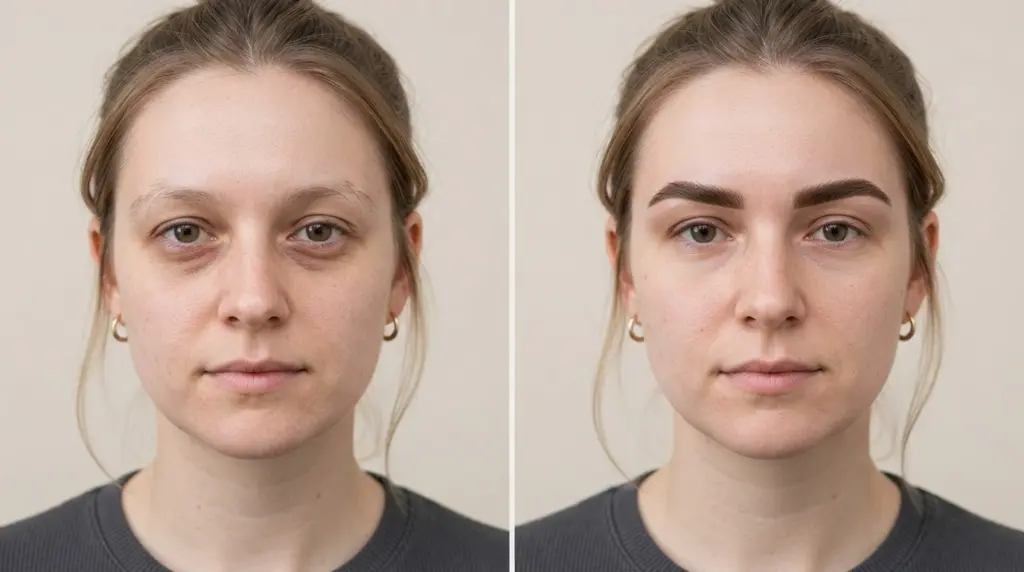
A client once handed me her phone at the start of an appointment, a blurry before photo pulled up, expecting the after shot to look like a completely different set of brows.
It didn’t, and that’s actually the point. Tint works with the hair you already have. It doesn’t add any. Once you know that going in, before-and-after photos start to make a lot more sense.
Tinting defines the existing brow hairs, which can create a fuller appearance without adding new growth.
The final result depends on your starting brow color, hair density, chosen shade, and any shaping performed during the appointment.
Fresh skin staining can also make immediate results appear stronger than the settled look. Comparing different starting brow types and watching how the color softens after the first few days can help set realistic expectations.
What Should You Notice in Eyebrow Tint Before-and-After Photos?
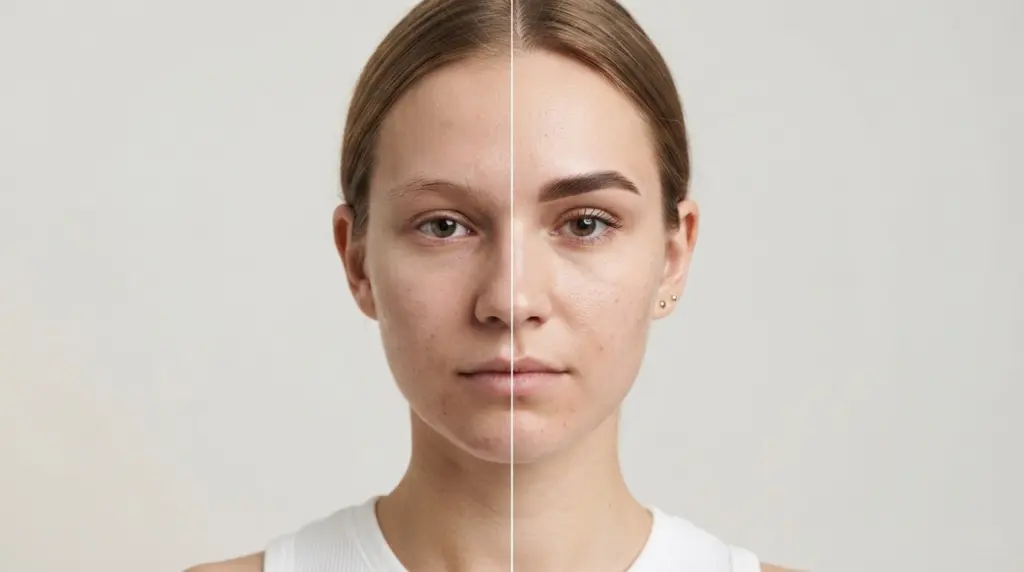
A genuine eyebrow tint result should mainly show changes in color, visibility, and definition, rather than a completely different brow shape. Fine or pale hairs that were already present often look darker, making the natural brow line easier to see.
This added contrast can make brows appear fuller because previously hard-to-see hairs become more noticeable.
Freshly tinted brows may also look bolder immediately after treatment when the product leaves temporary color on the skin beneath the hairs.
However, fuller does not mean more brow hair. Tinting colors existing hairs. It does not create new growth or permanently fill areas with no hair.
Keeping that distinction in mind, and knowing what the treatment involves, makes before-and-after photos much easier to judge realistically.
What Actually Changes Before and After Eyebrow Tinting?
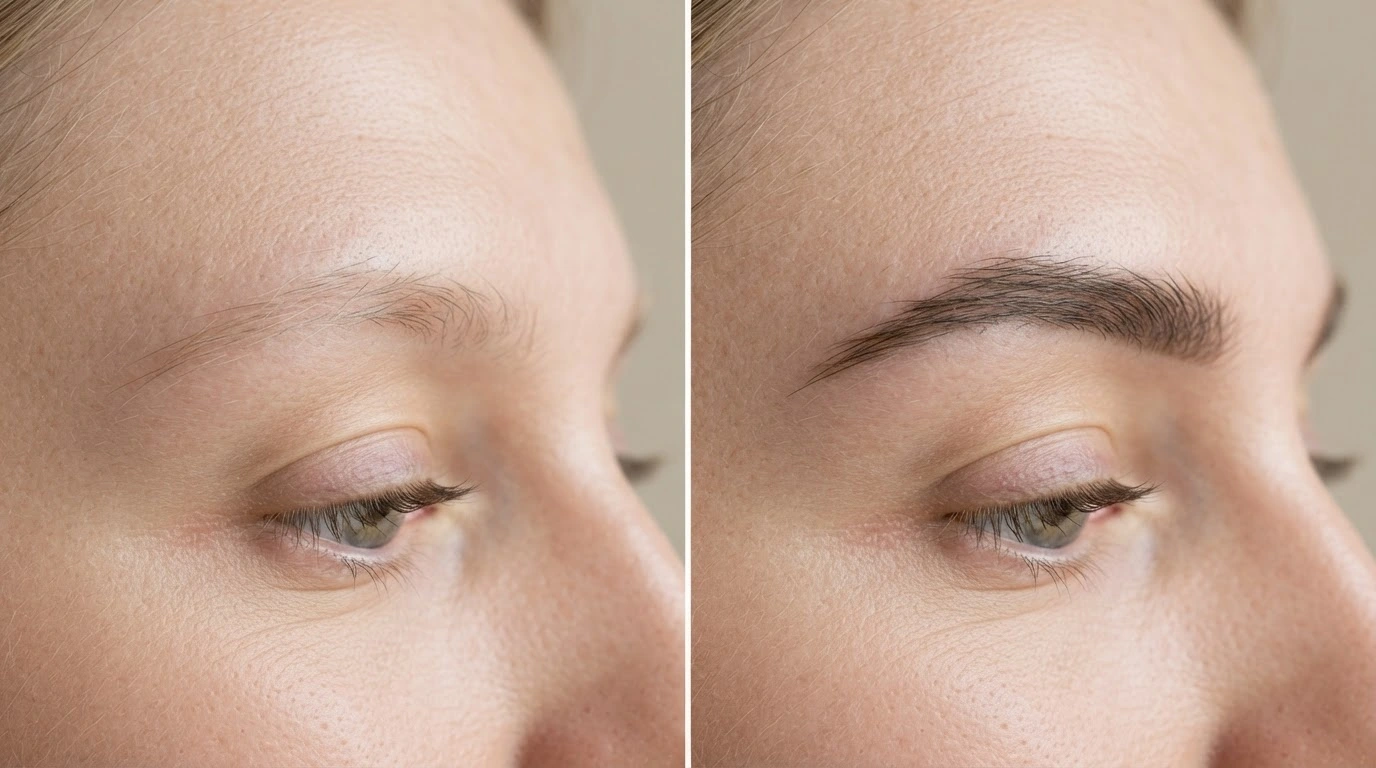
Eyebrow tinting can create several visible changes, but each comes from a slightly different effect. Comparing your starting brows with the finished result helps show what tint can realistically improve.
| Before Tinting | After Tinting | Why It Looks Different |
|---|---|---|
| Pale or barely visible hairs | Hairs look darker and easier to notice | Tint adds color to hairs that were already present |
| Uneven brow color | Brows appear more consistent | Lighter and darker hairs become closer in tone |
| Fine brows | Brows can look fuller and more defined | Fine hairs become easier to see |
| Sparse areas with pale hairs | Coverage may look slightly denser | Existing light hairs become more visible |
| Completely bare areas | Little lasting change | Tint cannot add hair where none grows |
Tint can improve the visibility and definition of existing hairs, but temporary skin staining should not be mistaken for permanent coverage in areas without brow hair. Color fading over time is a separate factor from how full the brows look on day one.
Eyebrow Tint Before and After Results by Brow Type
Before-and-after results can vary widely depending on your natural brow color, density, and hair texture. Looking at your starting brow type gives you a more realistic idea of the change to expect.
1. Light or Blonde Brows
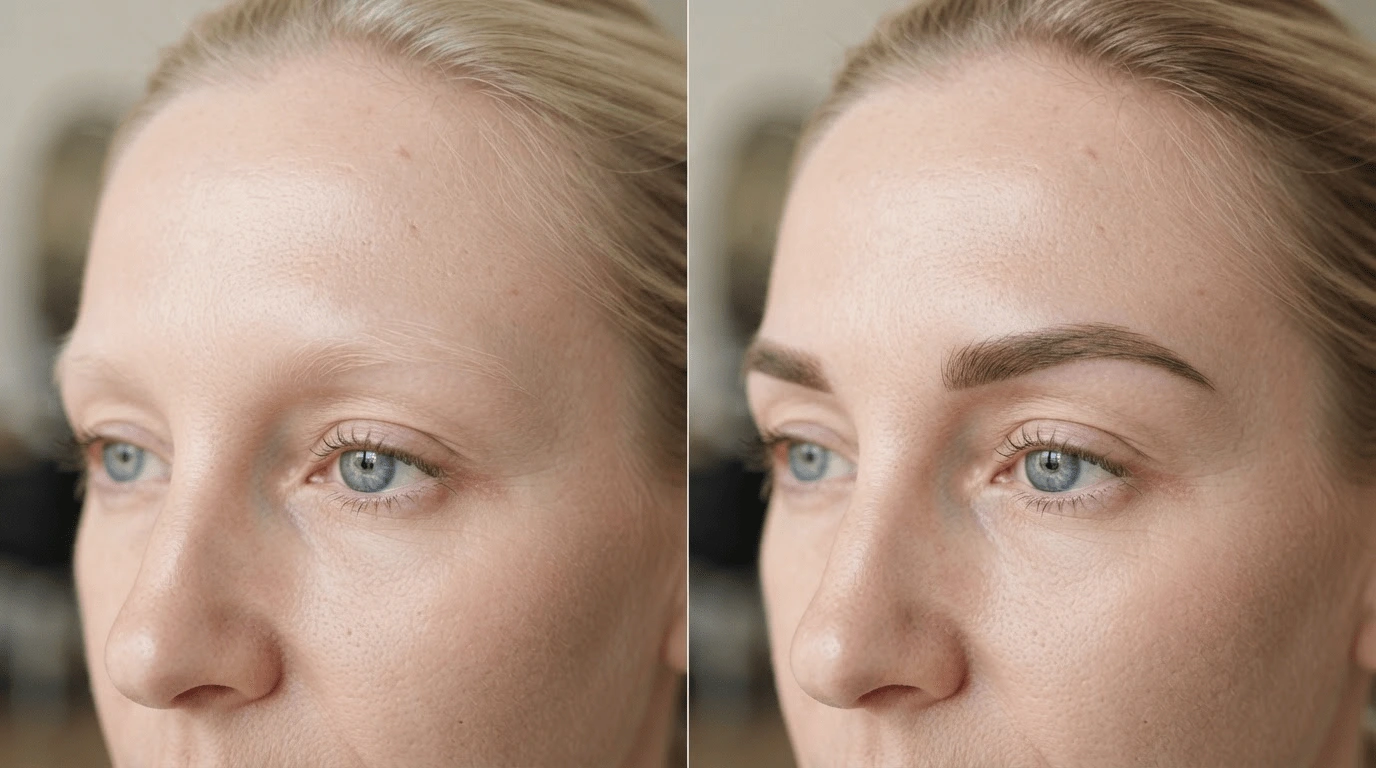
Light or blonde brows often show one of the clearest changes because hairs that were previously difficult to see become darker and easier to identify.
- Increased contrast: Brow hairs stand out more clearly against the skin.
- Clearer outline: The natural brow shape becomes easier to see.
- Fuller appearance: Previously hidden hairs add visible density without producing new growth.
Include a genuine before-and-after image of naturally light brows with no brow makeup in either photo
2. Fine Brows
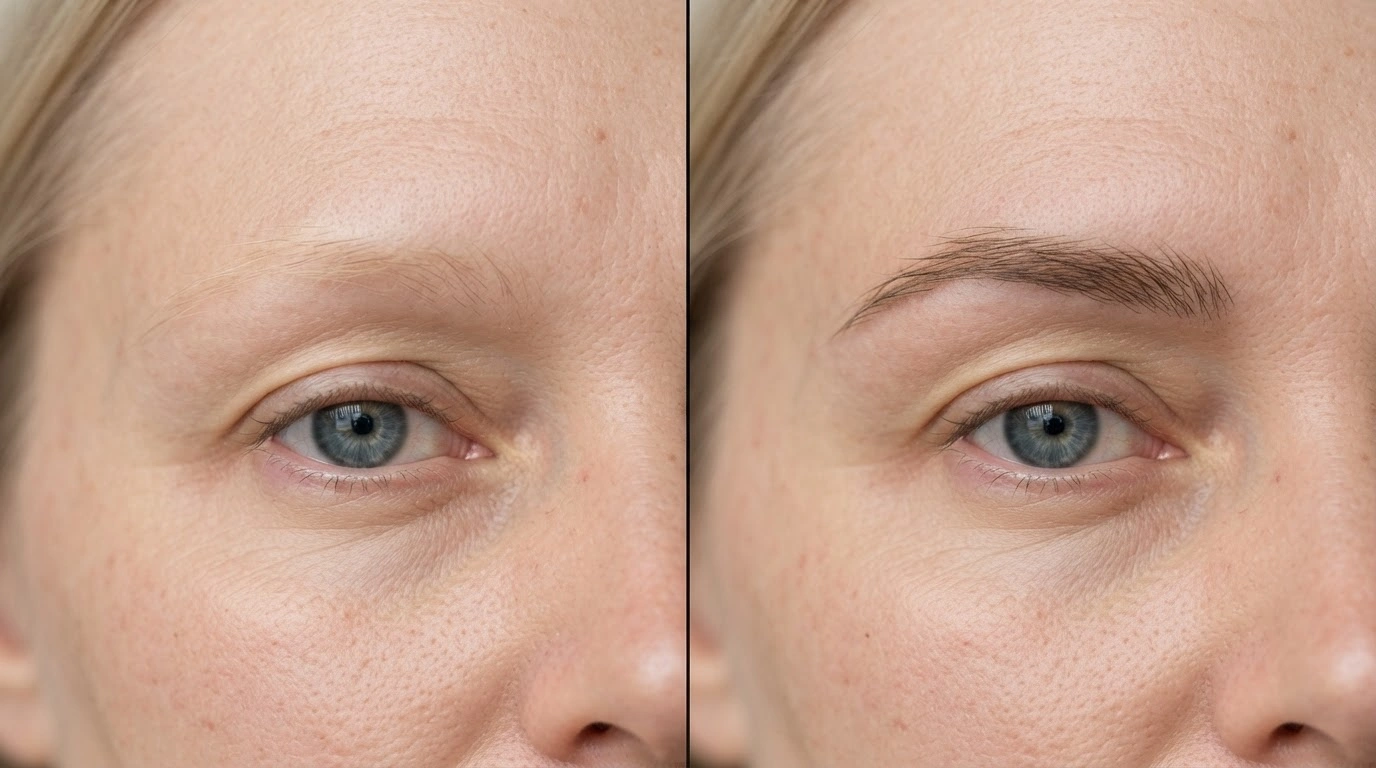
Fine brows can gain stronger definition when tint makes thin or pale hairs more visible across the natural brow area.
- Improved visibility: Fine hairs become easier to notice after picking up color.
- Better definition: The brow outline may appear clearer.
- Fuller look: More visible hairs can create the appearance of added density even though the hairs have not physically become thicker.
A close-up photo works particularly well here because readers should be able to see the individual fine hairs that became visible. Some people keep results looking fresh between visits by coloring brows at home, though matching the salon shade takes a little practice.
3. Sparse Brows
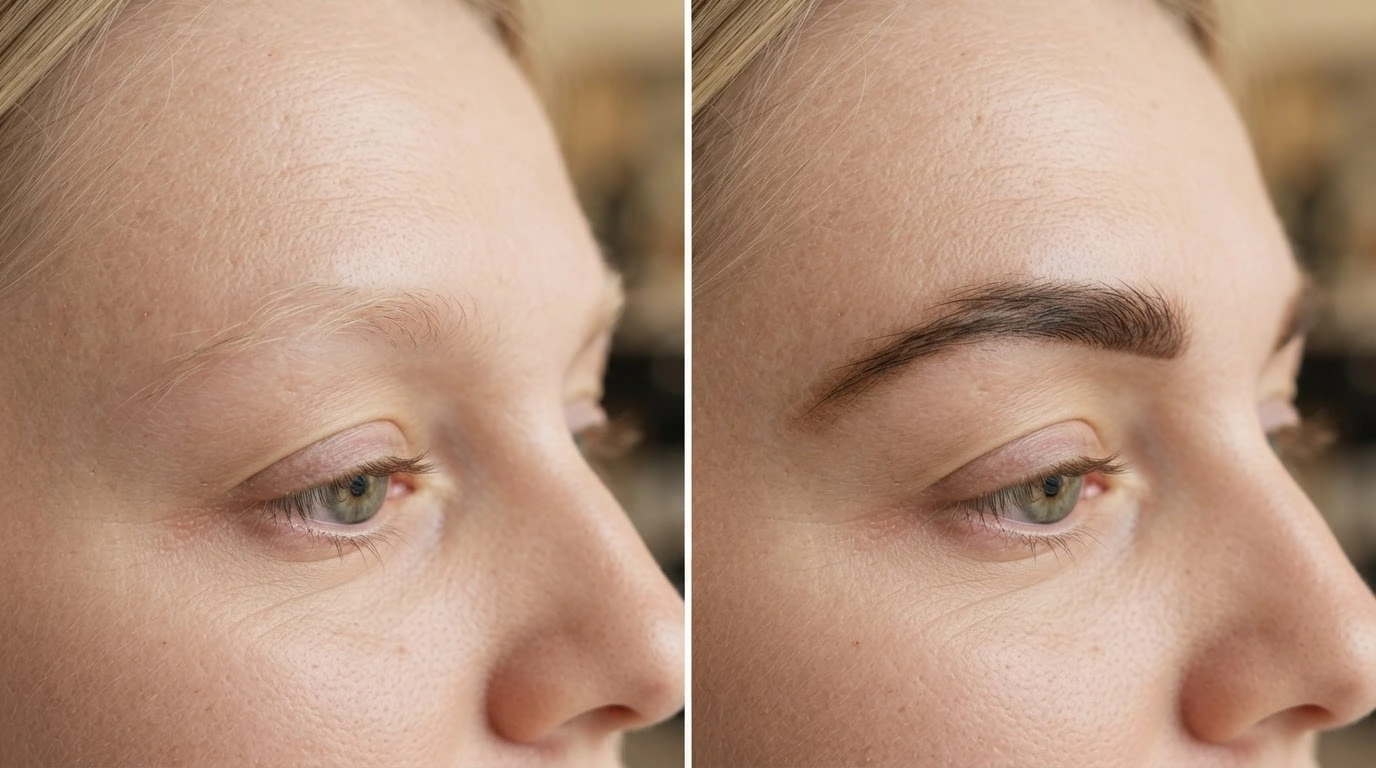
Sparse brows respond differently depending on whether the thinner areas contain fine hairs or are completely free of hair.
- Fine sparse hairs: Tint can darken these hairs and improve visible coverage.
- True gaps: Completely bare areas usually remain noticeable after skin staining fades.
- Temporary fullness: Skin staining may initially make gaps look smaller, but this effect does not create lasting hair coverage.
For this result, the most useful before-and-after example is one where readers can clearly distinguish between fine existing hairs and genuinely hairless areas.
4. Dark Brows
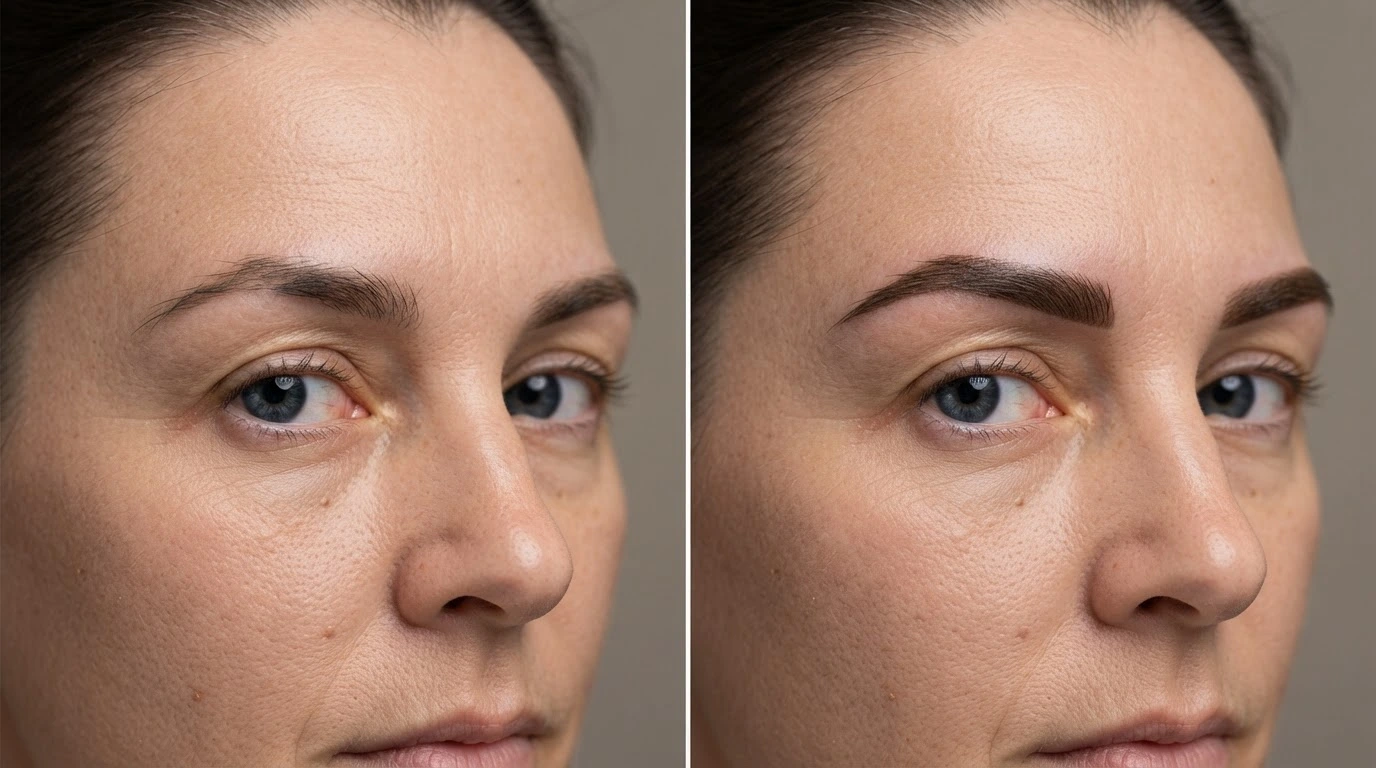
Dark brows usually show a subtler difference because most of the natural hair is already easy to see.
- More consistent color: Naturally lighter hairs may blend better with darker hairs.
- Clearer definition: Fine hairs around the edges and tail can become easier to see.
- More even appearance: Small differences in hair shade may become less noticeable.
A subtle after result does not mean the treatment failed. Naturally dark brows often gain consistency and definition rather than a dramatic color change.
5. Gray Brows
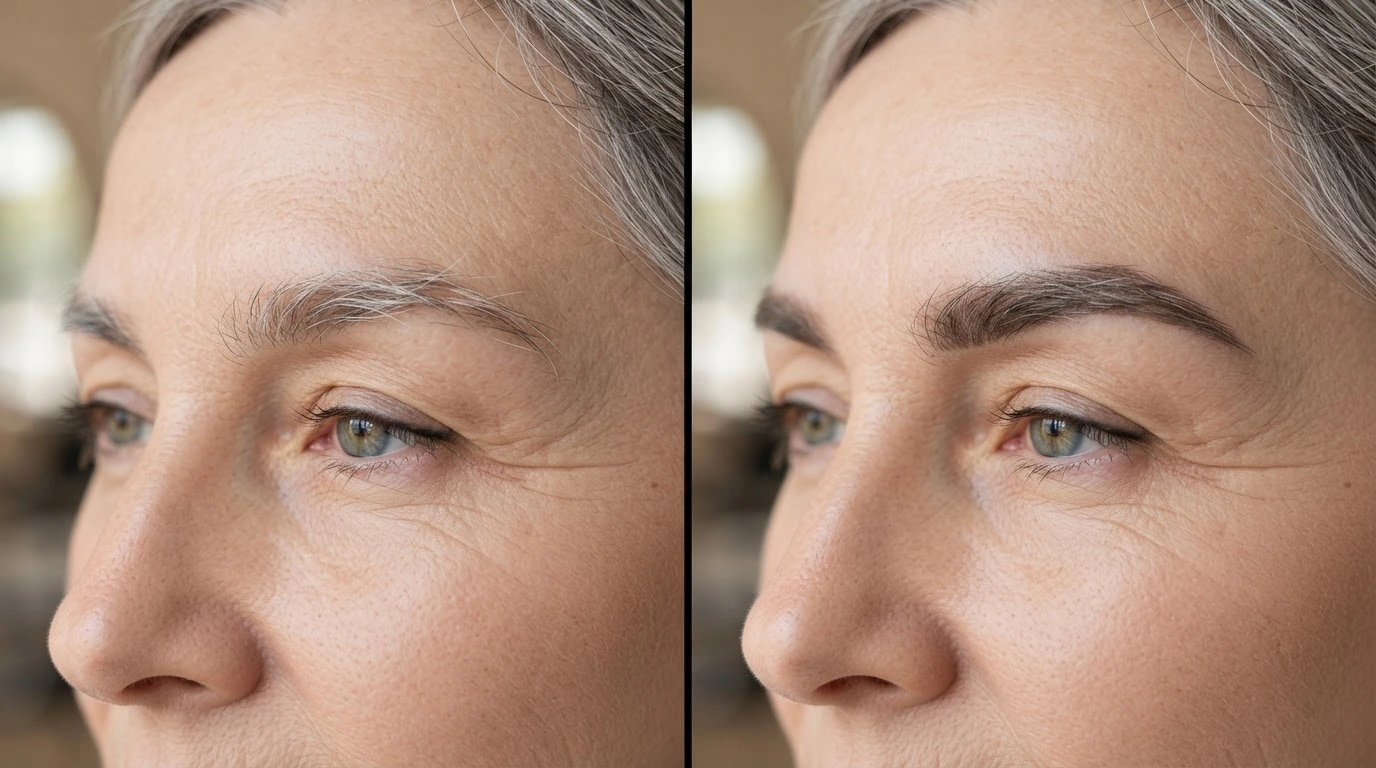
Gray or white brow hairs can become more noticeable after tinting, although the final coverage can vary with the hair and formula used.
- Improved color balance: Gray hairs may blend more closely with surrounding hairs.
- Greater definition: Added color can make lighter hairs easier to see.
- Variable coverage: Some coarse or resistant hairs may pick up color differently from others.
Your starting brow type strongly influences the final result. When comparing photos, look for people with similar brow color, density, and hair texture rather than simply choosing the most dramatic transformation.
Why Fresh Eyebrow Tint Can Look Darker Than Expected
Fresh eyebrow tint can look noticeably darker immediately after an appointment because more than one effect is happening at the same time.
The skin stain beneath the brow hairs may initially add extra depth, making the overall shape appear sharper and more filled in.
Immediately After Tinting: The brow color is usually at its strongest visually, particularly if the surrounding skin has picked up temporary color.
After the First Few Days: As temporary surface staining fades and the brows are cleansed according to the treatment’s aftercare instructions, the finished look may appear softer.
As the Tint Fades: Hair color gradually becomes less noticeable rather than disappearing all at once. This is why a salon-day after photo should not always be treated as the appearance you will have for the tint’s entire wear time.
At the same time, newly colored fine hairs that were previously difficult to see become more noticeable. This increases contrast and can make the brows appear fuller.
How Long Do Eyebrow Tint Results Last?
Eyebrow tint is temporary, and no single wear time applies to every person or formula. Professional sources commonly place brow-hair tint longevity somewhere within roughly two to six weeks, although products vary by formula, so individual products give different estimates.
For example, Benefit describes professional tinting as typically lasting about two to four weeks, while other professional and medical sources cite ranges extending to four to six weeks.
Any temporary color left on the skin generally fades sooner than the pigment visible on the brow hairs.
How quickly the overall result softens can depend on the tint formula, brow hair, cleansing routine, skincare products, and individual hair growth.
For before-and-after photography, this makes the timing of the “after” photo important. A same-day result and a two-week result should not be presented as though they represent the same stage.
Tint Alone vs. Tint with Shaping or Lamination
Before and after photos can be misleading when a few brow services happen in the same appointment. Knowing what each one actually changes helps you tell whether a result comes from tint, shaping, lamination, or some mix of the three.
| Treatment | Main Change |
|---|---|
| Brow Tint | Darkens existing hairs and improves color definition |
| Waxing or Threading | Removes unwanted hair and cleans up the outline |
| Brow Lamination | Repositions hairs for a lifted, brushed-up look |
| Tint plus Shaping | Adds color while cleaning up the outline |
| Tint plus Lamination | Deepens color while lifting and repositioning the hairs |
Check which services were actually booked before comparing results. Tint changes color, shaping refines the outline, and lamination changes hair direction. Once you know which is which, before and after photos get much easier to read.
What Happens During an Eyebrow Tint Appointment?
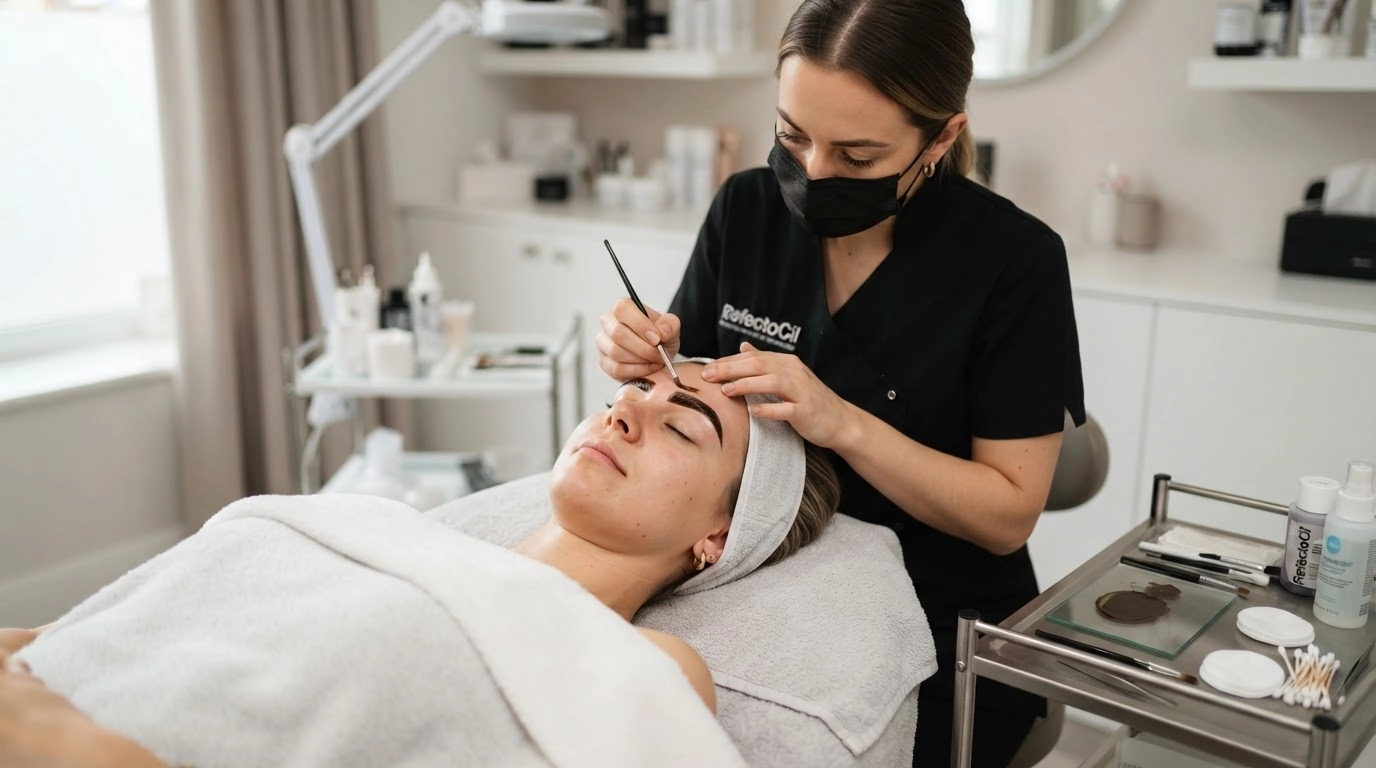
Understanding the appointment process can help you interpret the finished result and identify which changes come from tinting versus optional shaping services.
- Brow Assessment and Shade Selection: The technician evaluates your natural brow color, hair density, shape, and desired level of definition before choosing a tint shade that matches the amount of contrast you want.
- Brow Preparation: Makeup, skincare residue, and surface oil are removed from the brow area to help the tint apply evenly across the hairs.
- Tint Application and Processing: The selected tint is carefully applied to the brow hairs and left in place for the product-specific processing time needed to achieve the desired shade. Technicians typically keep the product away from the lash line and eye itself, following eye-area safety guidelines.
- Tint Removal and Final Check: The product is removed, and the technician checks the color, balance, and overall appearance to ensure the result matches the expected finish.
- Optional Brow Shaping: Waxing, threading, trimming, or lamination may be performed if included in the appointment. These services can affect the final before-and-after appearance, so identify them when comparing results.
This version keeps the process clear while reinforcing the main search intent: understanding what caused the visible change in eyebrow tint before-and-after photos.
How Should You Choose Your Eyebrow Tint Shade?
Choosing an eyebrow tint shade depends on how much contrast and definition you want. Your natural brow color, hair color, skin tone, density, gray hairs, and personal preference also matter.
1. Soft and Natural: Choose a softer shade if you want subtle definition without making your brows look dramatically darker. It can make pale hairs easier to see while keeping the result close to your natural color.
2. More Defined: A more defined shade adds clearer contrast and makes the natural brow outline stand out. It works well if you want lighter and darker hairs to look more even.
3. Bold: A bold tint creates stronger contrast and deeper color. It may suit people who prefer more noticeable brows or regularly wear stronger brow makeup.
The best shade should complement your natural coloring while giving you the contrast and definition you want in the final result.
What Users Say About Eyebrow Tint Before and After Results
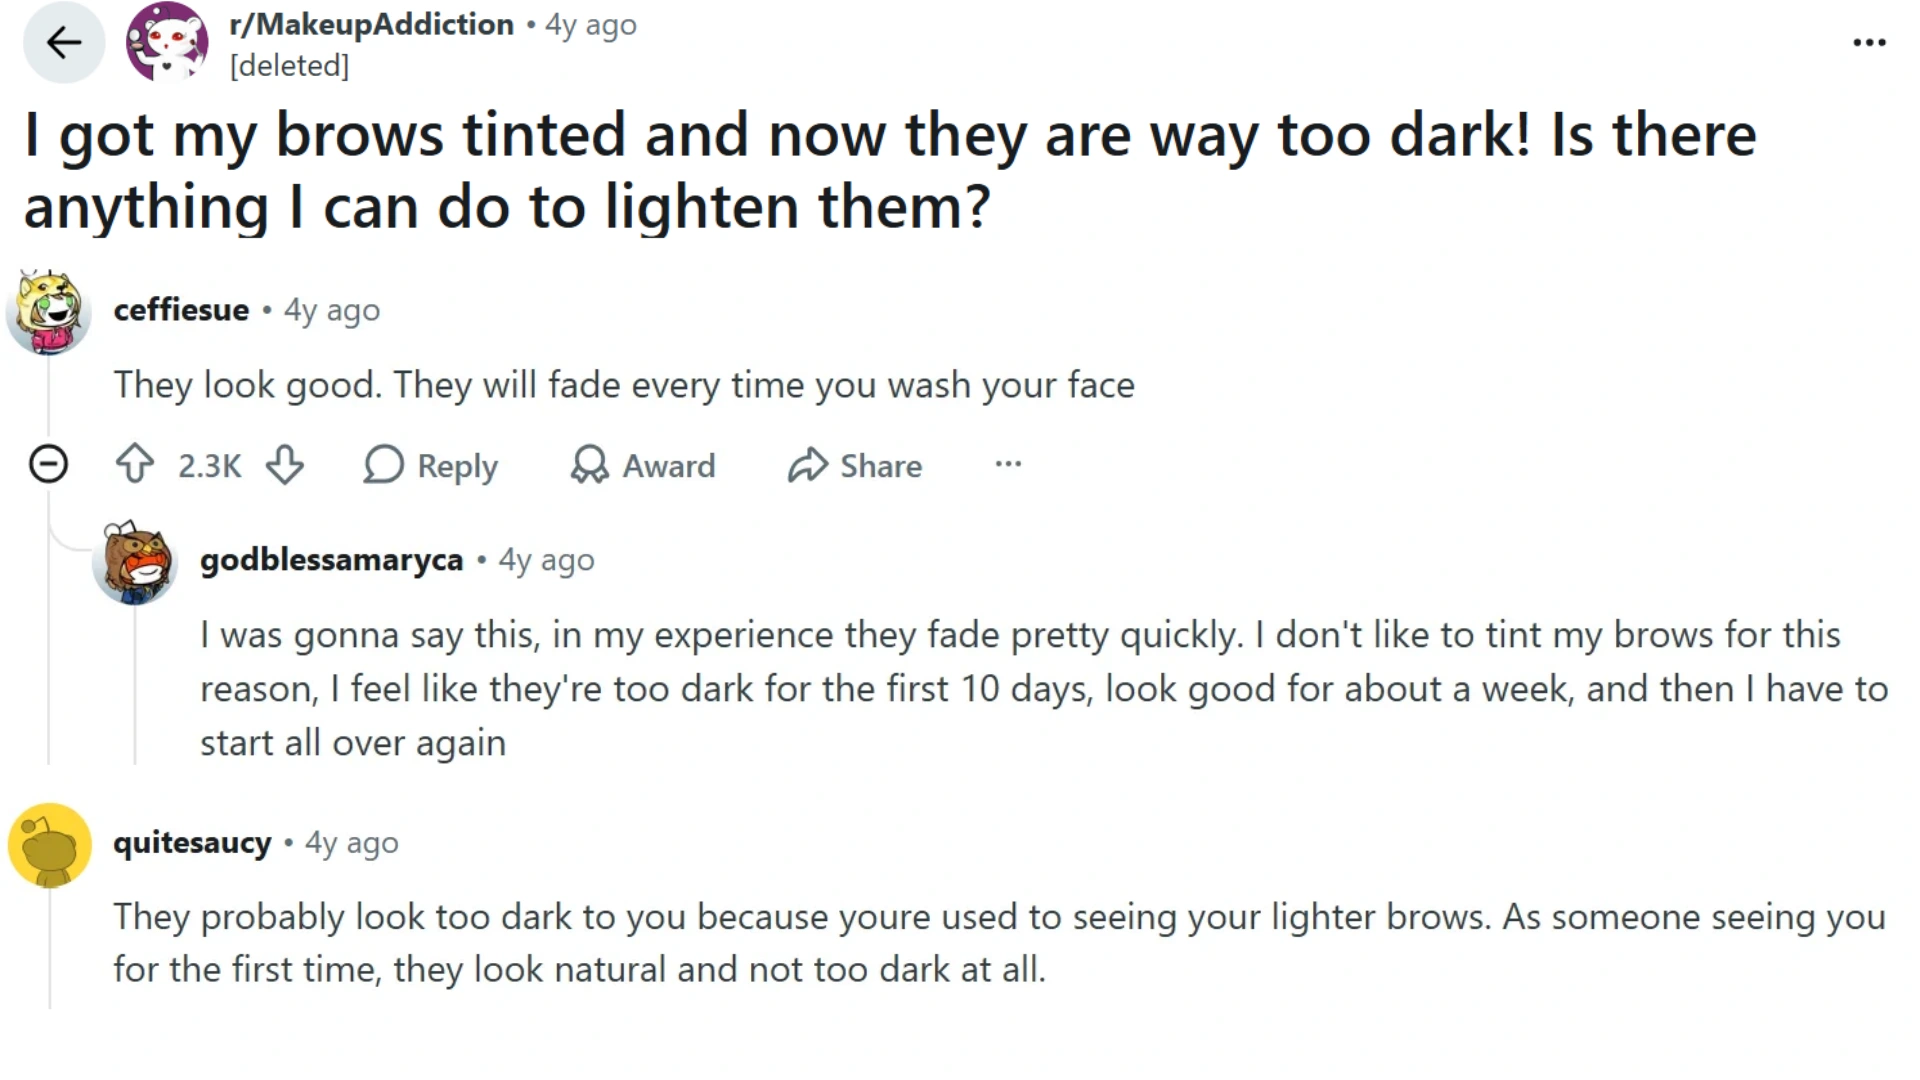
Reddit users often describe eyebrow tinting as looking stronger on the first day than it does once the color settles.
In one recent r/beauty discussion, several commenters said freshly tinted brows can feel unusually dark at first, but the intensity often softens within the first few days.
Other Reddit posts show that tint can make previously hard-to-see hairs more noticeable, while genuinely sparse areas may still show because tint can’t create hair where none exists.
Users also commonly notice the skin stain fading before the brow-hair color, which can make the result seem less dramatic after washing. These experiences are personal rather than guaranteed outcomes, so results can still vary with brow density, shade, formula, and application.
How Can You Keep Your Tinted Brows Looking Good for Longer?
Brow maintenance can help preserve the appearance of the result between appointments, but aftercare instructions can vary by formula and any additional services performed at the same time.
- Follow your aftercare instructions: Use the directions provided by the technician and product manufacturer.
- Cleanse gently: Wash around the brows without aggressive rubbing or scrubbing.
- Pat rather than rub: Reducing unnecessary friction can help keep the brow area comfortable.
- Be careful with exfoliating skincare: Follow your aftercare instructions when using acids, retinoids, or other active products close to the brows.
- Follow water and exercise guidance: Use the waiting period specified for your particular treatment rather than assuming one rule applies to every tint.
- Watch how the color fades: Consider another professional tint when the brow color no longer gives you the definition you prefer.
Avoid applying universal rules such as “never get your brows wet for exactly 24 hours” unless that instruction comes from the product or professional responsible for your treatment
How Can You Maintain the After-Tint Result?
First, follow your technician’s aftercare advice, as different tint formulas may need different care.
Secondly, cleanse gently around the brows and pat the area dry. Third, avoid unnecessary rubbing or scrubbing, which can disturb the finish. This matters because hair dyes are a recognized trigger for skin irritation, so gentler handling lowers the chance of a reaction.
Fourthly, watch your skincare products and keep strong exfoliants, acids, or retinoids away when advised. Fifthly, manage swimming and sweating by following the recommended waiting period and gently drying the brows afterward.
Lastly, plan touch-ups by appearance rather than following a fixed schedule, booking another tint when the color no longer gives you the definition you prefer.
Final Brow Check
Eyebrow tinting can make pale, fine, or gray brow hairs more visible, creating stronger color, definition, and a fuller-looking shape without adding new hair.
Results depend on your starting brow color, density, chosen shade, and whether shaping is included. Fresh tint may also look darker at first before the color settles.
So, when comparing an eyebrow tint before and after, focus on realistic changes in visibility, contrast, and definition rather than expecting completely new brow growth.
Thinking about trying a brow tint? Comment below with your opinion and share the result you would want from your appointment.
Frequently Asked Questions
Can You Wear Brow Makeup After Eyebrow Tinting?
Yes. Once your technician’s recommended aftercare period has passed, you can usually apply brow makeup if needed, using gentle application and removal around the tinted hairs.
Should You Bring Reference Photos to Your Brow Appointment?
Yes. Reference photos can help communicate whether you want a soft, defined, or bold finish, while your technician can adjust the shade to suit your natural brows.
Does Eyebrow Tint Look Different In Photos Than in Person?
Yes. Lighting, camera exposure, and editing can make tinted brows appear darker, sharper, or more filled in, so view photo comparisons with some caution.