A facial at home can do more than your daily routine ever will. It clears deeper, preps your skin to actually absorb what you put on it, and takes about 45 minutes start to finish.
The problem is that most guides hand you a product list and skip the part that matters: the order, and why it works the way it does. That’s what I keep coming back to with clients.
Skipping a step or switching two around changes what the next one can do. Skin that hasn’t been steamed won’t absorb a serum the same way. A mask over unexfoliated skin is mostly wasted.
This guide walks you through every at-home facial step in sequence, with enough context to make the whole routine actually land.
Note: This guide is for general informational purposes only. If you have any diagnosed skin condition such as rosacea, eczema, or active cystic acne, consult a dermatologist before adding steam or chemical exfoliants to your routine.
What a Facial at Home Actually Does for Your Skin?
Most of us cleanse every day and reach for a mask once in a while. A full facial at home does something different: it works through the skin in layers, each step preparing the next one to go deeper.
Steaming is the clearest example. Skin sitting at around 40 to 42 degrees Celsius becomes measurably more permeable.
Products applied right after steam absorb more effectively than on cold, dry skin. That’s not just a spa industry claim. The difference in how your serum feels post-steam tells you everything.
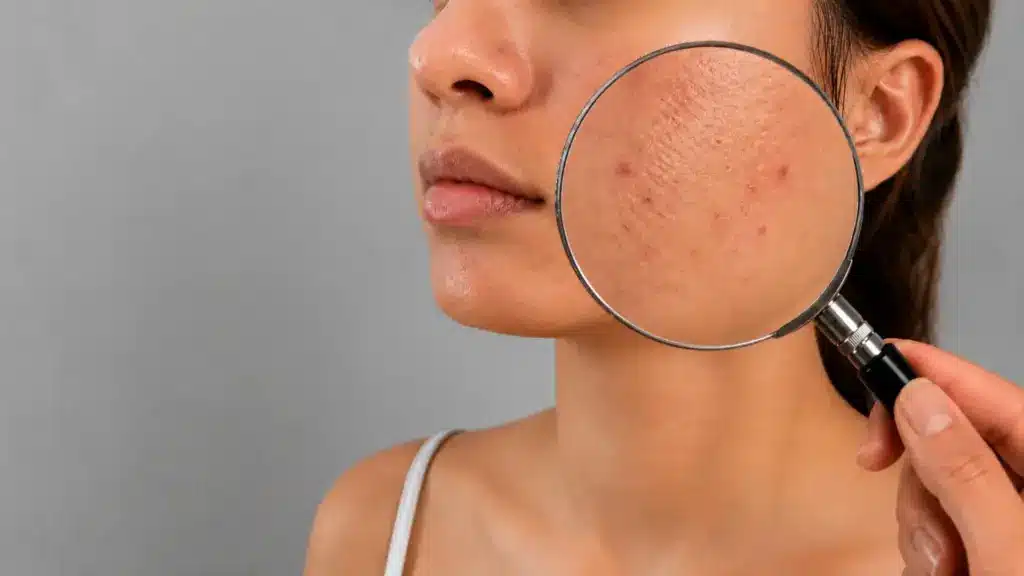
Exfoliation removes the layer of dead cells sitting on the surface, the ones behind that dullness that doesn’t shift with washing alone.
Once they’re gone, your mask can come into direct contact with live skin. Your toner can do its job without interference. The steps are compound.
The massage at the end, even two minutes of upward strokes with your fingers, supports lymphatic drainage and blood circulation.
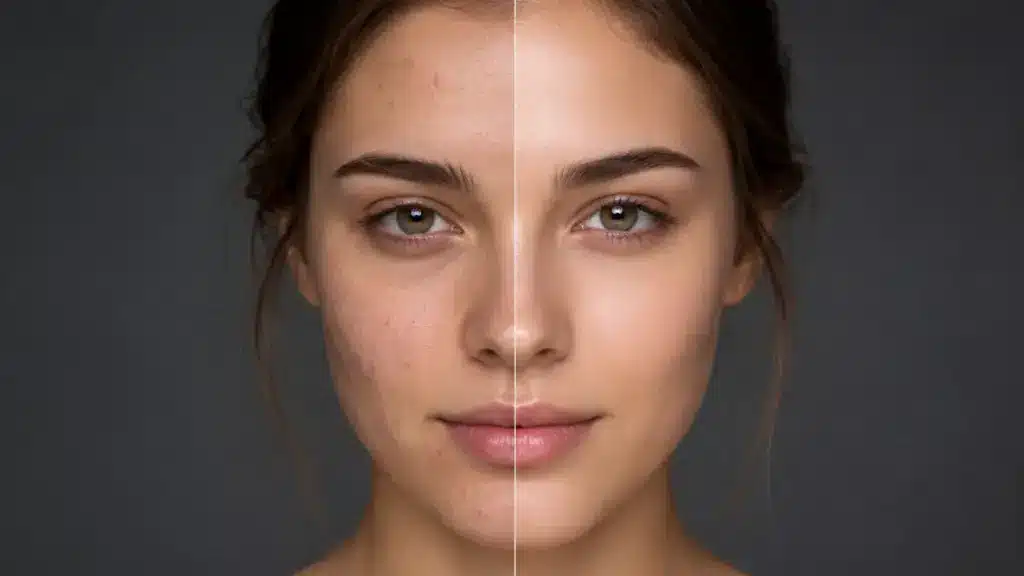
Skin worked through properly looks different from skin that’s only been cleaned. That’s the shift a full facial at home delivers.
What You Need Before You Start Your Facial at Home?
A successful at-home facial starts with proper preparation. Taking just 5-10 minutes to set everything up properly can make your entire routine safer, more effective, and more enjoyable.
Here’s exactly what to do before you begin:
- Pull your hair completely back using a headband, claw clip, or ponytail. This keeps hair out of the way and prevents product transfer.
- Wash your hands thoroughly with soap and water. Your hands will be touching your face and tools throughout the process.
- Clean all your tools (gua sha stone, facial roller, extraction loop, etc.) with warm soapy water or 70% isopropyl alcohol. Let them air dry. Never skip this step; bacteria left on tools is one of the fastest ways to cause new breakouts.
- Gather and organize all your products in advance so you’re not stopping mid-routine to search cabinets or drawers.
- Patch-test any new product on your inner forearm at least 24 hours before using it on your face. This helps avoid unexpected irritation or allergic reactions.
- Prepare your steaming setup using a large heat-safe bowl and a clean towel. (You don’t need a fancy facial steamer; the bowl method works just as well.)
Pro Tip: Lay everything out on a clean towel or tray near your workspace. This creates a spa-like flow and keeps you focused once you begin the steps.
At-Home Facial Steps You Can Do Safely

Work through these in sequence. Each one prepares the skin for the next.
Step 1: Double Cleanse
Start with an oil-based cleanser to dissolve makeup, sunscreen, and surface oil. Follow with a gentle water-based cleanser. Use upward circular motions for 30 to 60 seconds each pass. Rinse with lukewarm water.
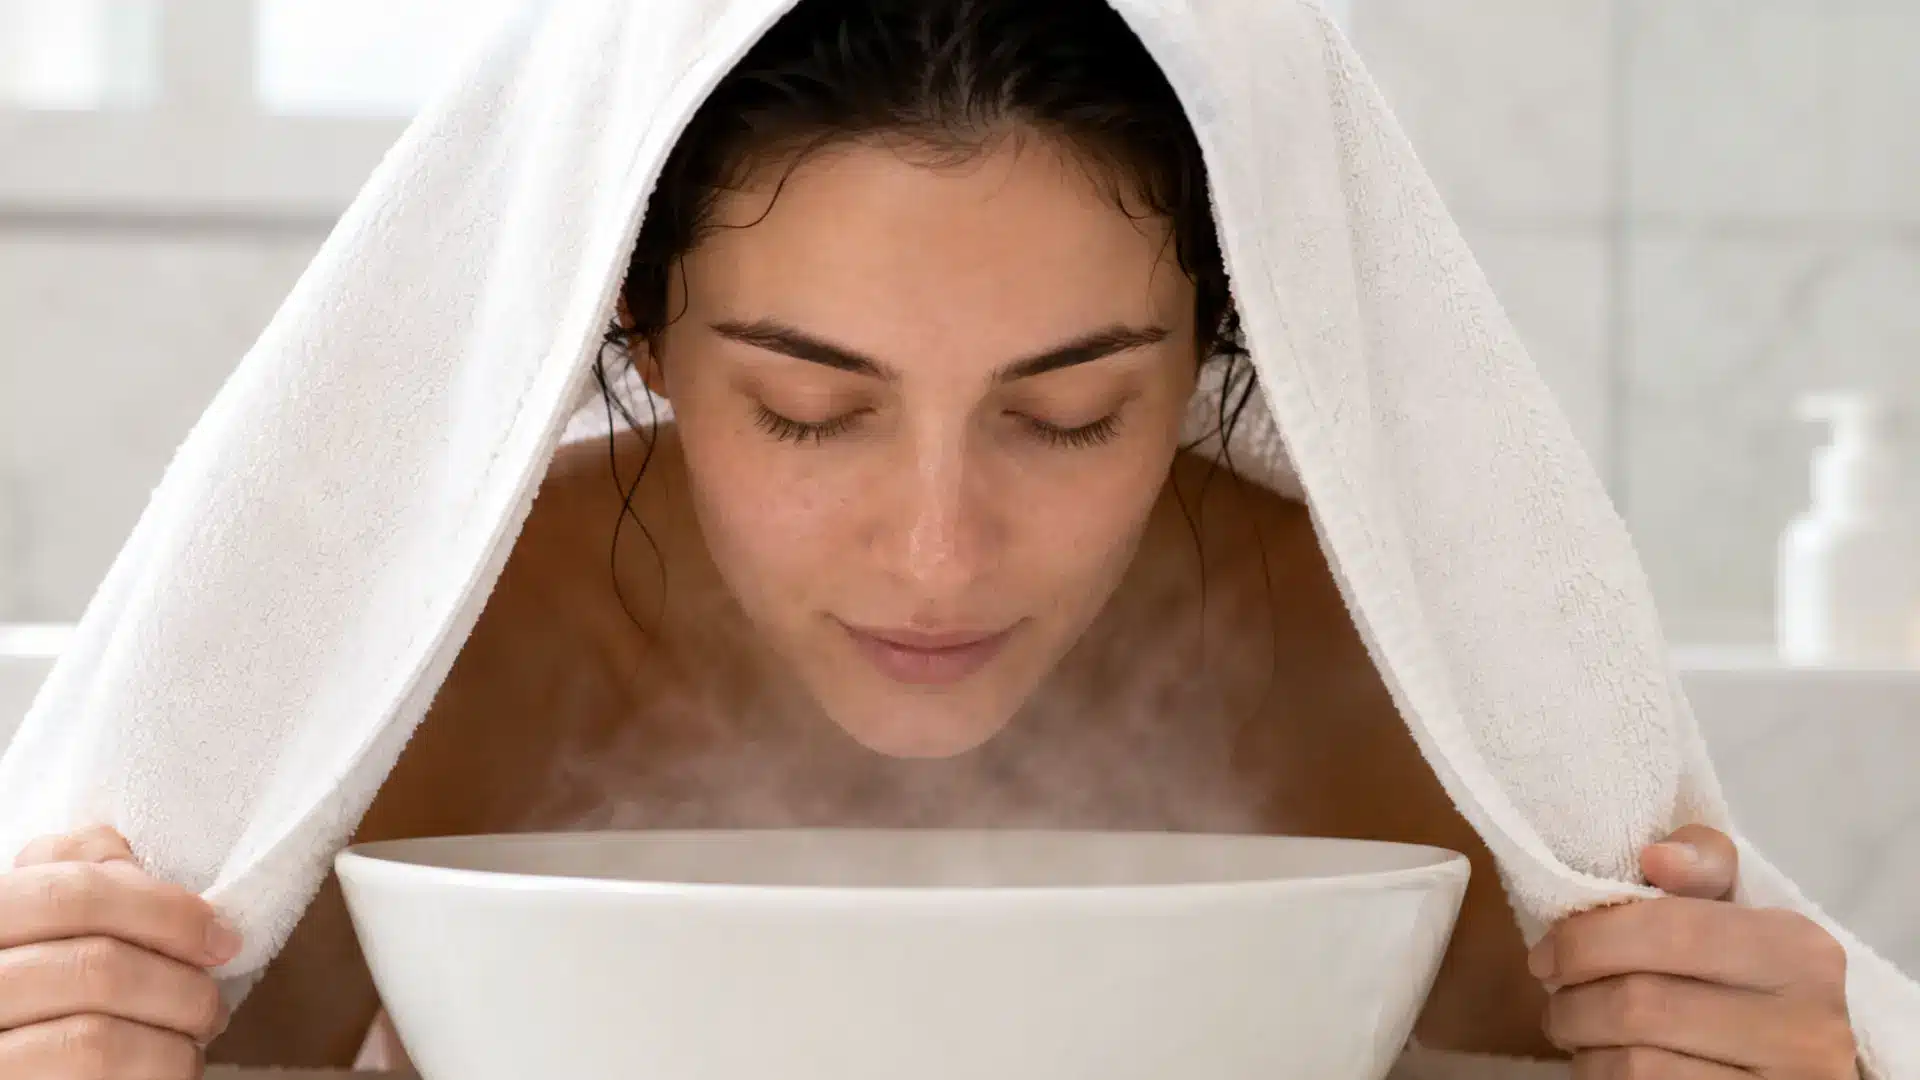
Step 2: Steam
Fill a large heat-safe bowl with near-boiling water. Drape a clean towel over your head and hold your face about 8 inches above the surface for 5 to 8 minutes.
Test the steam on the back of your hand before you begin. This is also when you can add a drop of lavender or chamomile essential oil to the water for a bit of calm.
Step 3: Exfoliate
While skin is softened, apply your exfoliator. Chemical exfoliants like glycolic or lactic acid work well for most skin types.
Both loosen the bonds between dead skin cells without the mechanical abrasion of a physical scrub, which makes them easier to use consistently and gentler on reactive skin.
Physical scrubs are fine for normal and oily skin. Massage gently in circular motions for about 30 seconds, then rinse.
Step 4: Tone
Apply toner to a cotton pad and swipe across the face, neck, and decolletage. A good toner finishes the cleansing process and helps restore the skin’s natural pH balance before you apply anything active.
Step 5: Serum
Press serum into slightly damp skin rather than rubbing it in. Hyaluronic acid suits almost every skin type. Vitamin C works well for dull or oily skin. Give the serum at least a minute to settle before moving to the next step.
Step 6: Face Mask
Apply your chosen mask to the face, avoiding the eye area. Clay masks suit oily skin well. Sheet masks and cream formulas work better for dry and sensitive types.
Follow the timing on the product, usually 10 to 15 minutes. Remove with a damp cloth, not by rinsing.
Step 7: Facial Massage
Apply a small amount of facial oil or a few drops of your serum and use upward strokes along the jawline, cheekbones, and forehead.
A gua sha stone adds more structure to the strokes, but fingers work just as well. I still reach for my hands more often than any tool, and the results hold.
Step 8: Moisturize
Lock in everything with a moisturizer matched to your skin type so your face does not feel tight after the routine.
At night, apply eye cream before moisturizer, especially around the under-eye area. In the daytime, finish with SPF 30 or higher to protect freshly treated skin from sun sensitivity.
If you’re still narrowing down the right formula, our look at a gentle moisturizer that works across skin types covers what to look for.
How to Adjust These Facial Steps by Skin Type?

The sequence stays the same across skin types. What changes is the product choice and a few technique adjustments.
1. Oily and Acne-Prone Skin
- Swap physical scrubs for a salicylic acid exfoliant, which clears inside the pore rather than just buffing the surface.
- Use a clay or sulfur mask to absorb excess oil and target bacteria without stripping the skin.
- Choose lightweight, non-comedogenic oils for massage; jojoba and grapeseed are well tolerated by acne-prone skin.
- Keep steaming for 5 minutes. Longer can overstimulate already-reactive skin.
For acne-prone skin in particular, understanding what a professional does differently is worth your time.
The breakdown in our guide to acne-focused facial treatment covers the technique and tool differences that make a real impact on breakout-prone skin.
2. Dry and Sensitive Skin
- Use a cream or milk cleanser for the second cleanse. Foaming formulas can strip too much from skin that’s already low on oil.
- Sit a little further back from the steam and keep sessions to 5 minutes. Heat on dry skin can pull moisture out faster than it adds it.
- Enzyme exfoliants are gentler than acids here. They resurface without the same risk of irritation.
- Follow your mask with a richer moisturizer to lock in the hydration you just built up. Most of my sensitive-skin clients find that this final step changes how their skin feels the next morning more than any other part of the routine. Don’t skip it.
3. Combination Skin
- Cleanse with a gel formula that handles the T-zone without drying out the cheeks.
- You can apply two masks at the same time: clay on the nose and forehead, hydrating on the cheeks and jaw.
- A niacinamide serum helps balance oil production across the face without tipping dry areas into tightness.
Common Mistakes that Undo Your Facial at Home
Small errors undo the benefit of a full routine. These are the ones worth watching for:
- Skipping the double cleanse: One round of cleanser rarely removes everything. SPF and oil-based makeup need an oil-based first step to break down properly. Without it, every product after sits on residue.
- Steaming for too long: More than 10 minutes, especially for sensitive or rosacea-prone skin, can cause redness and over-dilated surface capillaries. Five to 8 minutes is the right range for most skin.
- Masking before you exfoliate: A mask applied over unexfoliated skin has less to work with. Dead cells create a barrier. Exfoliate first, then mask.
- Layering a heavy cream mask directly over a fresh vitamin C serum: Rich occlusive masks trap heat and active ingredients. This can cause sensitivity, particularly for reactive skin. Give your serum two to three minutes before applying a mask.
- Using dirty tools: A gua sha stone or roller that hasn’t been cleaned brings bacteria directly onto freshly cleared skin. Rinse tools before and after every use.
- Applying makeup immediately after: Letting your moisturizer absorb for 10 to 15 minutes before anything else goes on means better absorption and less transfer to clothing or pillows.
How Often Should You Do a Facial at Home?
Here is a simple guide to how often you should do an at-home facial based on your skin type and how your skin reacts afterward.
| Skin type | Facial Schedule |
|---|---|
| Most skin types | Do an at-home facial once or twice a month. |
| Oily or acne-prone skin | Up to three times a month can work if your skin tolerates it. |
| Sensitive skin | Once a month is safer, especially if you use retinol or acid toners. |
Celebrity aesthetician Renee Rouleau makes a practical point about timing your facial at home: night sessions work better because skin is in a more receptive state after dark, when its focus shifts from protection to repair.
Morning facials aren’t wrong, but they are harder on the skin if you go straight into SPF and makeup.
The real signal is your skin in the day or two after. Redness or new breakouts mean you’ve pushed too hard, so scale back the exfoliation or shorten the steam next time.
A facial should leave your skin feeling clean and calm, not like it needs to recover.
Conclusion
Sequence and attention are what separate a real facial at home from a night when you happen to use three products.
The steps work because each one sets up the next, and skipping or reordering them changes what’s possible.
What I notice most after a proper facial isn’t just how my skin looks that night. It’s how my daily products work better the following week.
Skin that’s been deeply cleansed and exfoliated absorbs moisturizer, serum, and SPF more readily. One good session extends the benefit across days.
Start with what you have. A cleanser you trust, a bowl of steam, a mask that suits your skin type, and a few minutes of massage are enough to feel the difference. Build the habit first. Products can follow.
What step do you always skip, or what would you add to your home facial routine? Drop it in the comments below.
Frequently Asked Questions
Can You Do a Facial at Home Without Professional Products?
Yes. The technique and sequence matter more than the brand. A gentle drugstore cleanser, a clay mask, and a basic moisturizer will take you through a solid facial at home.
The biggest upgrade you can make is learning the correct order, not buying more expensive products. Skin responds to consistency and care, not price points.
Is It Safe to Steam Your Face if You Have Rosacea?
Steaming is generally not recommended for Rosacea. Heat dilates the surface blood vessels in already-reactive skin and can trigger flare-ups.
If you have rosacea, skip the steam step and go directly from cleansing to a very gentle enzyme exfoliant. A dermatologist can advise on the safest exfoliation method for your specific condition.
What Should You Put on Your Face Right After a Facial at Home?
A moisturizer suited to your skin type is the right final step. For a nighttime facial, add eye cream before your moisturizer.
For a daytime facial, finish with SPF 30 or higher. Avoid heavy makeup for at least a few hours to give your skin time to settle and absorb what you’ve just applied.